Originally published on February the 22nd 2018, last update May 2024
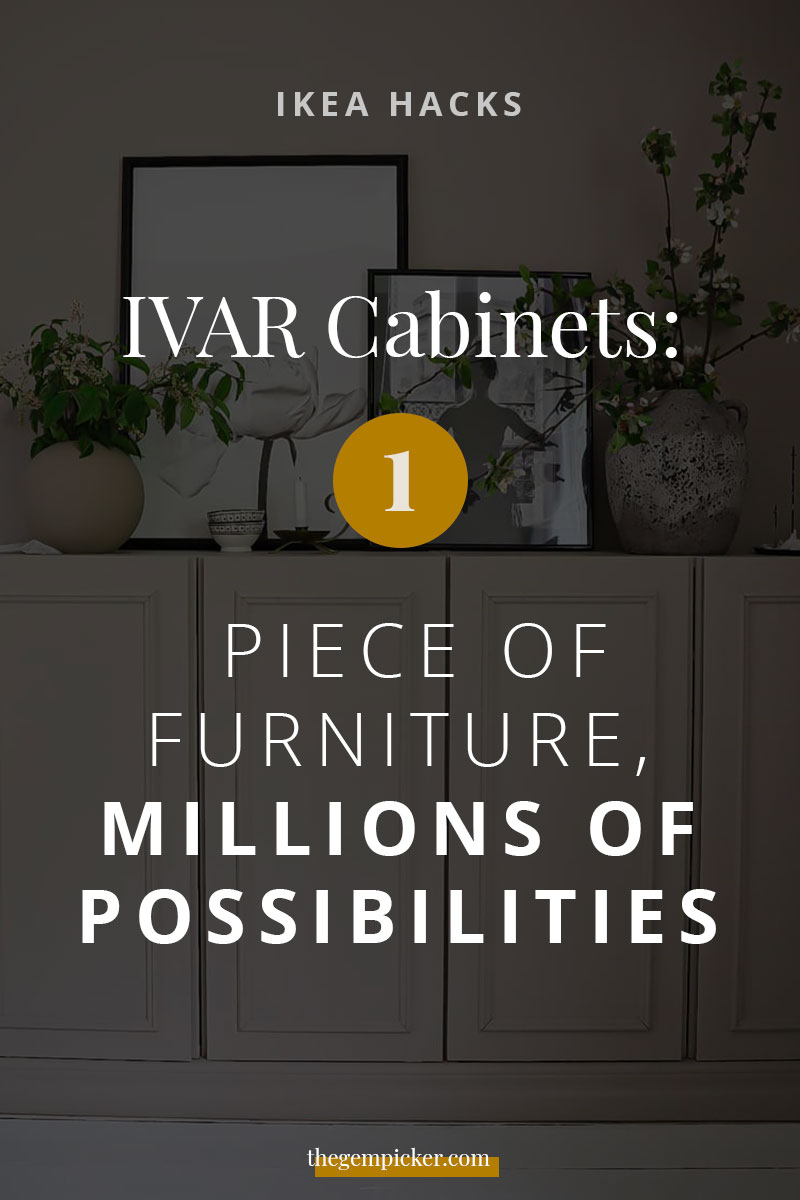
Nowadays, a lot of people have already tried to customize an Ikea piece of furniture. Some have even made a business out of it. This is not surprising considering the fact that Ikea’s furniture is really easy to put together and very affordable. The Ivar cabinet’s hacks I’m going to introduce are amongst the best I’ve seen. I’m always keeping an eye on new hacks emerging from the internet to update this article with only the best possible ways to update this solid pine cabinet. So here it goes.
Is the IKEA Ivar cabinet a good piece to hack?
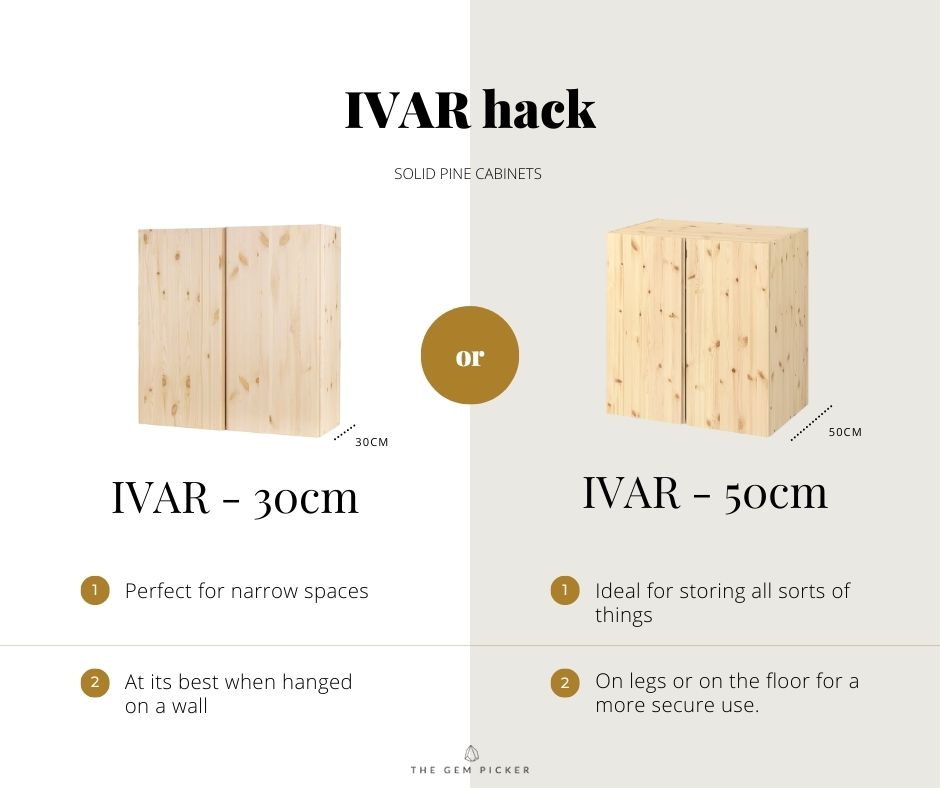
What makes the Ivar cabinet a great piece of furniture to hack? First of all, it’s a very affordable piece of storage furniture, which is rare enough to mention. Secondly, it comes in two different sizes, 30 cm deep or 50 cm, which is very convenient for a wide range of storage needs. It is also made of solid untreated pine, so it is easily customizable. Finally, its understated design makes it a perfect piece that everyone can adapt to their taste.
IKEA IVAR: One piece of furniture but many options
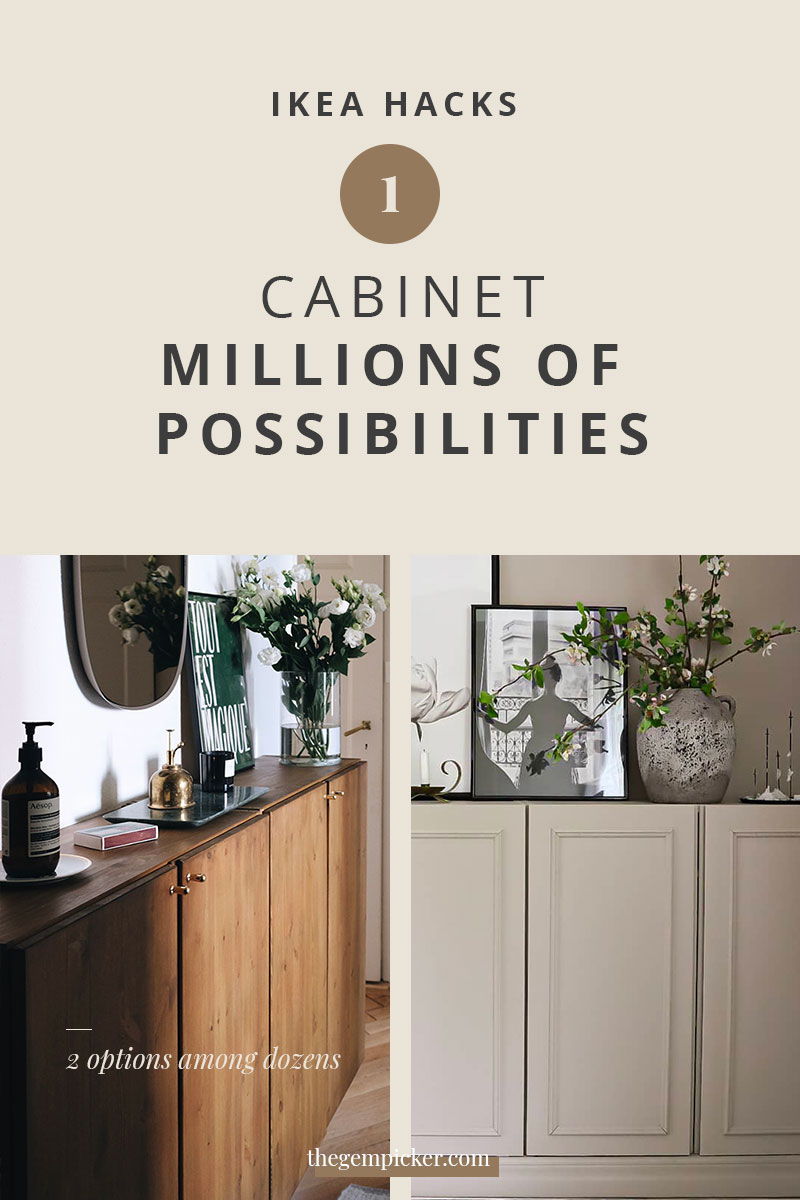
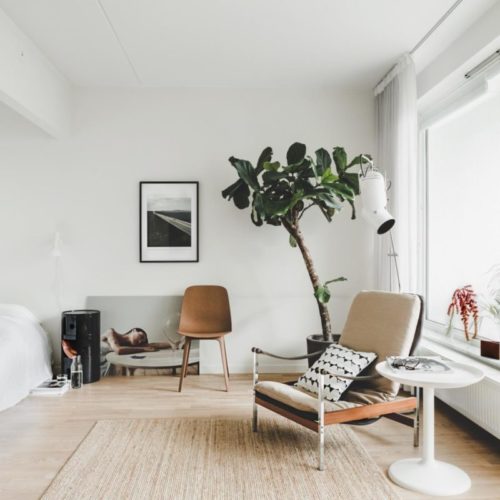
I’ve seen all kinds of use for this piece. Some people transformed it into a sideboard others used it as a kitchen counter as a cupboard, and as vertical storage. It seems that the sky is the limit for these cabinets! But I’d say Ivar is at its best when used as a sideboard, especially with 2 or more cabinets side by side, or as a sort of dresser.
Two reasons for that: Since you can hang it on the wall, it looks like it’s floating in the air. This makes a narrow room look less cluttered and stuffy than with a traditional on-ground console.
As a dresser, because you can put it anywhere, it has the
IKEA IVAR HACK: 11 best transformations
So, If you’re looking to take your IVAR cabinets to the next level, you’ve come to the right place. With these genius hacks, you can turn your cabinets into functional masterpieces that will make your life easier and more stylish. From maximizing space to increasing efficiency, I’ve got you covered.
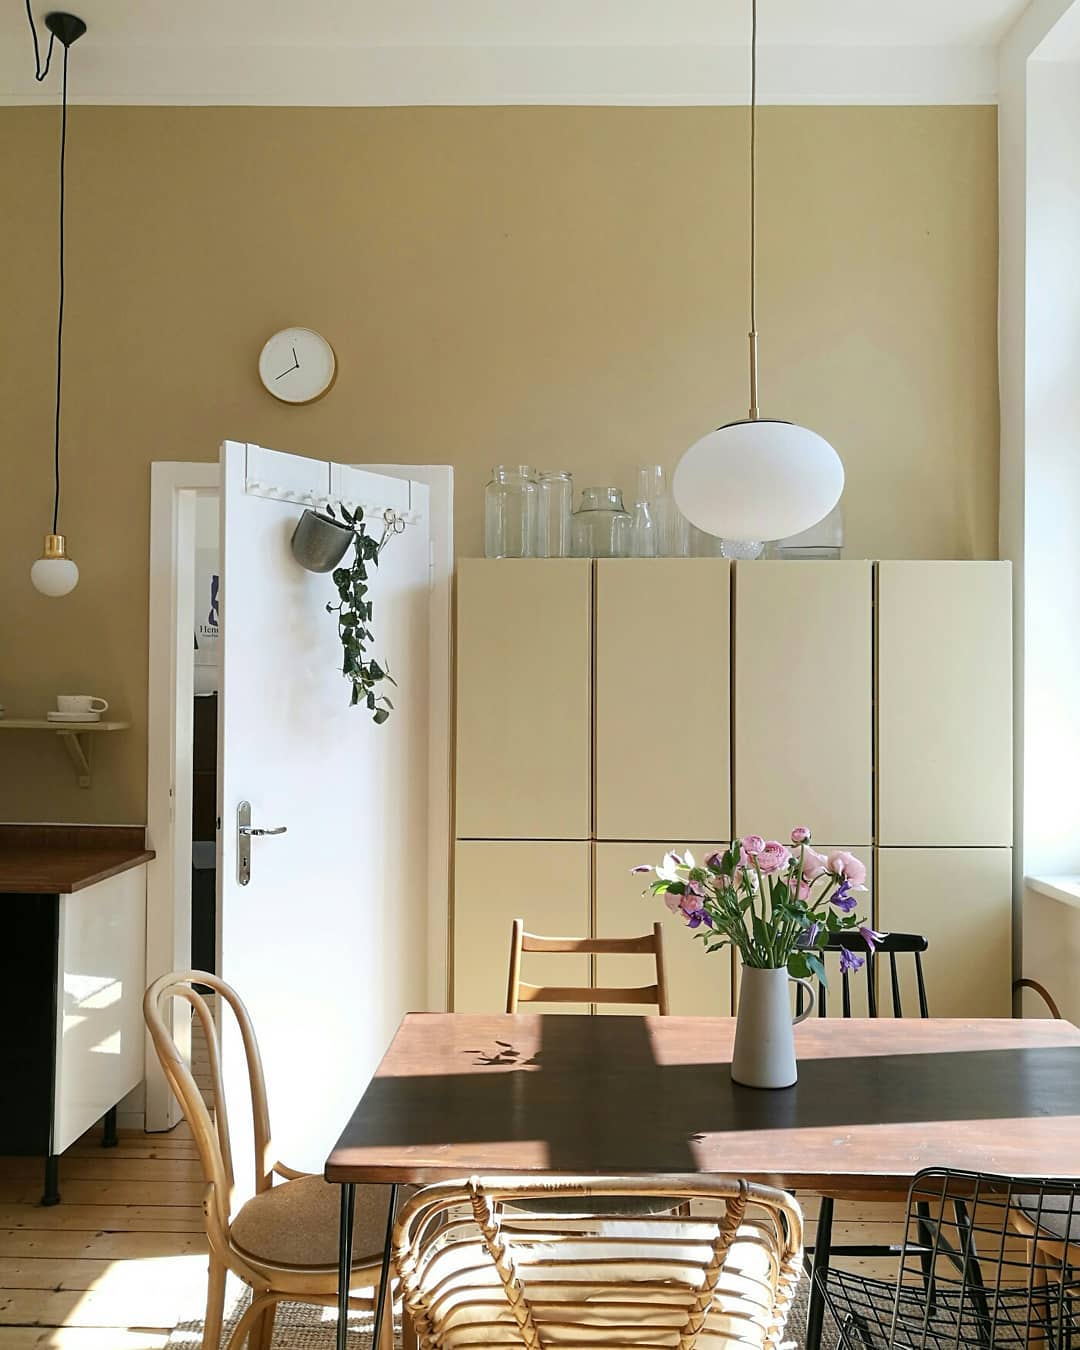
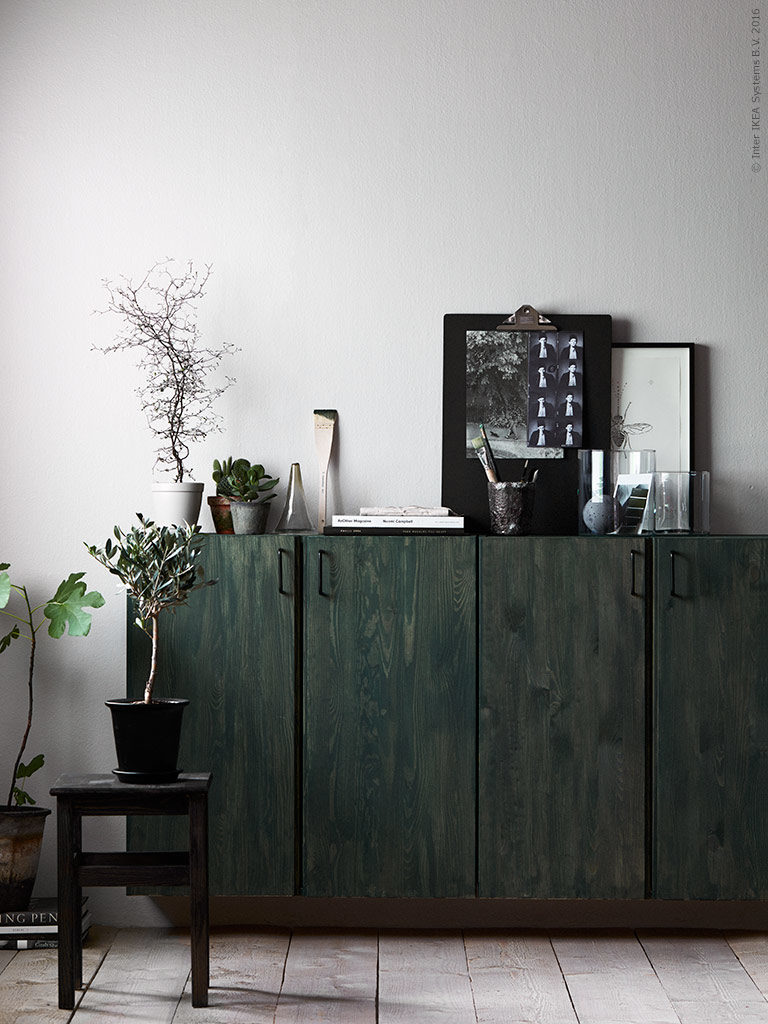
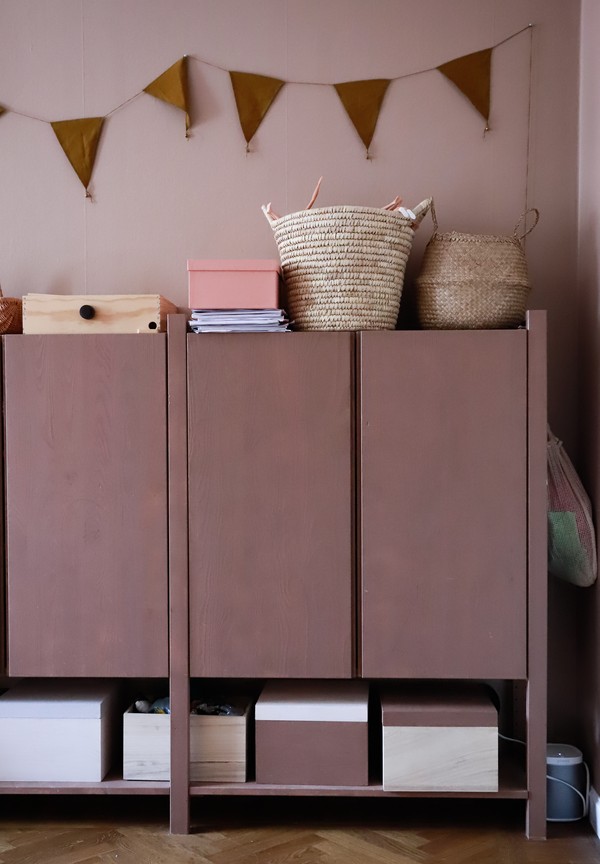
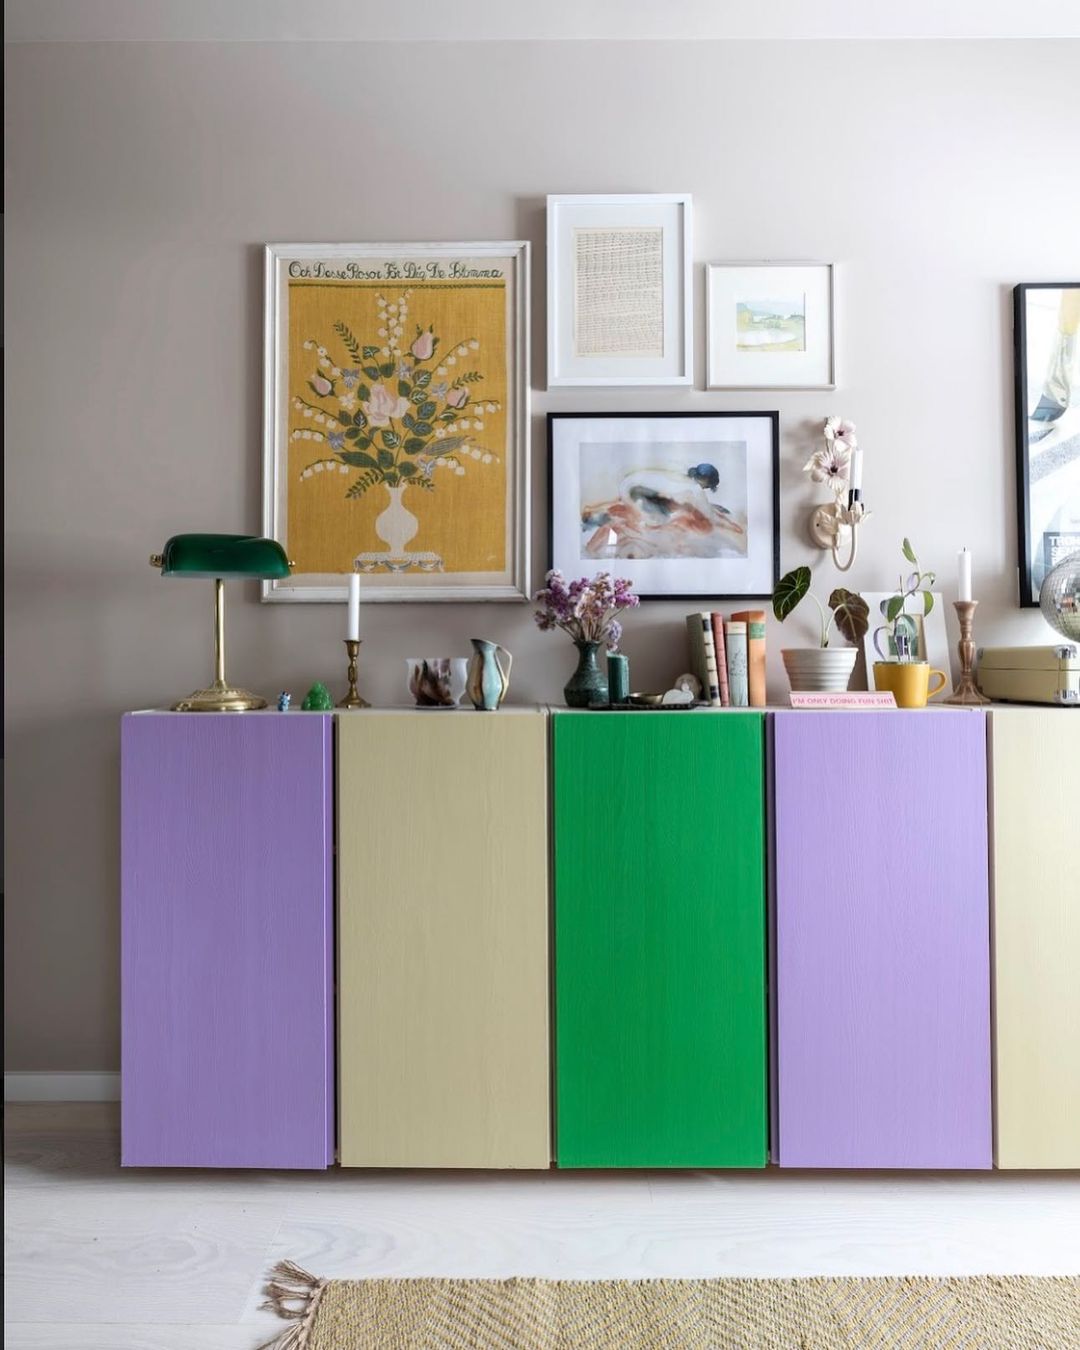
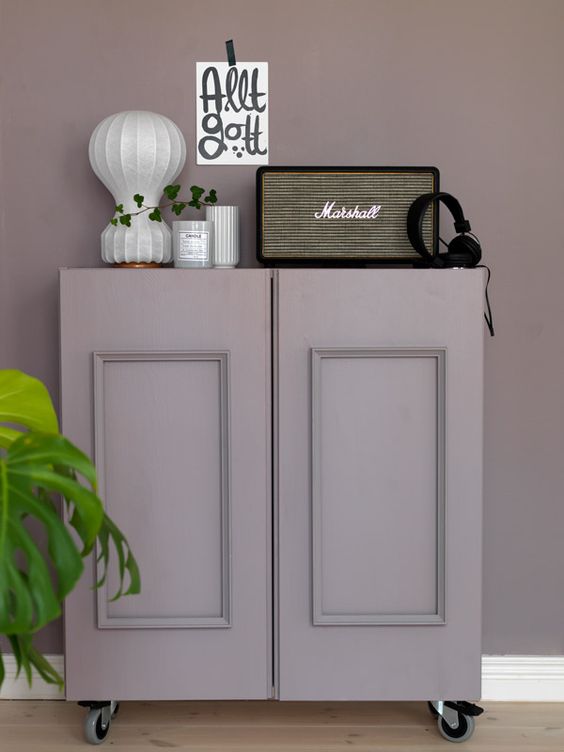
1.Add paint to your Ivar cabinet
Let’s start with the most obvious hack: painting your IKEA Ivar cabinets.
- Paint is an easy and affordable way to personalize your Ivar hack. Whether you choose a bright pop of color or a soothing, neutral tone, adding paint to your Ivar hack pieces will make them look brand new.
- Adding paint to your Ivar hack will help them blend in with your existing décor and color scheme. Paint can be used to tie together different pieces of furniture, creating a unified look in any room.
- Paint helps protect Ivar from damage such as scratches, dents, and smudges. A few coats of paint can make your Ivar pieces look like they’ve just been purchased and will help them last longer.
- Paint is a simple way to customize any room. By choosing the perfect color and style, you can achieve a distinctive look for your Ivar hack that is truly unique.
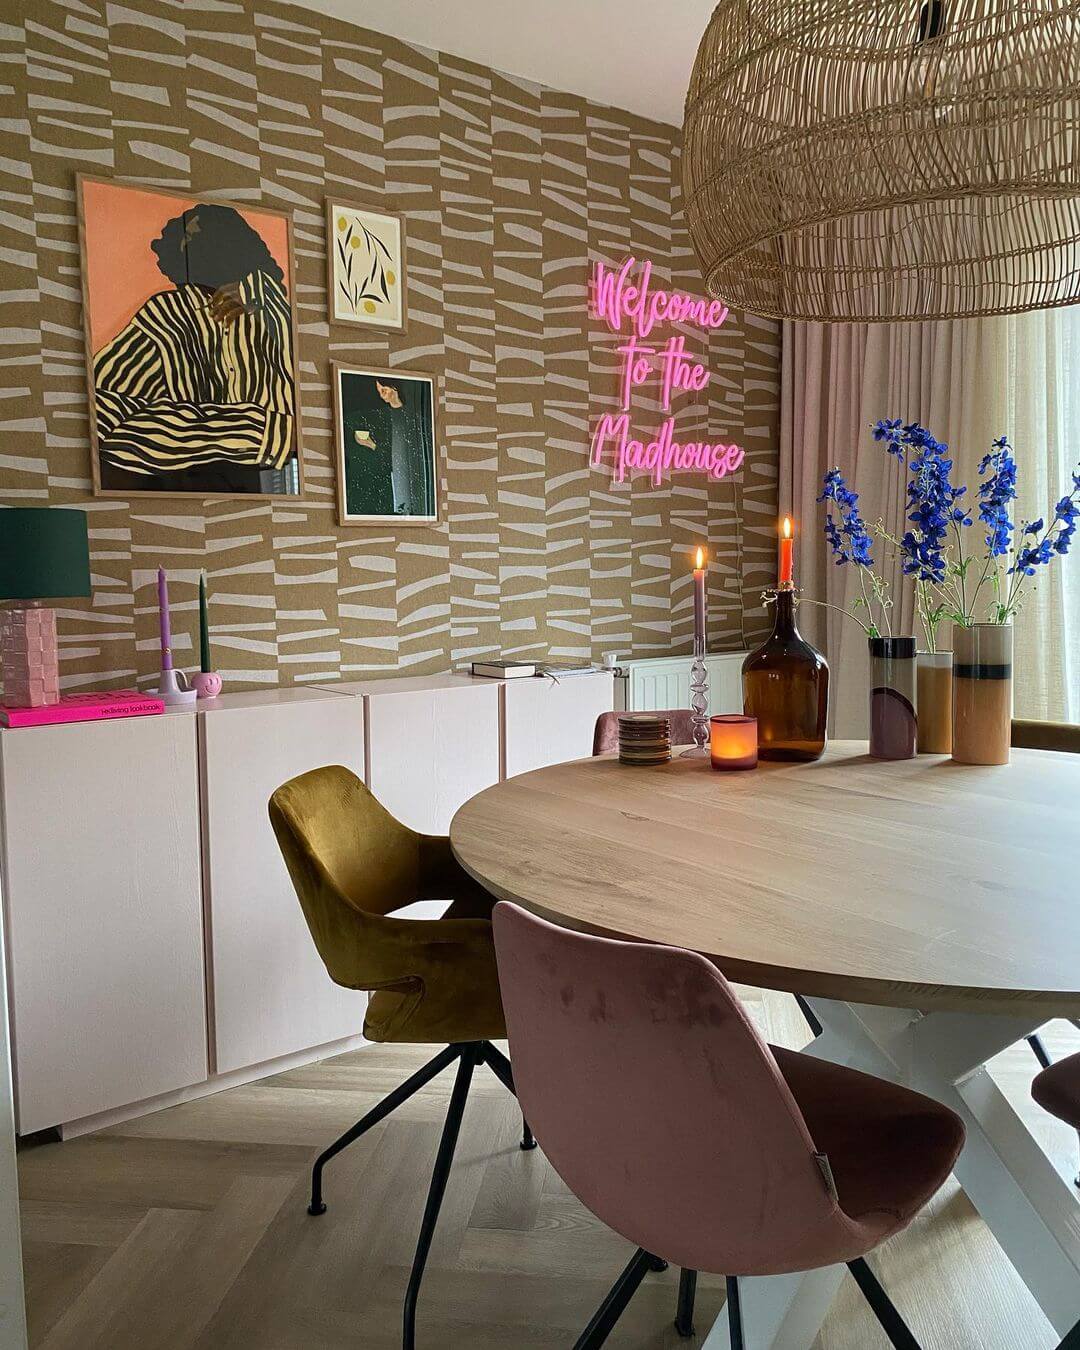


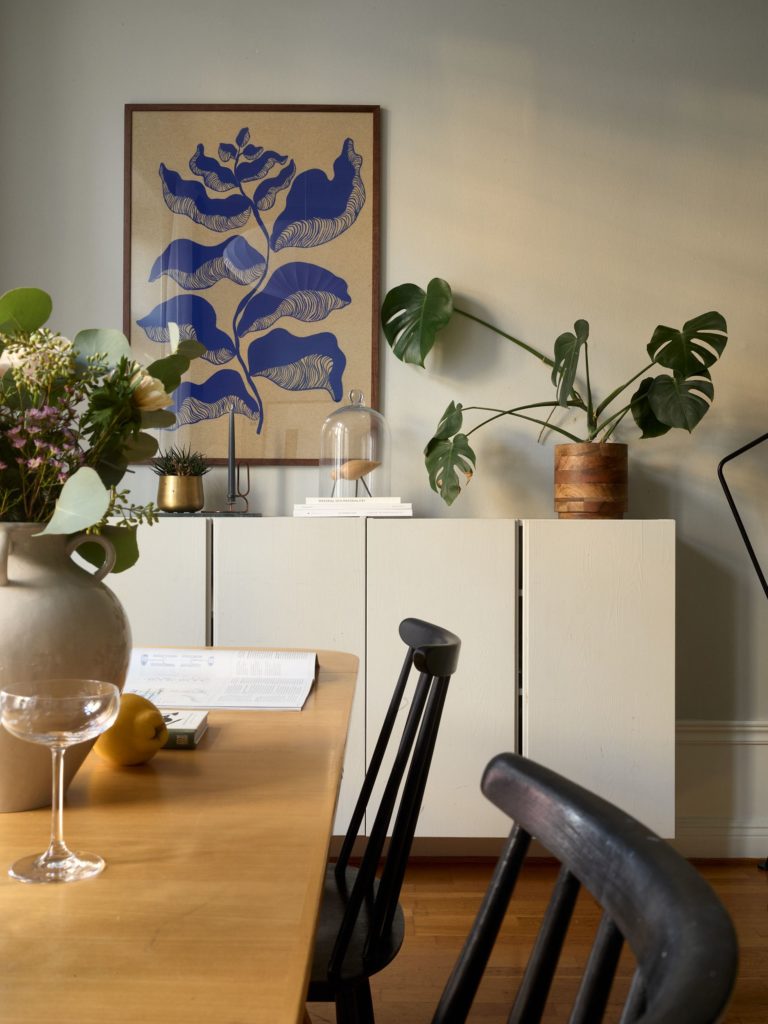
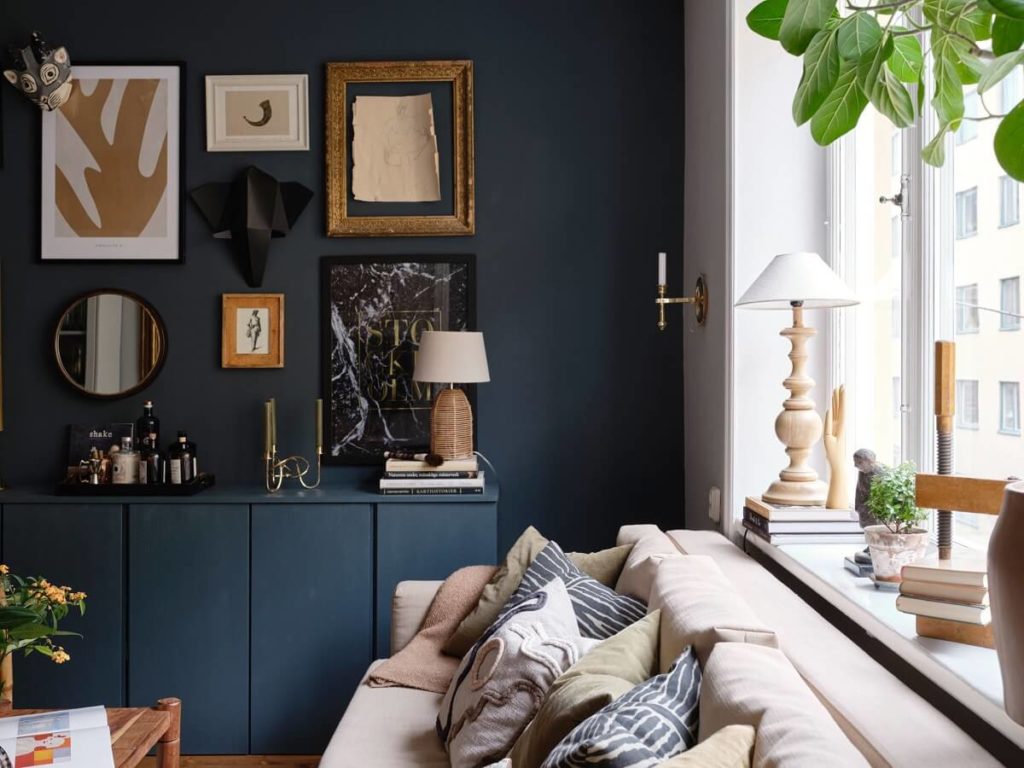
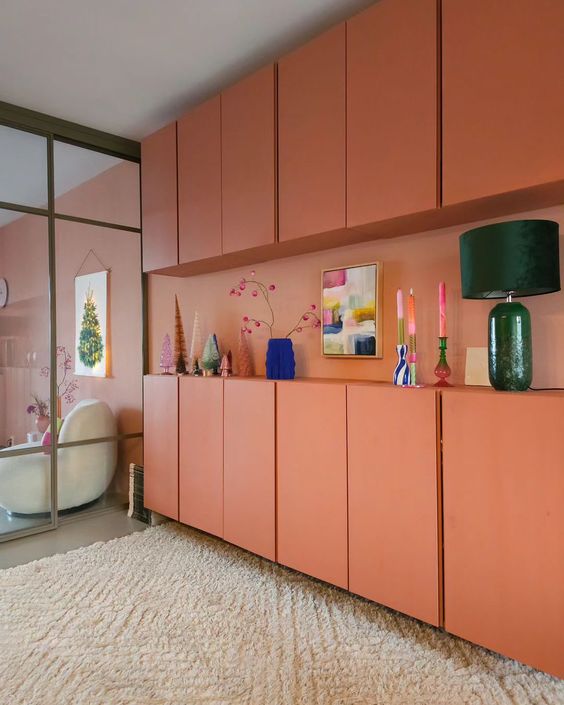
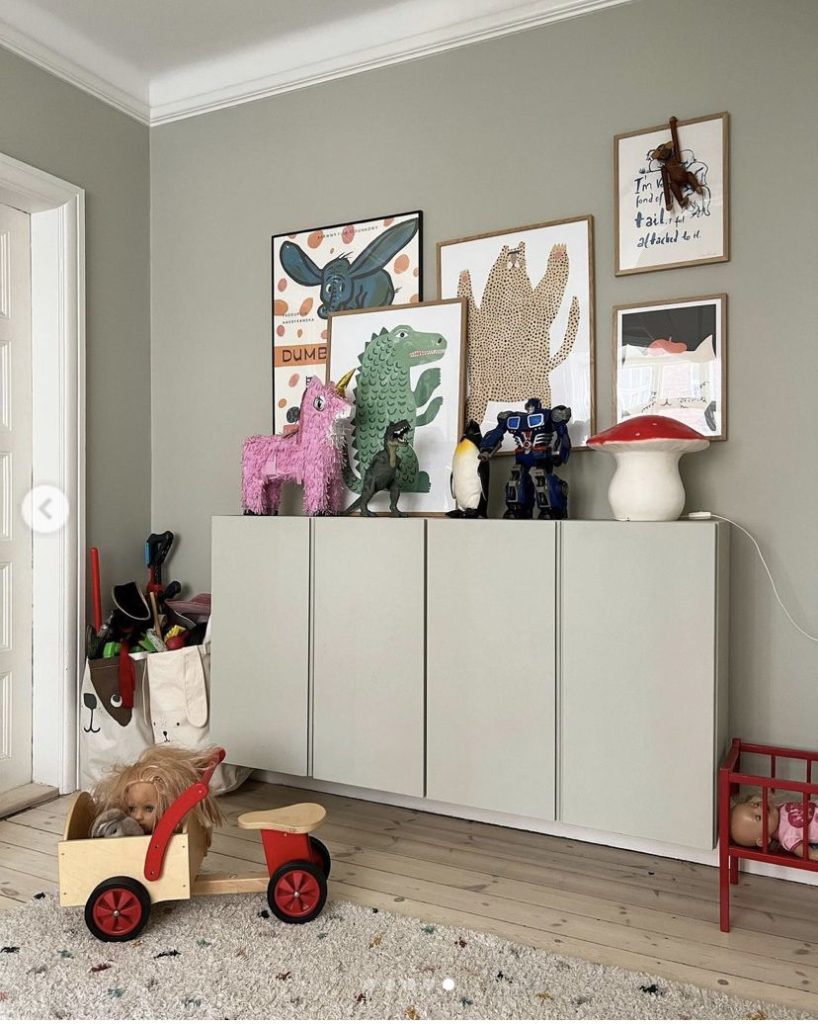
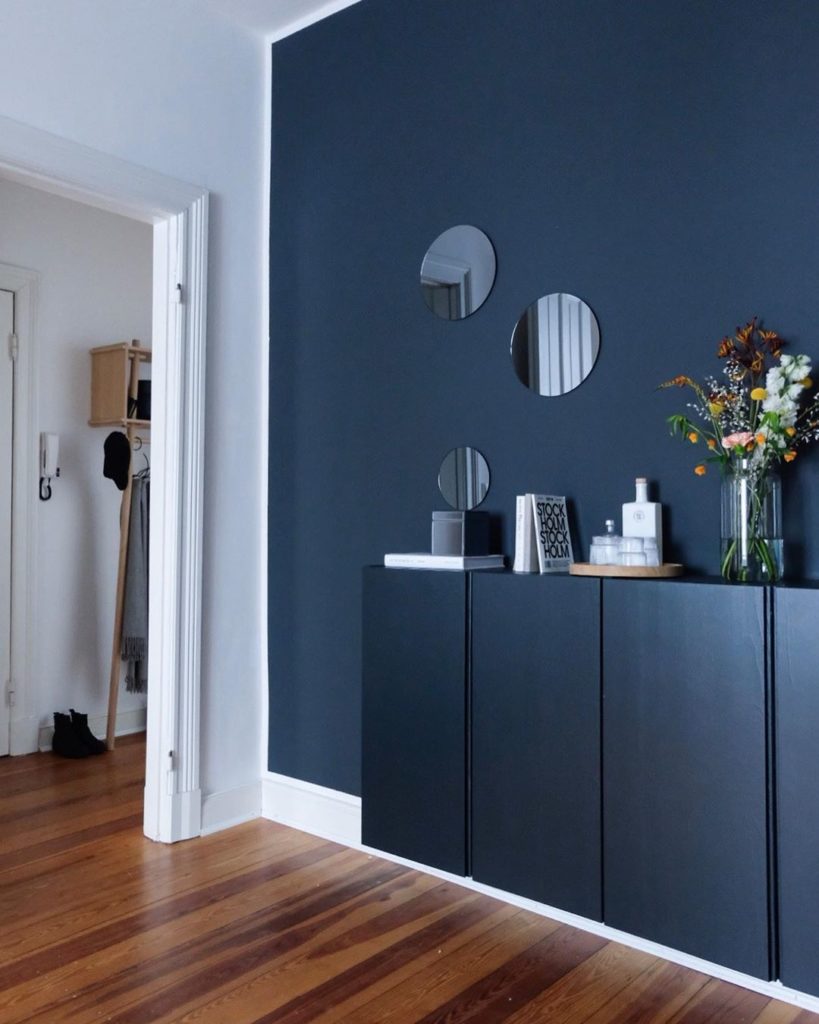
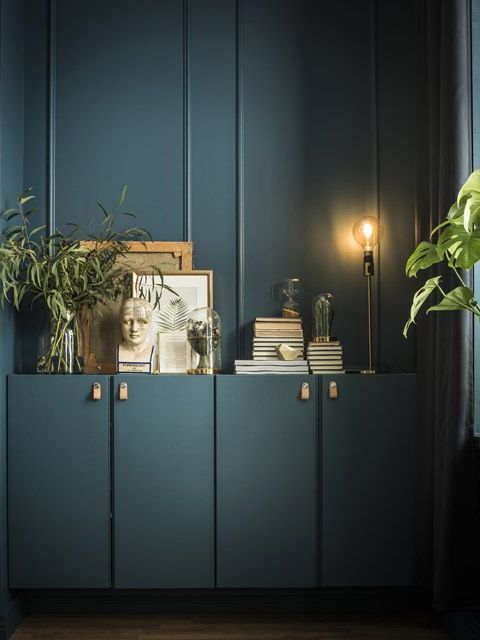
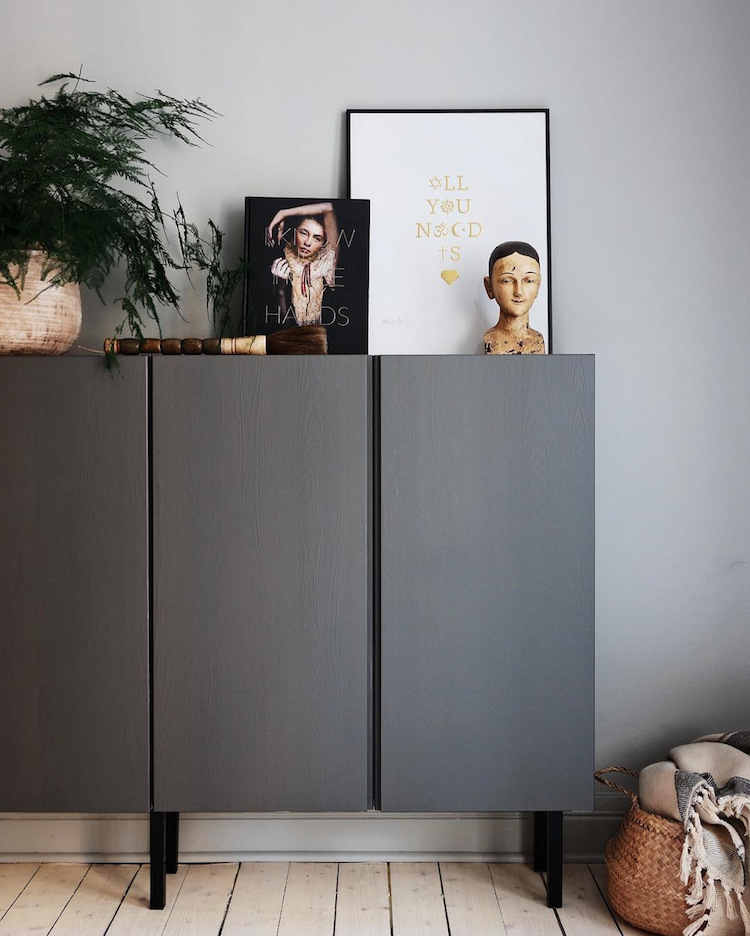
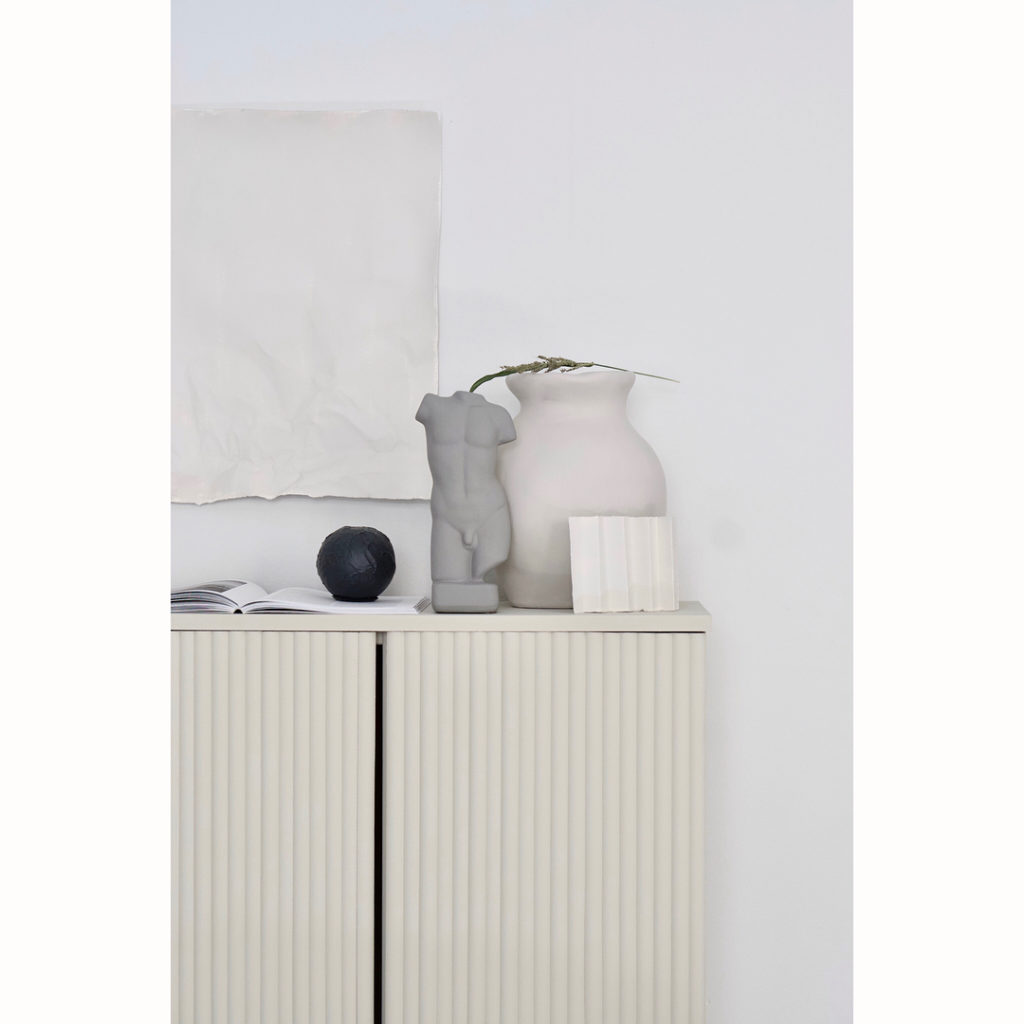
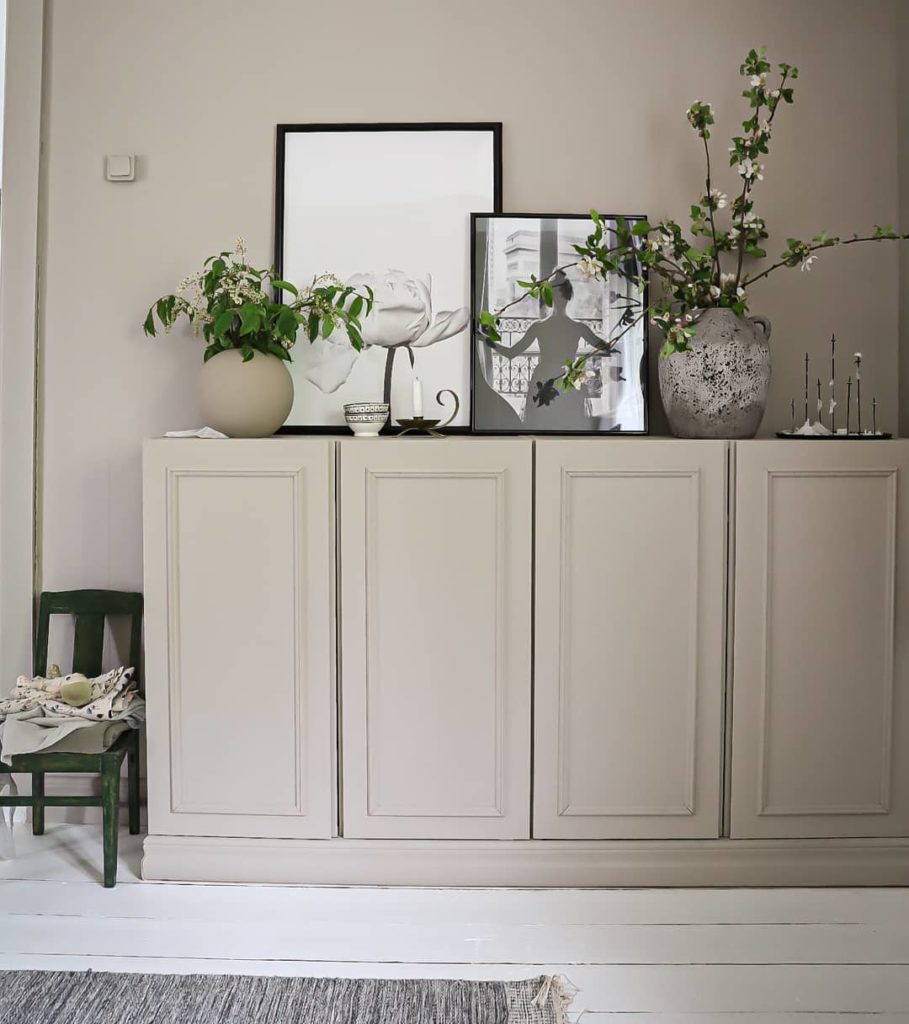
2.Paint your Ivar cabinet the same color as your wall
Another great way to give your IVAR cabinet a stylish upgrade is by painting the same color as your wall. This creates a seamless and cohesive look that can make the cabinet blend in and become a part of your wall rather than standing out as a separate storage piece.
This hack is particularly useful for those who want to keep their space looking clean and minimalistic, as it eliminates the visual clutter of having a different colored cabinet. Additionally, if you have limited space, this hack can help make the room appear larger by reducing visual distractions.
To achieve this look, simply choose a paint color that matches your wall and paint the entire cabinet. Ensure that you use a high-quality paint that is durable and can withstand wear and tear.
Keep in mind that this hack may not be suitable for those who want their IVAR cabinet to be a statement piece or a focal point in the room. However, if you prefer a more understated and cohesive look to your decor, painting your IVAR cabinet the same color as your wall is the way to go.
A few of my favorite examples :


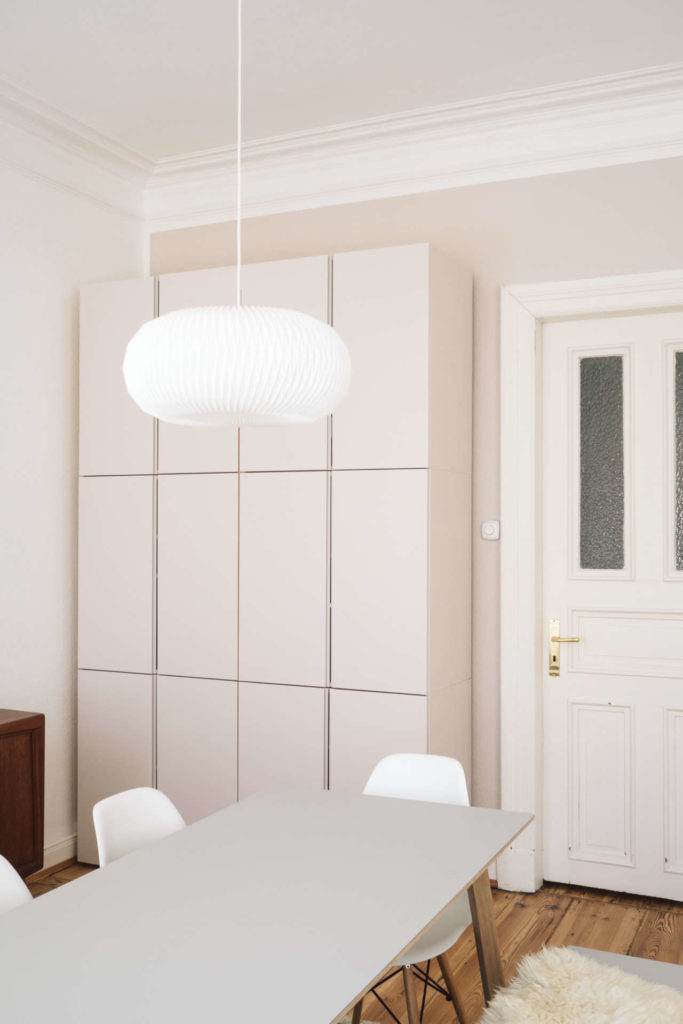


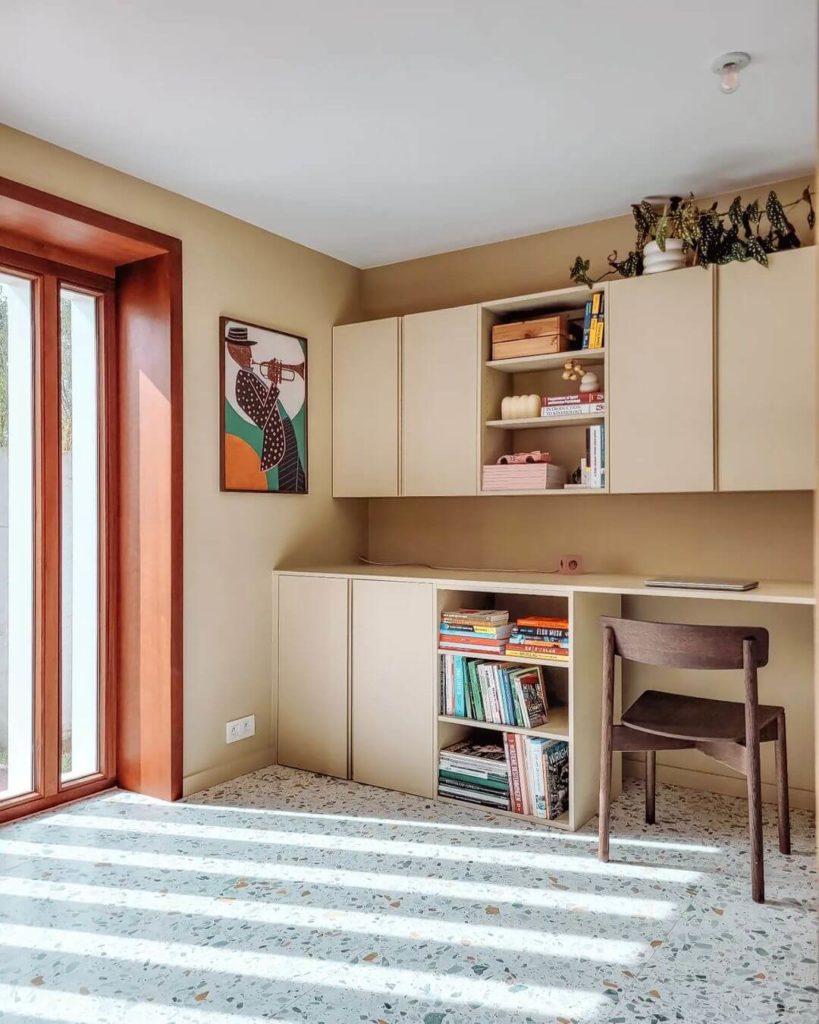
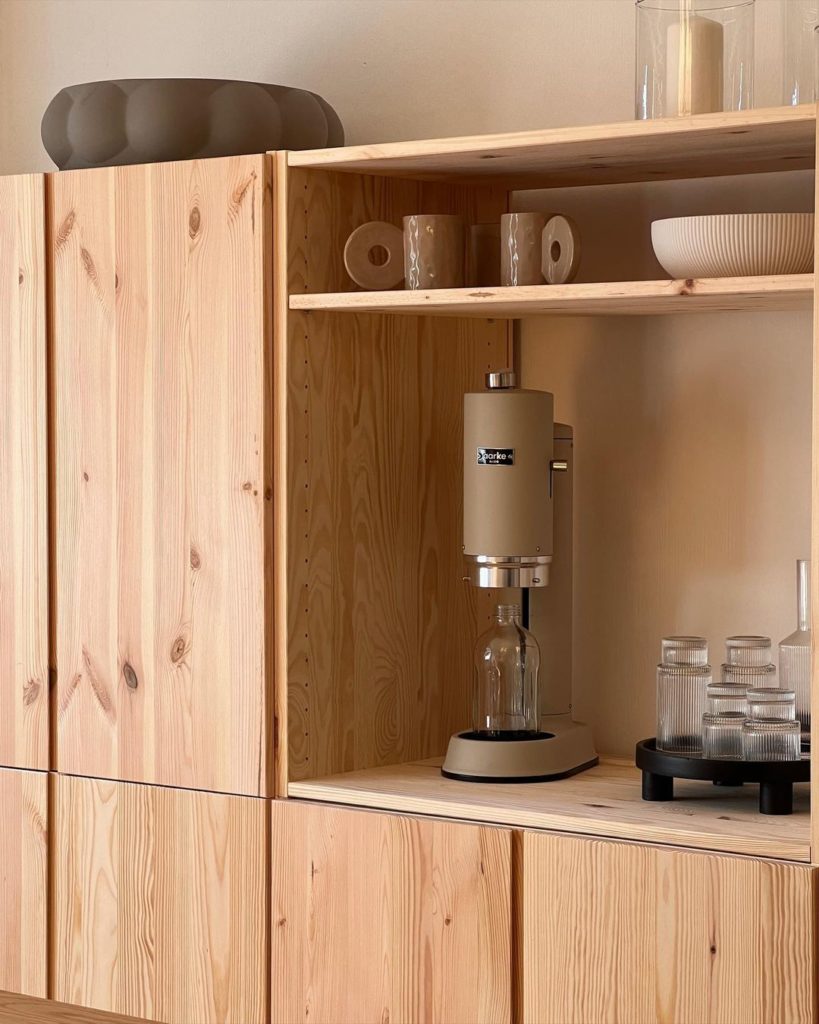
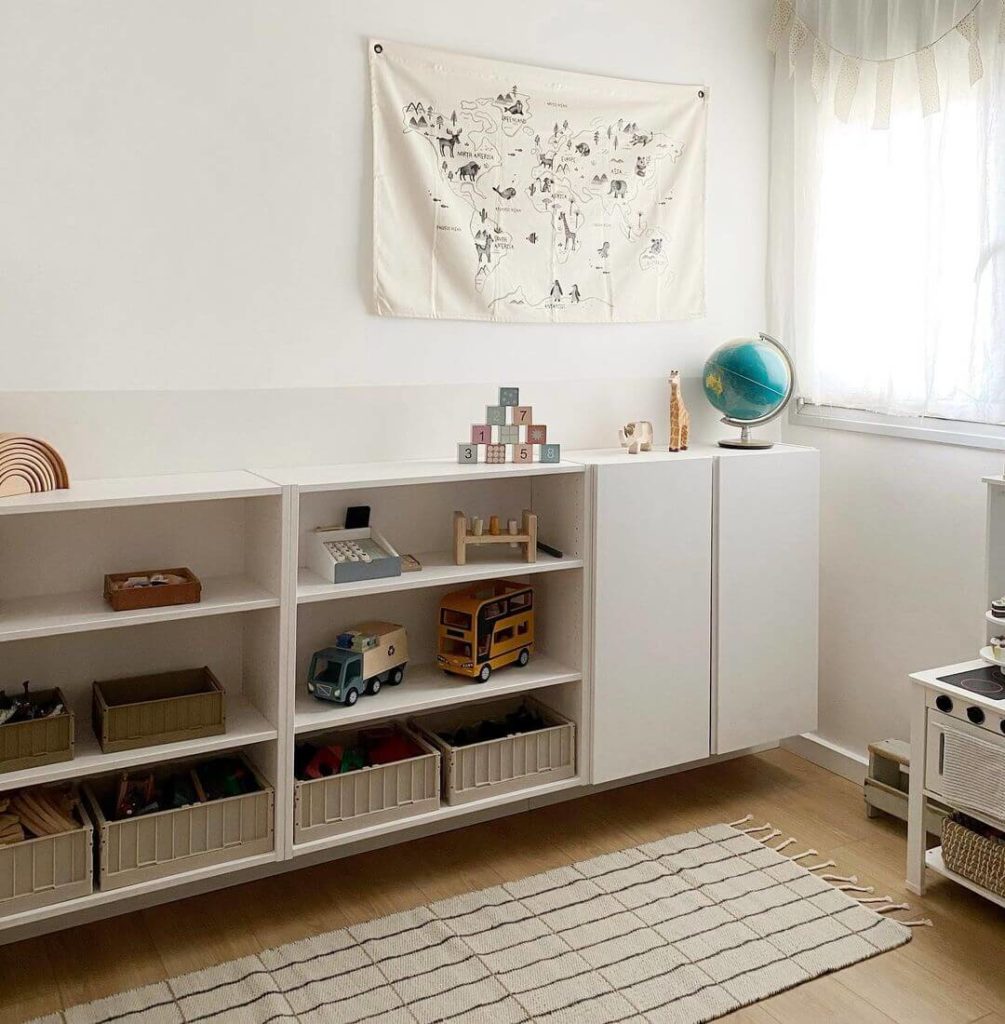
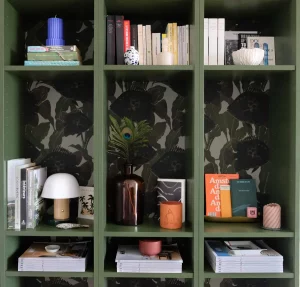
3. Maximize vertical space, and use it as a cupboard
If you don’t have a lot of space, create an organized and attractive storage solution with IKEA Ivar cabinets by stacking them. Using the height of your walls could really make you gain a lot of storage space. Use the additional wall space to place baskets or decorative items. This will create a stylish and well-organized piece of furniture that can be used to store everyday items.


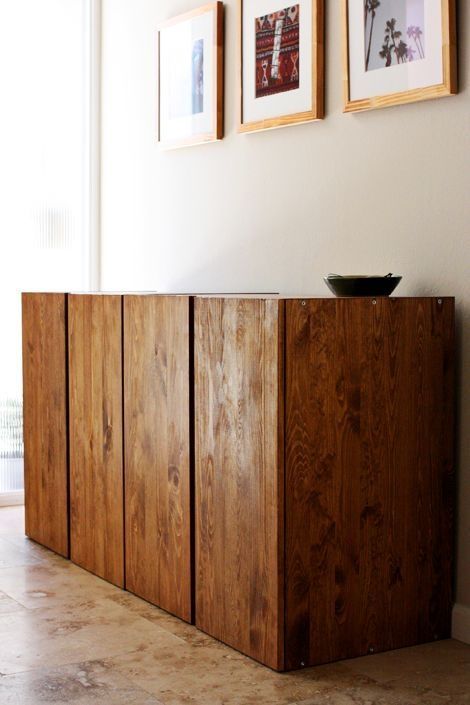
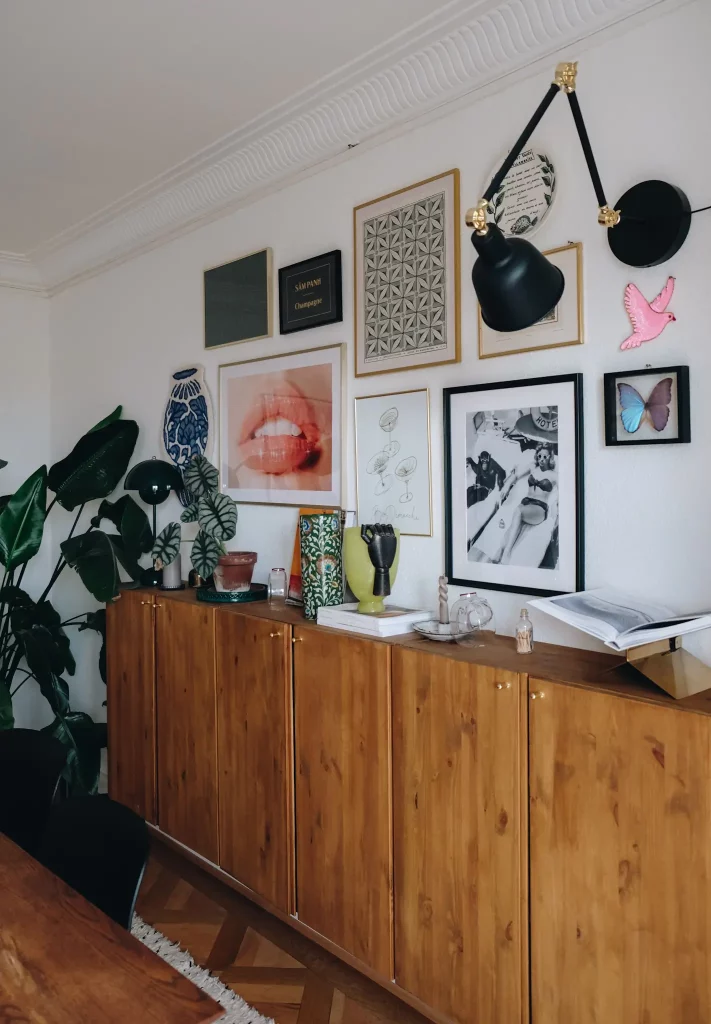
3. A darker wood stain for more character
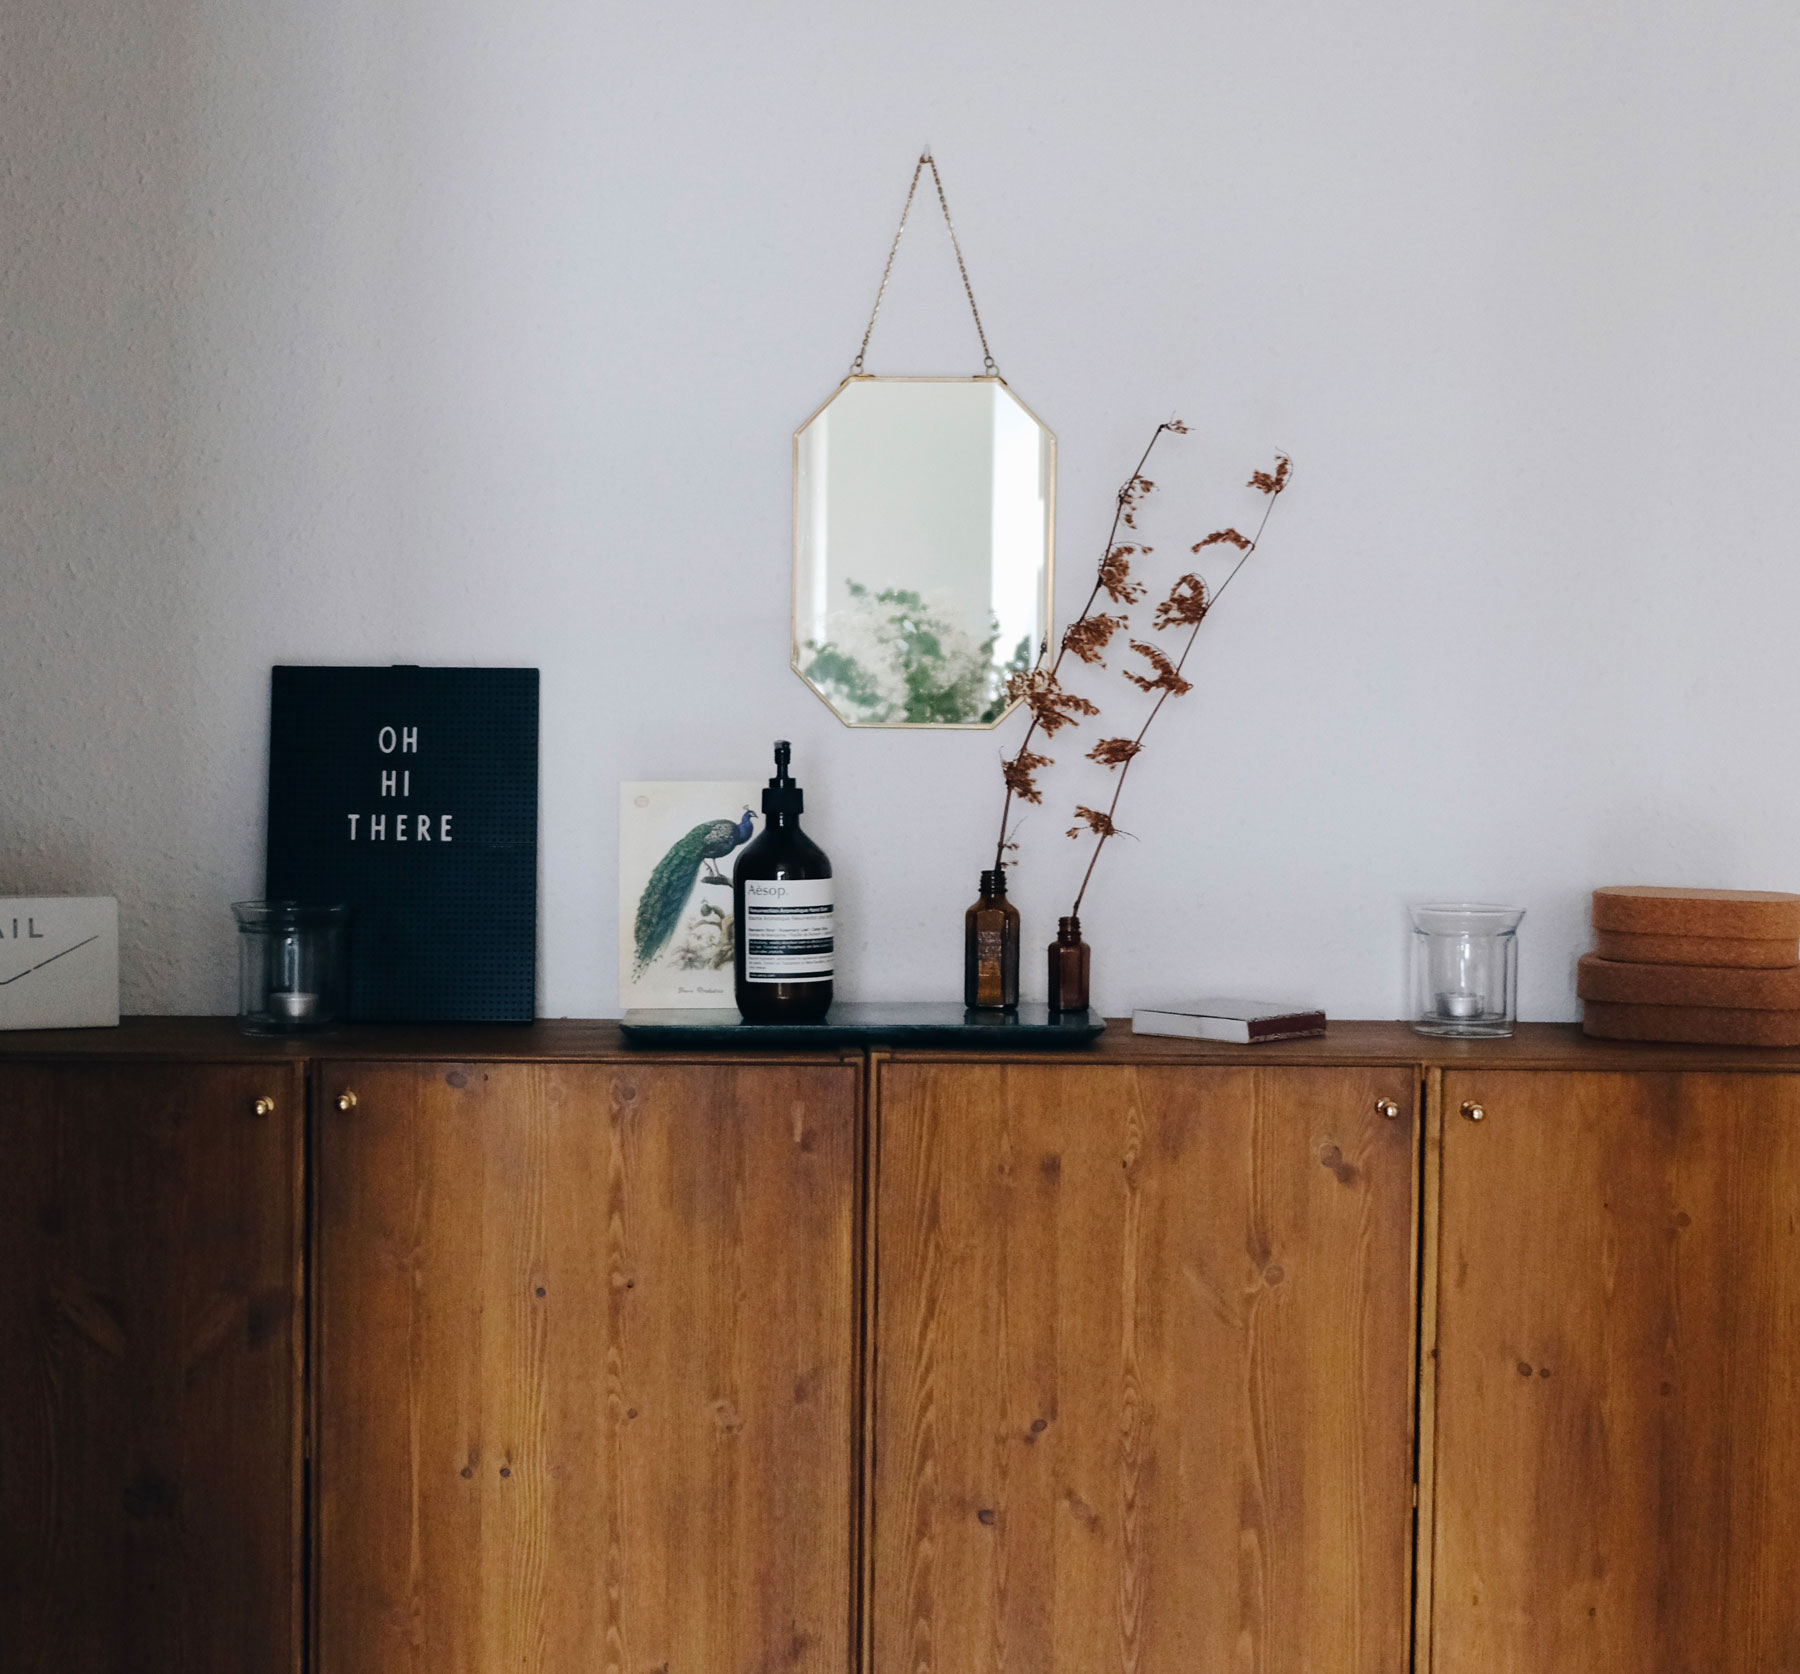
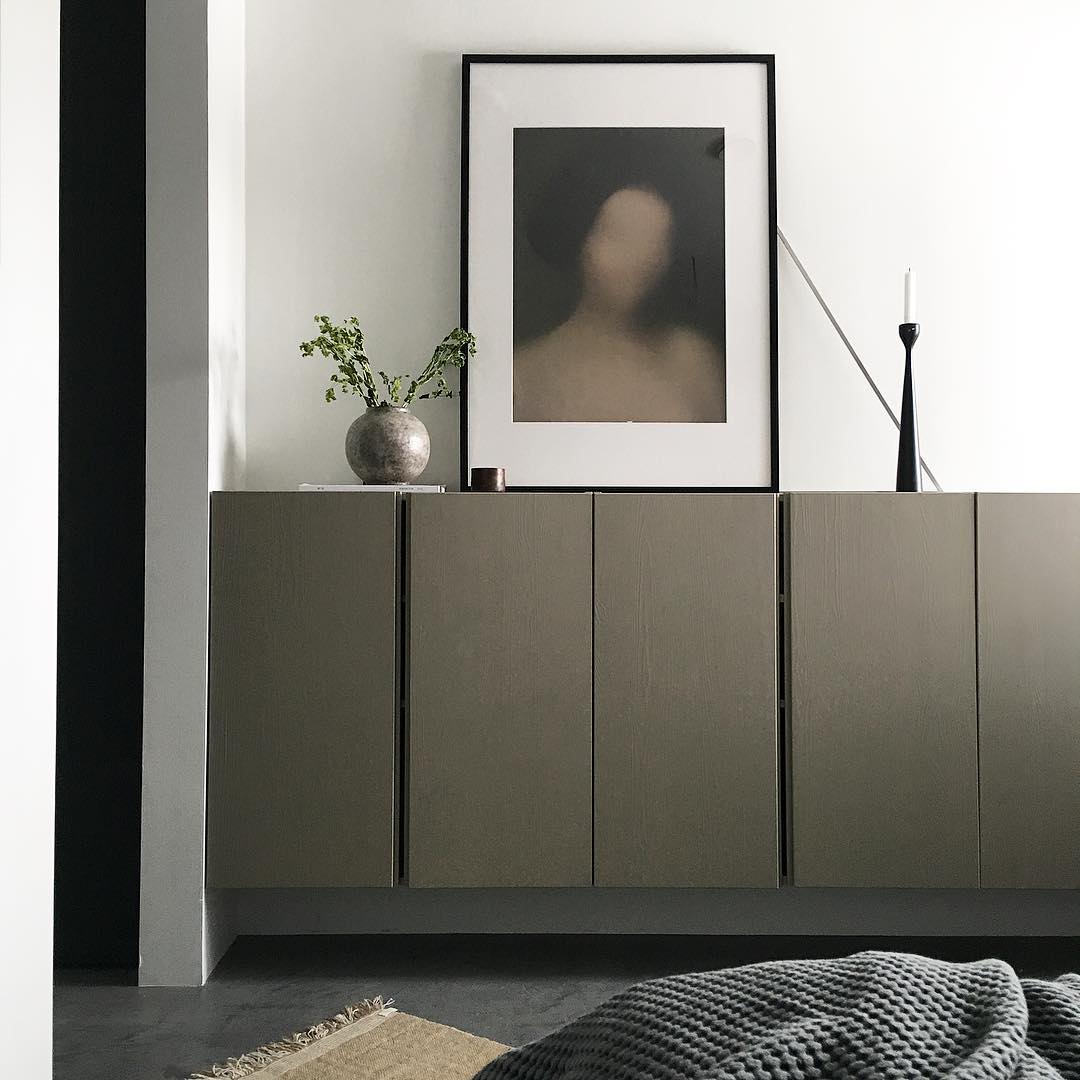
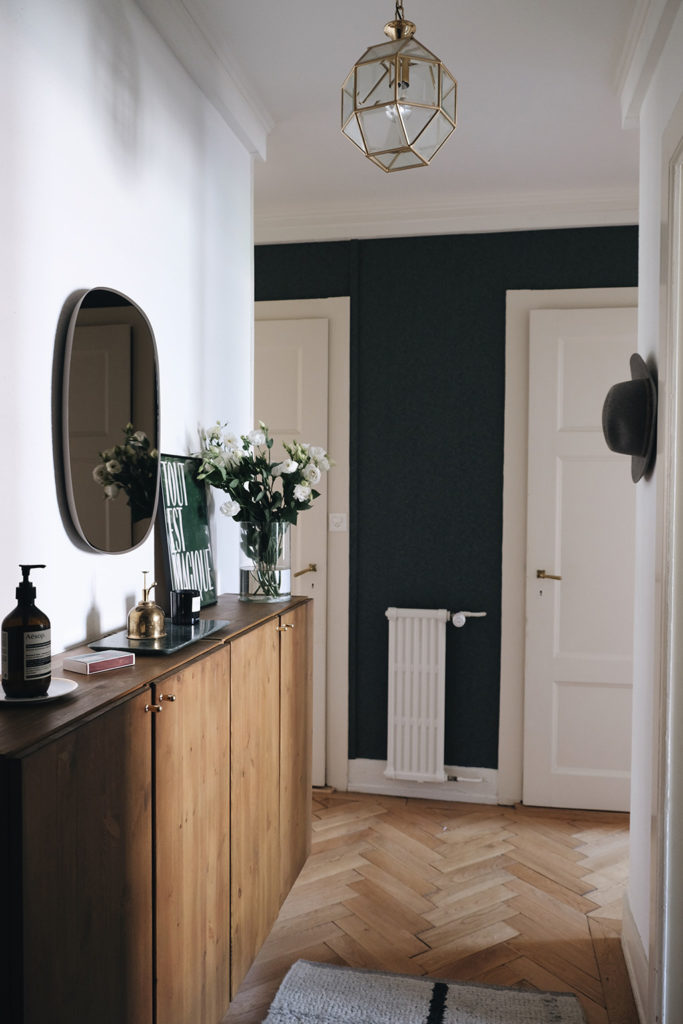
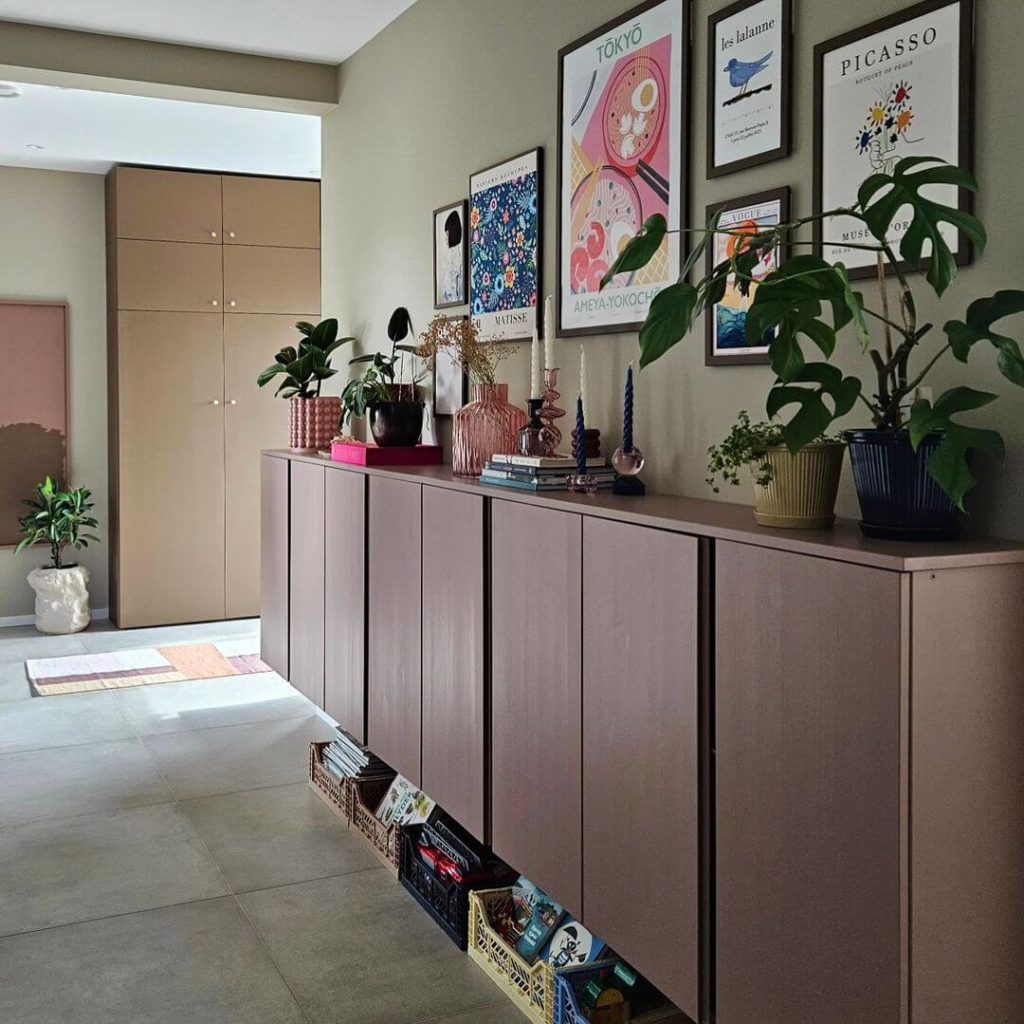
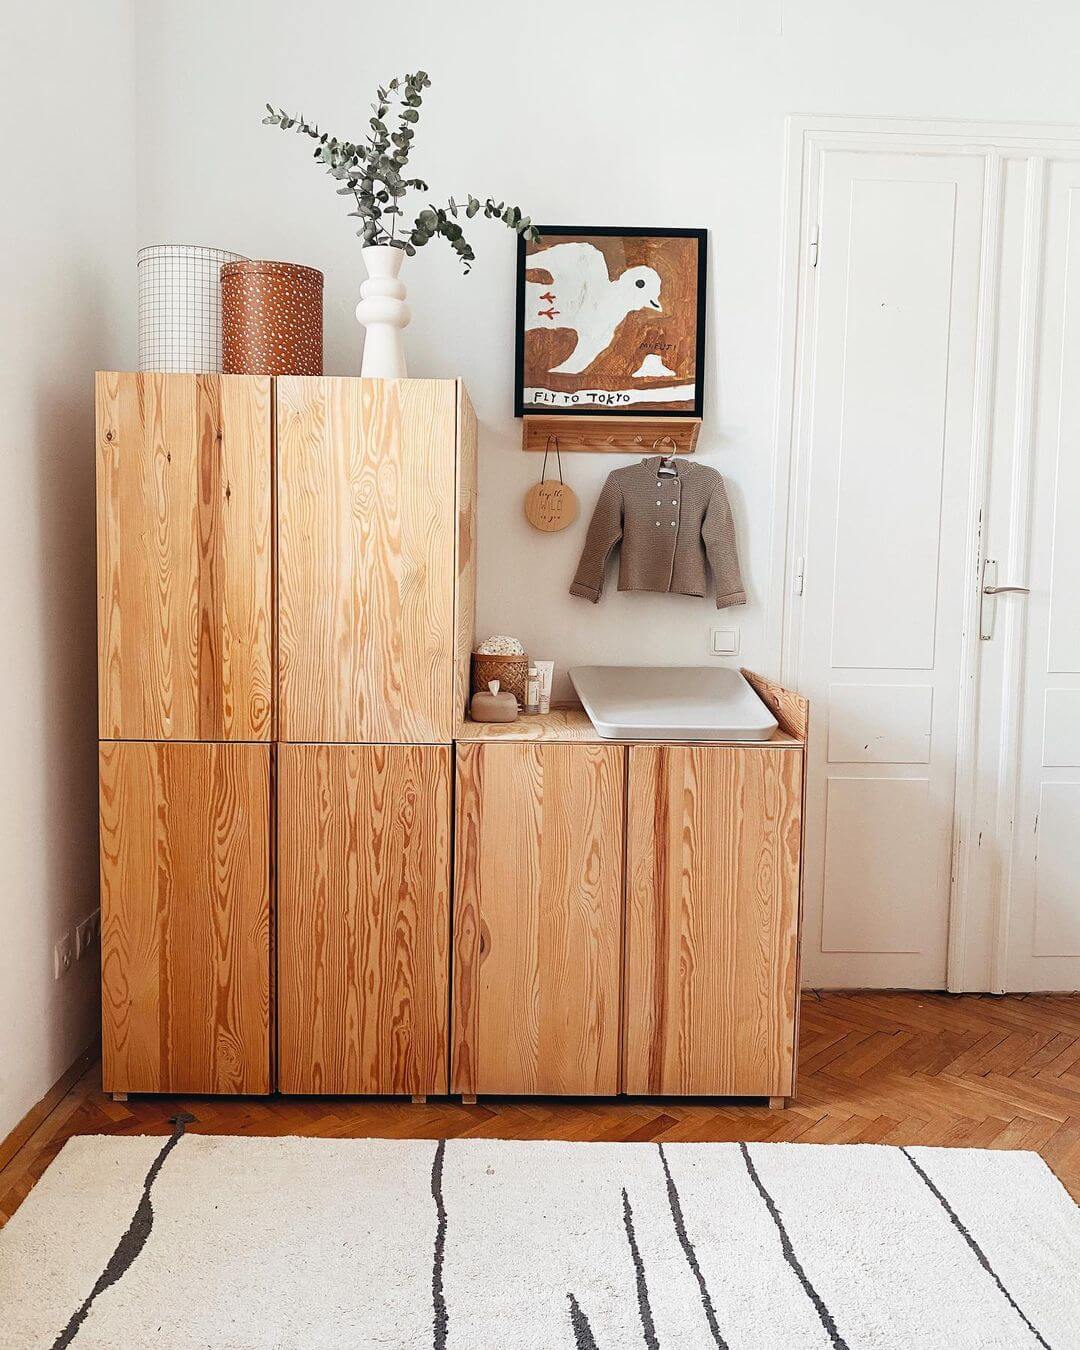
If you want to add a bit of character to your IVAR cabinet, this section covers how a darker wood stain can do just that. Keep in mind that keeping the IVAR cabinet in its natural state is also an option (see number 8). However, if you want to add a bit of character to your IVAR cabinet, staining it with a darker wood tone can do wonders. A darker stain creates a rich and warm tone, which can add depth to your furniture and enhance your room’s overall aesthetic.
Adding a darker wood stain can transform your IVAR cabinet and create a timeless look that fits in with any decor style. Once you’ve stained your cabinet, it’s time to add some doorknobs to complete the transformation.
That’s the option I went with. In order to make it look more ancient or as if
>>How to stain your Ivar cabinet: a step by step guide
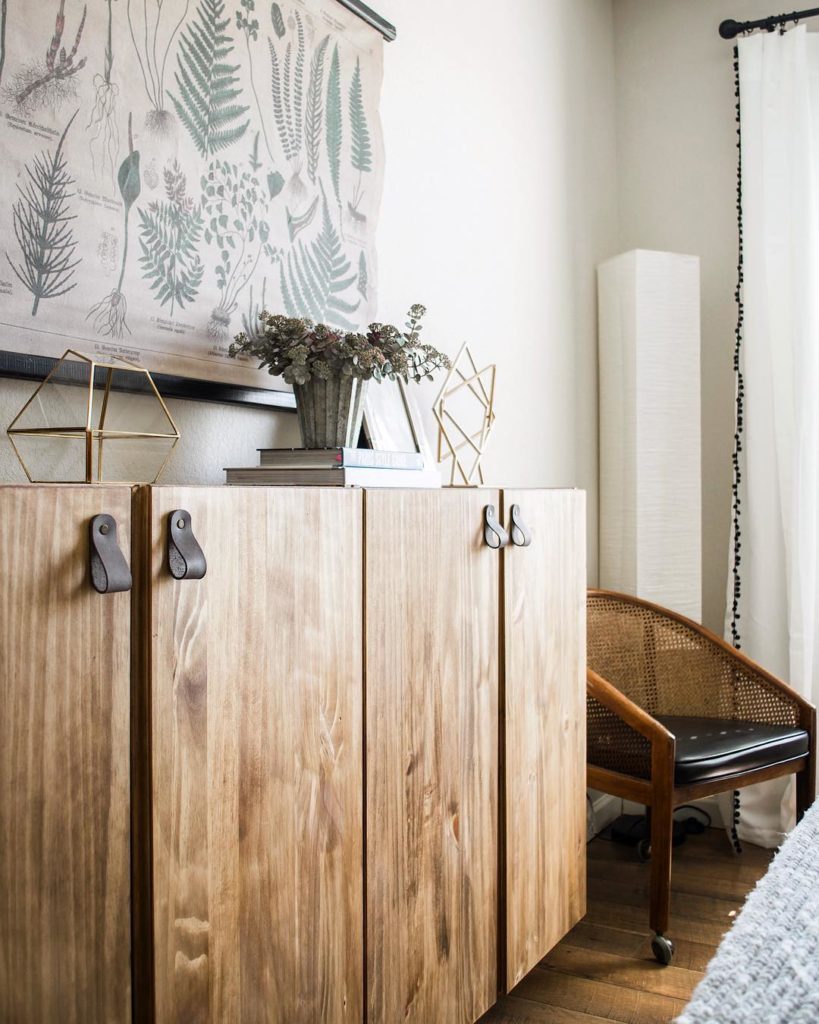

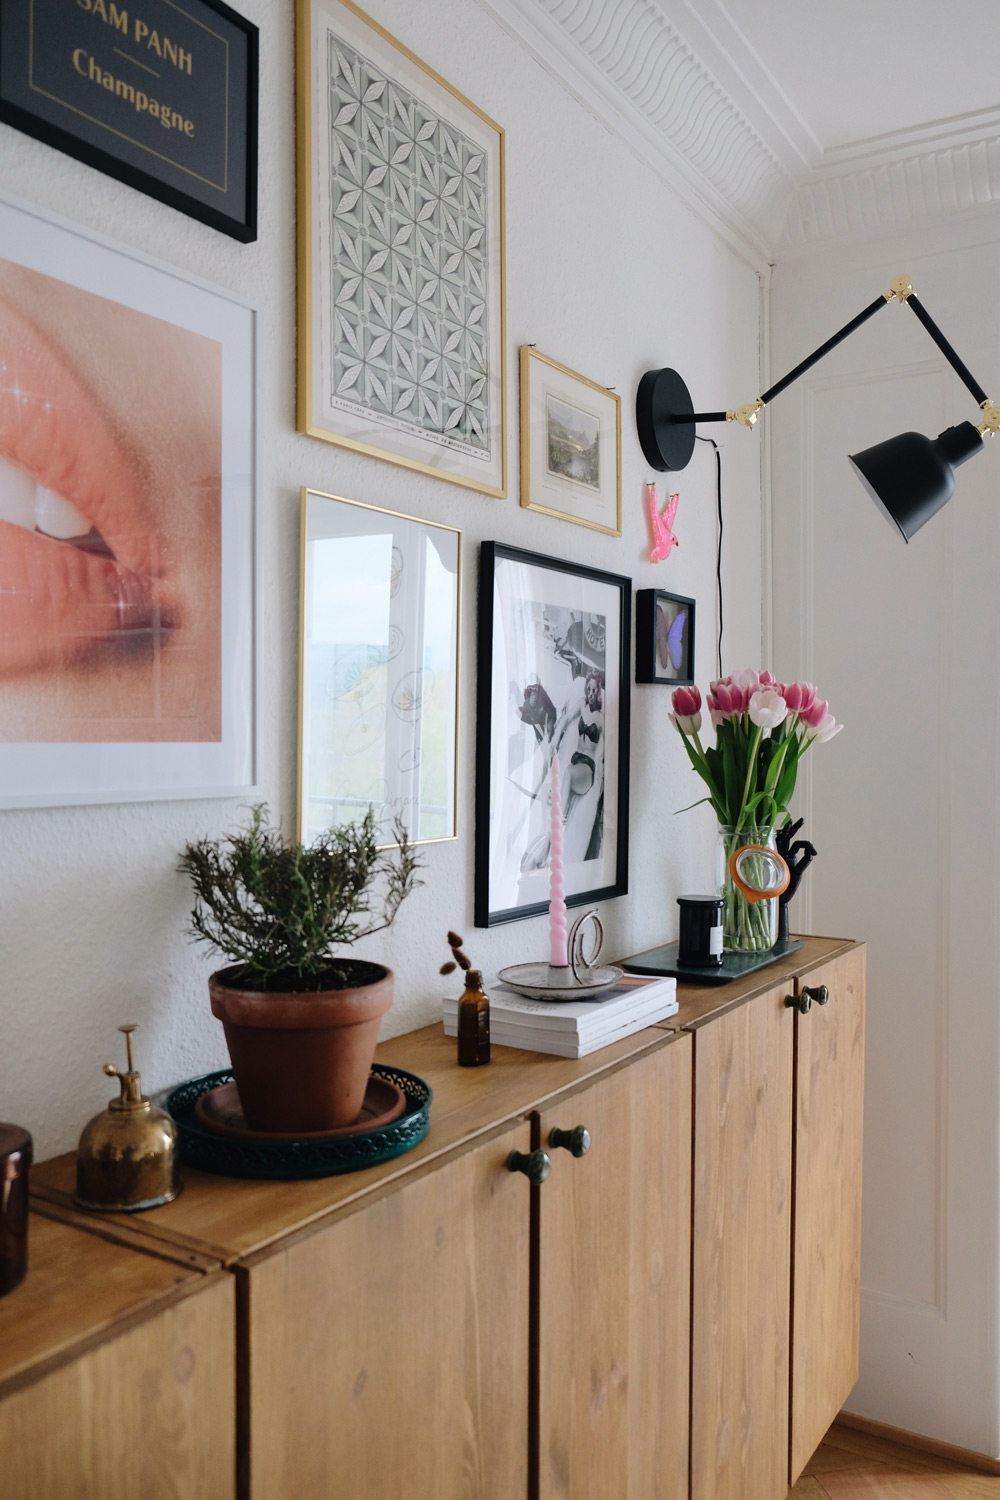

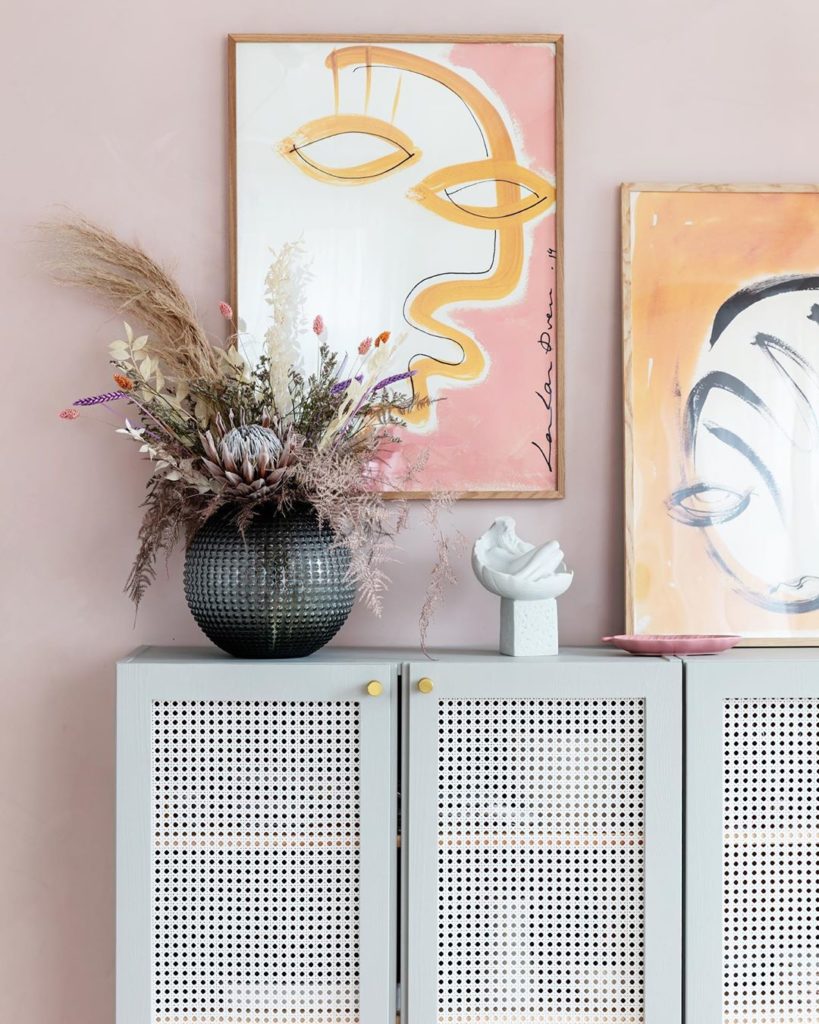
4. Add some doorknobs or pulls
Adding handles or knobs to your IVAR cabinet can enhance its appearance and functionality. They not only make it easier to open and close the doors but also add a polished look to the piece. With various styles and finishes to choose from, you can select handles or knobs that match your decor and personal style.
When choosing handles for your IVAR cabinet, consider the size and shape of the knobs, along with the necessary installation hardware. In my experience, knob handles have been the most suitable choice when adding handles.
Once you’ve chosen your doorknobs and gathered any necessary hardware, you can begin installing them on your cabinet doors. Using a drill or screwdriver, attach the knobs to the doors according to the manufacturer’s instructions. Take care to ensure that each knob is level and securely fastened.
Doorknobs make it look a little chicer also you can make it fit a certain style depending on the type of doorknobs you choose. I added doorknobs. It’s more coherent with the rest of the entryway now. My favorite online shops for these types of things are Etsy, Superfront, Pretty pegs, or Norse.

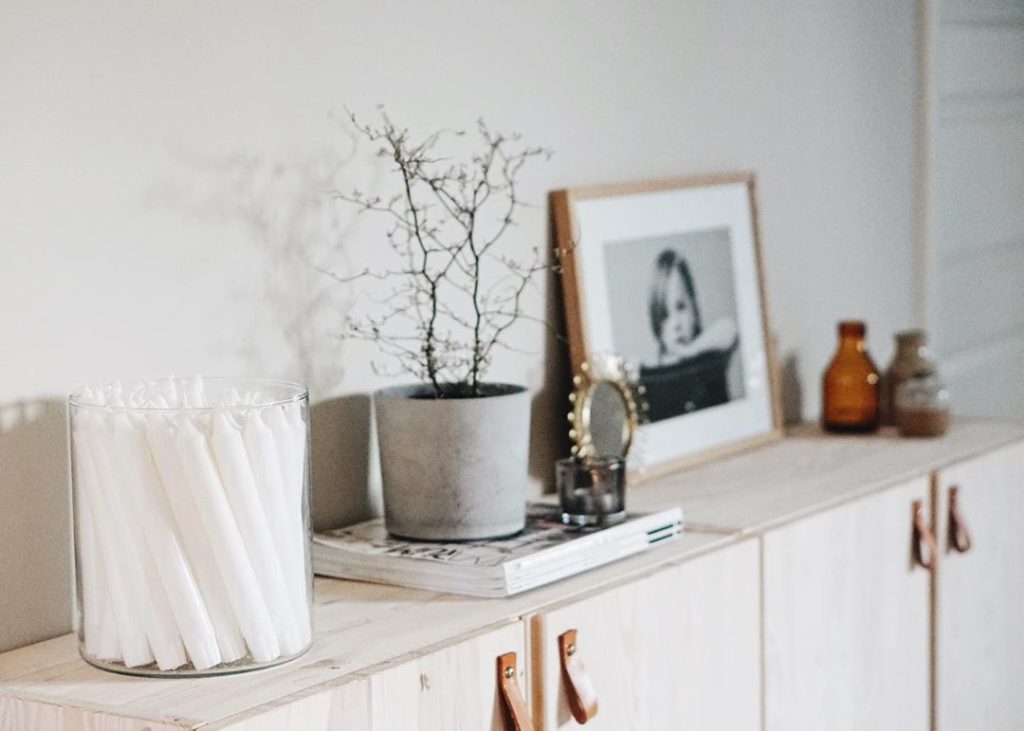
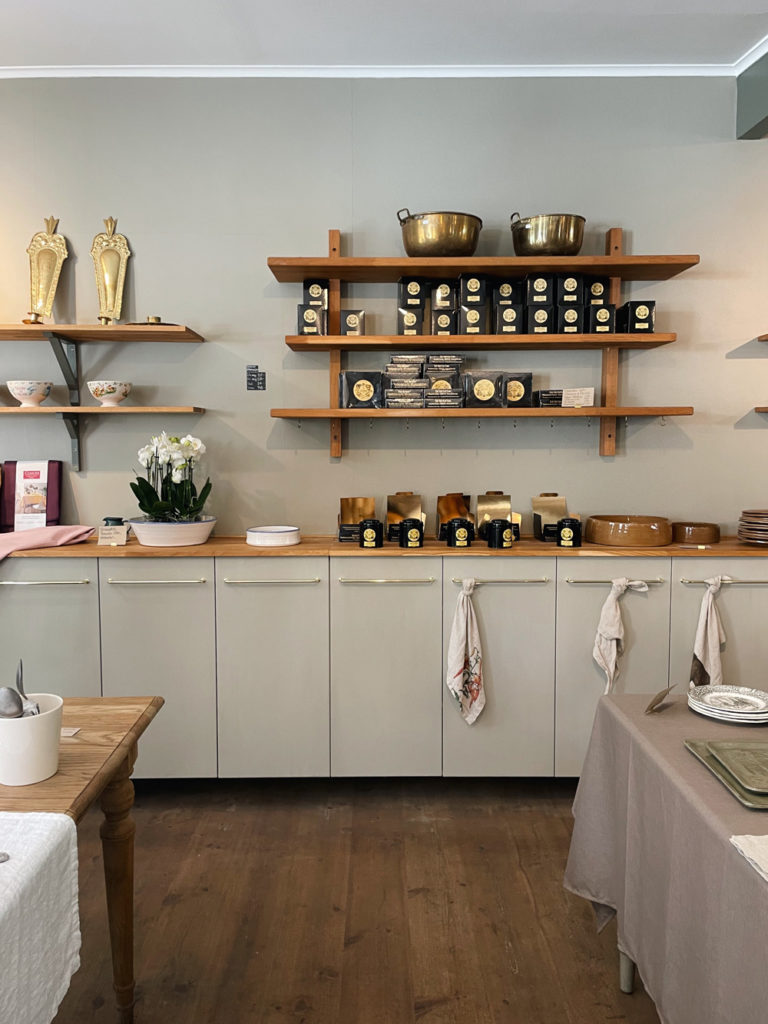
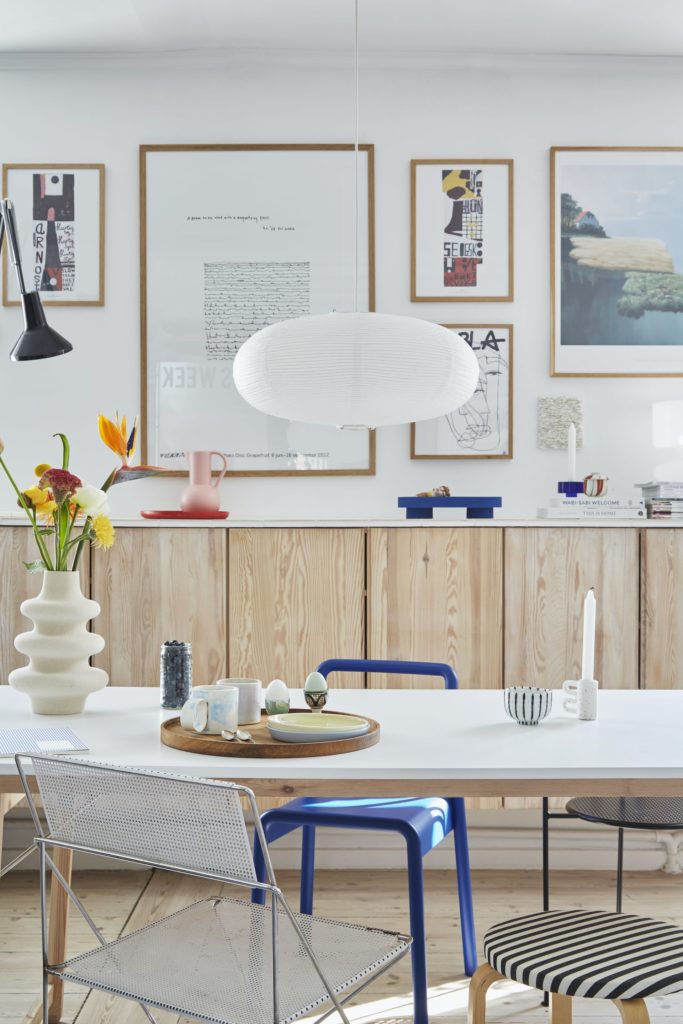
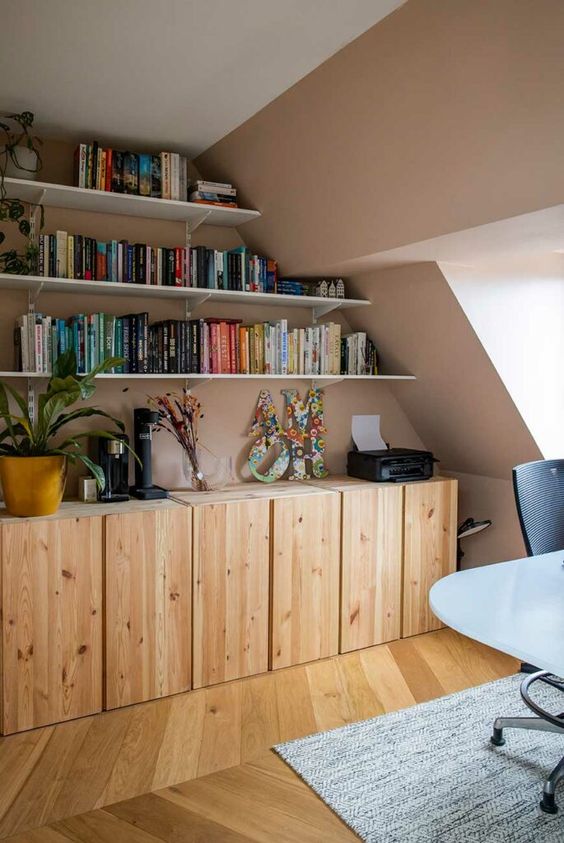
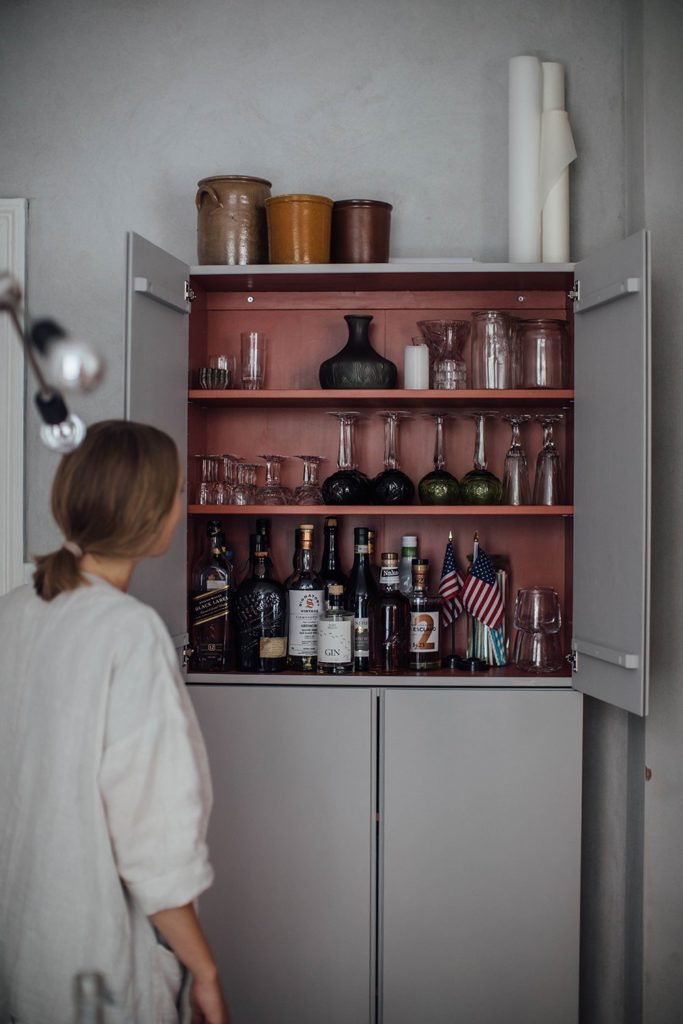
5. A countertop for a more finished look
If you’re looking to take your IVAR cabinet’s customization to the next level, consider adding a countertop. Not only does this option provide a finished look, but it also allows you to turn your cabinet into a functional workspace or storage unit. The countertop can be made from a variety of materials, including wood, laminate, or even concrete, depending on your personal style and needs.
In the examples below, you’ll see that some have used Ivar cabinets to create an entire workspace or even a kitchen (second picture below)! Ivar cabinets can be used on the floor or suspended from the wall, making them very versatile.
Before adding a countertop to your IVAR cabinet, make sure to measure the cabinet carefully. You’ll want to ensure that the countertop fits snugly and securely on top of the cabinet. Once you’ve chosen your material, cut it to size, and attach it to the cabinet using screws or brackets. Be careful if you want to go with a heavier countertop and if you plan on hanging your cabinets on the wall, there is a limited weight the screws can support.
Adding a countertop isn’t just a practical solution; it can also complement the style of your room and tie together your design.


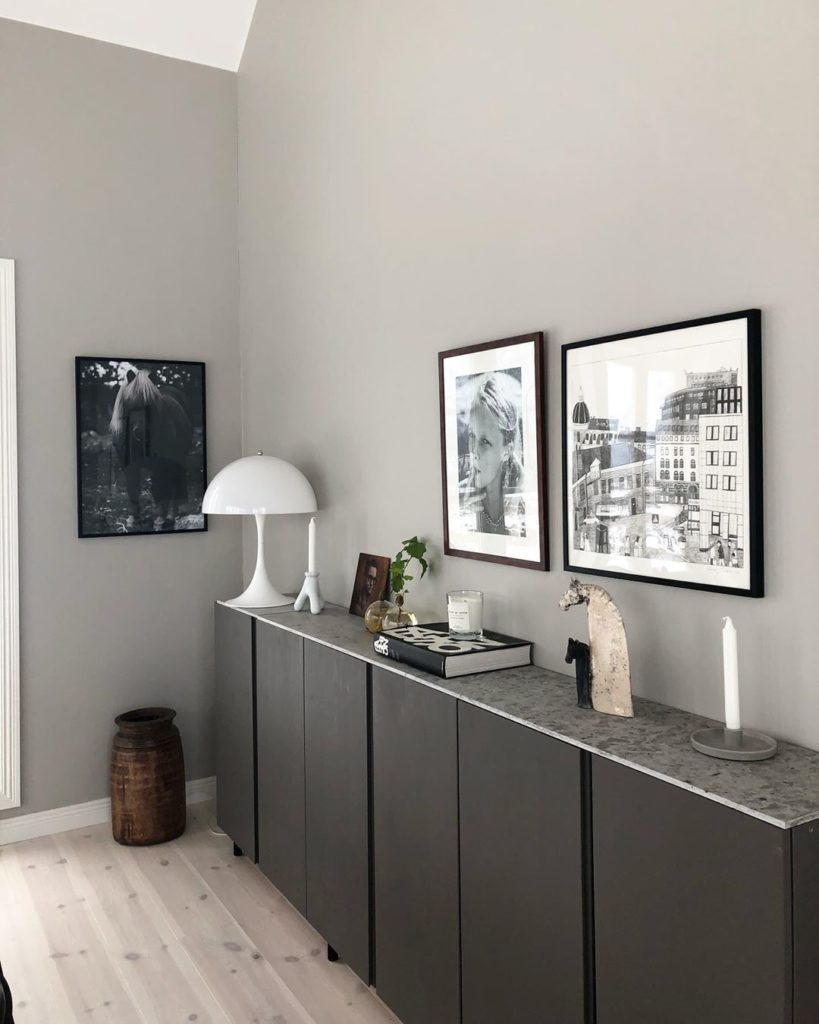


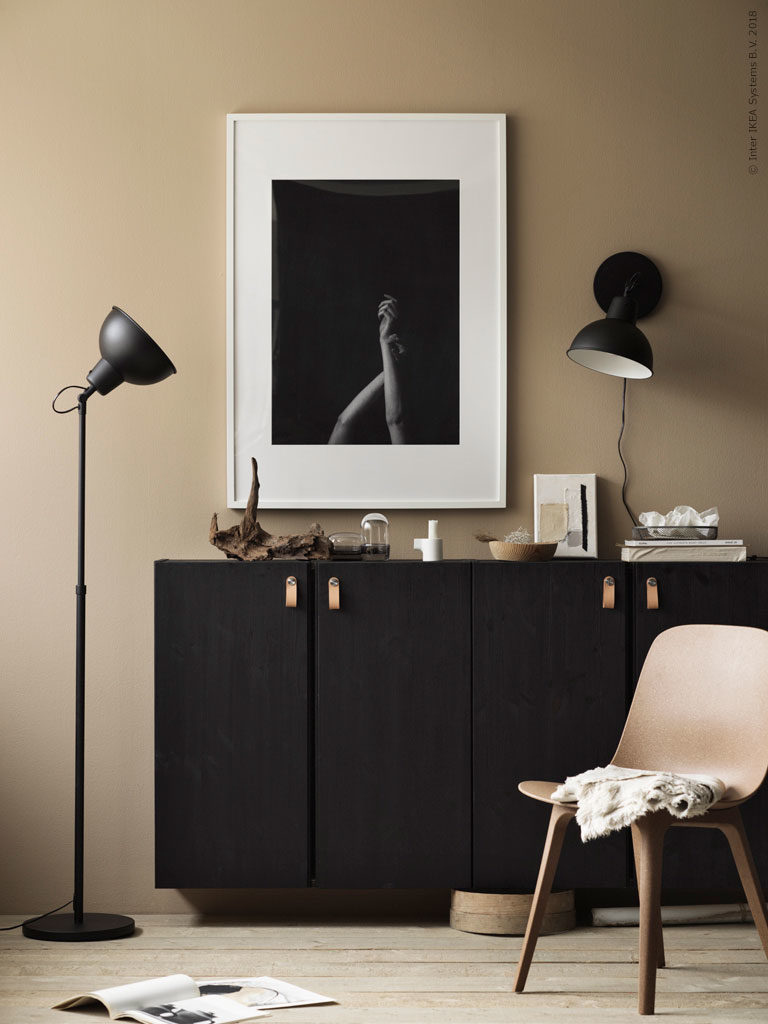
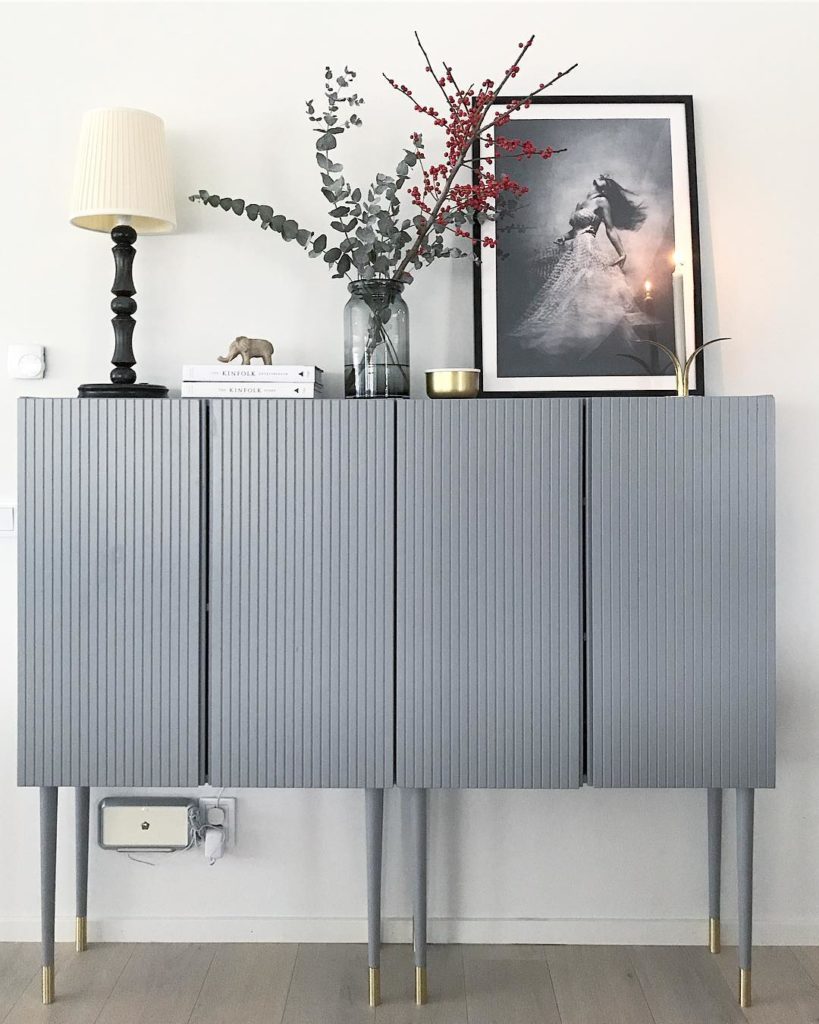
6. Make it stand on legs
Adding legs is a good way to personalize it as well. Just like for the doorknobs, some pretty cool online shops offer great solutions for cute legs (see my article about Where to Find Custom Legs for Your IKEA Furniture). This hack not only creates a more sophisticated and elevated look but also makes it easier to clean underneath. You can choose between metal, wooden, or even hairpin legs to match the style of your room.


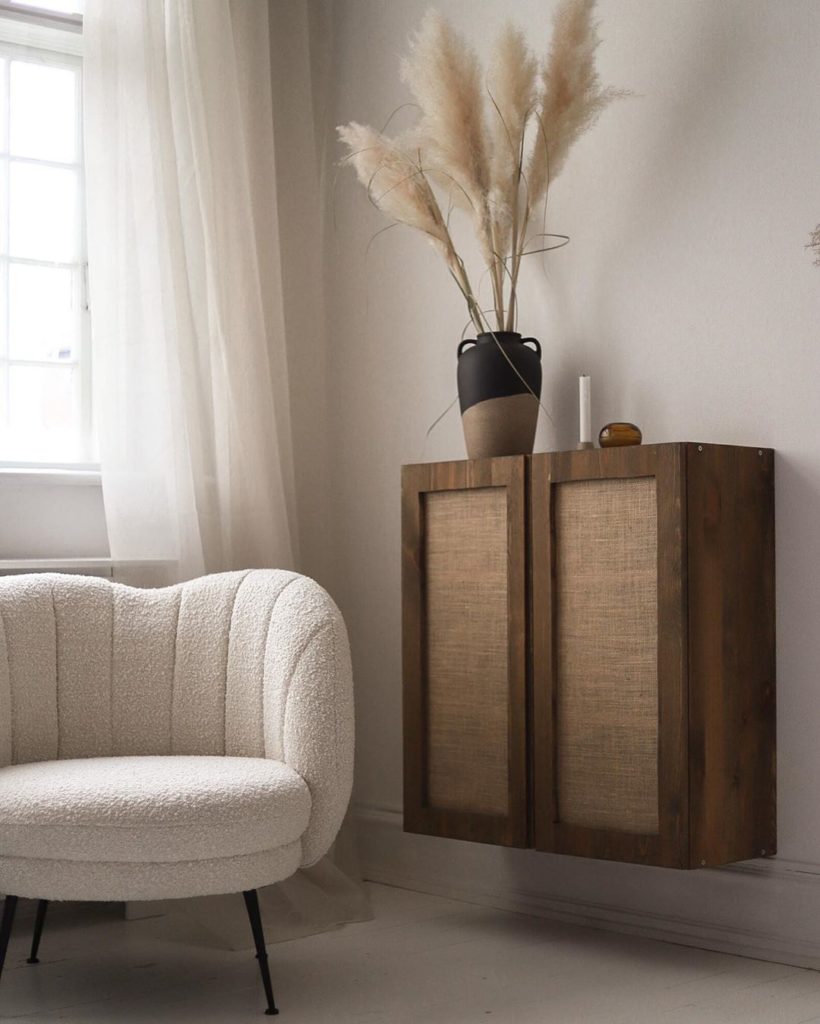
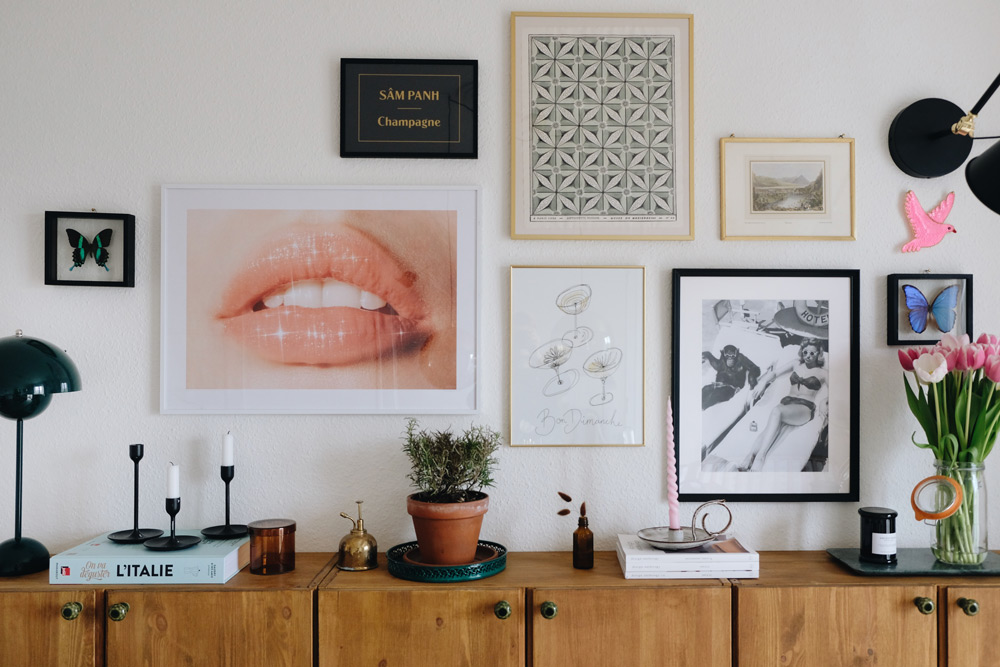
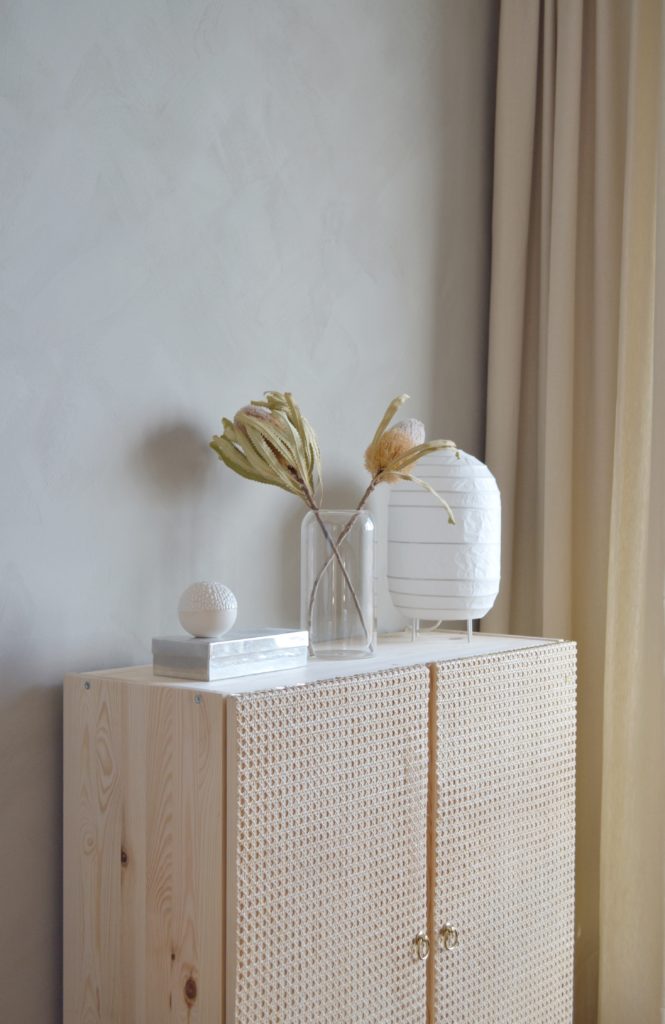
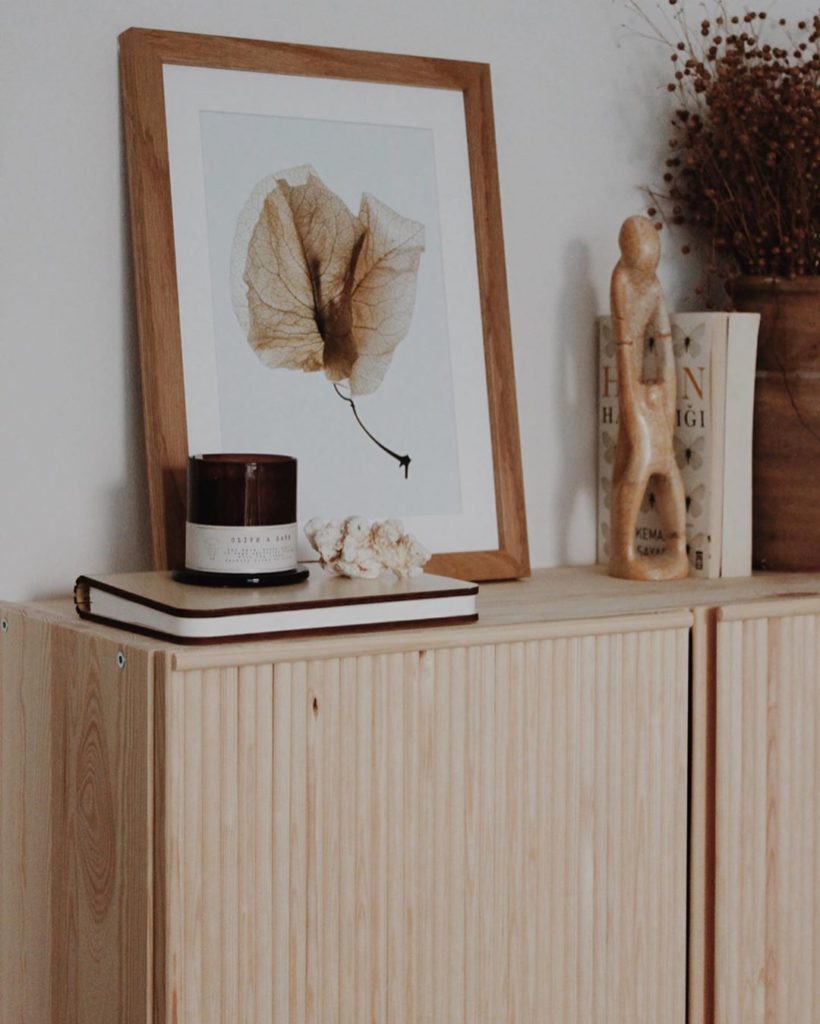
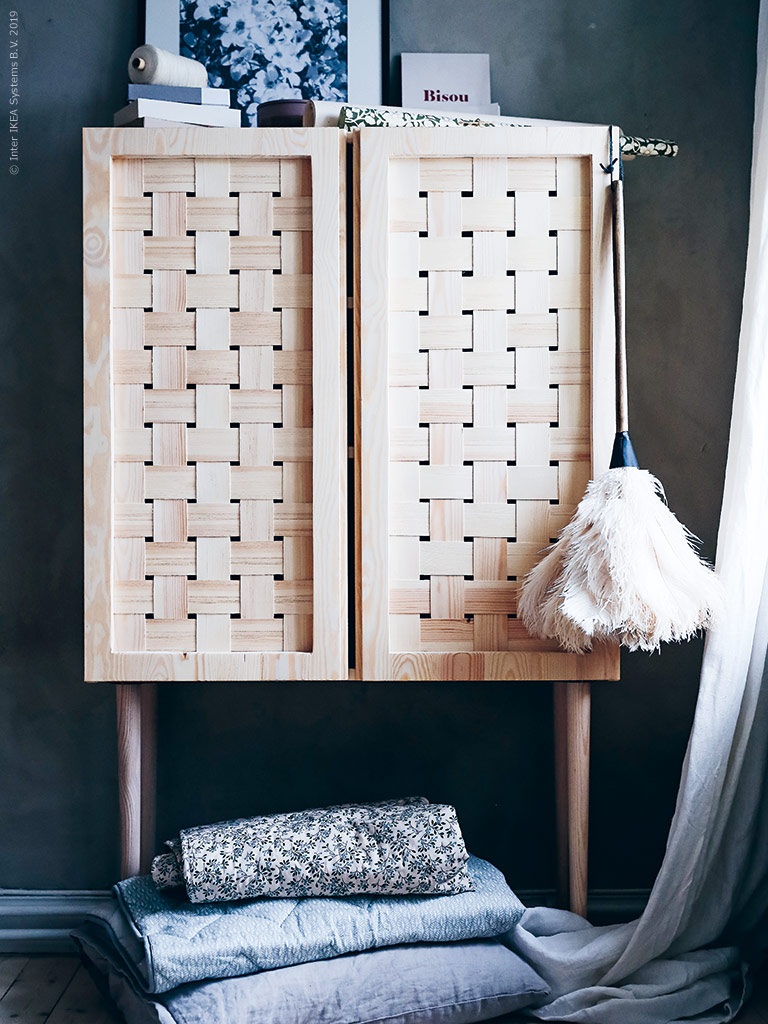
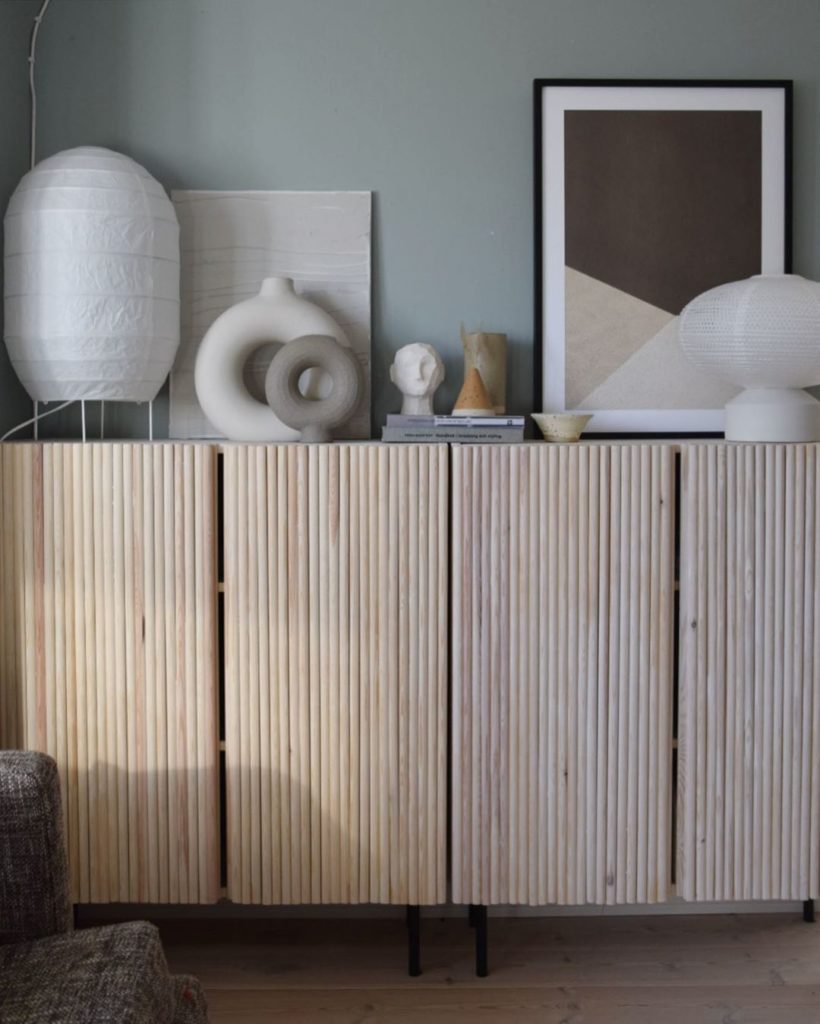
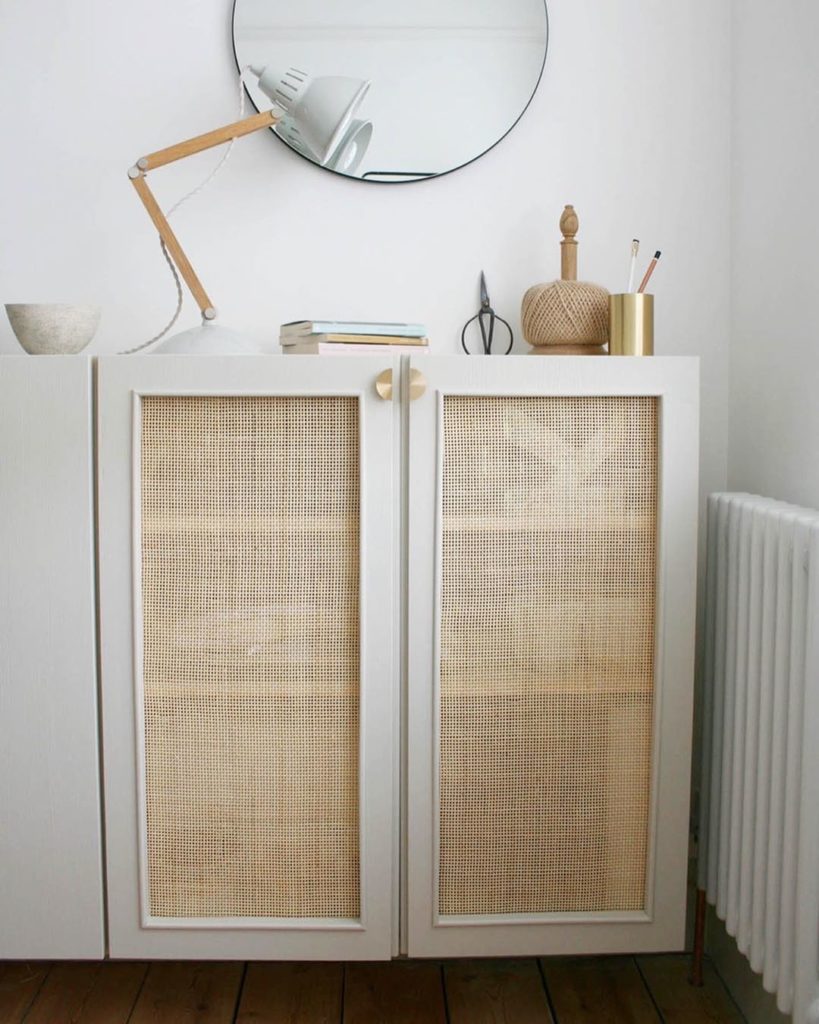
7. Dress up its doors
One of the great features of the IVAR cabinet is its versatility for creativity. Transforming its doors can elevate it from ordinary to exceptional. There are numerous methods to accomplish this, such as painting the doors with a new color or pattern, incorporating wallpaper or texture onto the panels.
Adding texture to these cabinets is a stylish touch.
update: IKEA sells doors with a sort of cane coating so you don’t even need to do it yourself anymore

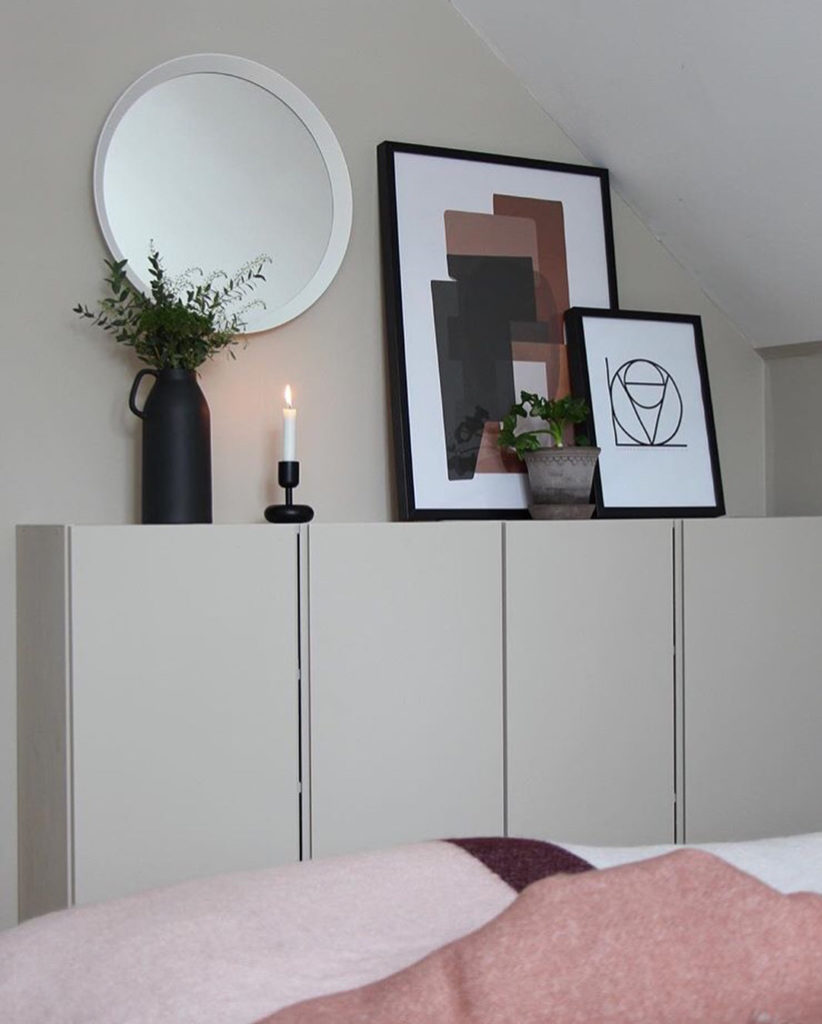
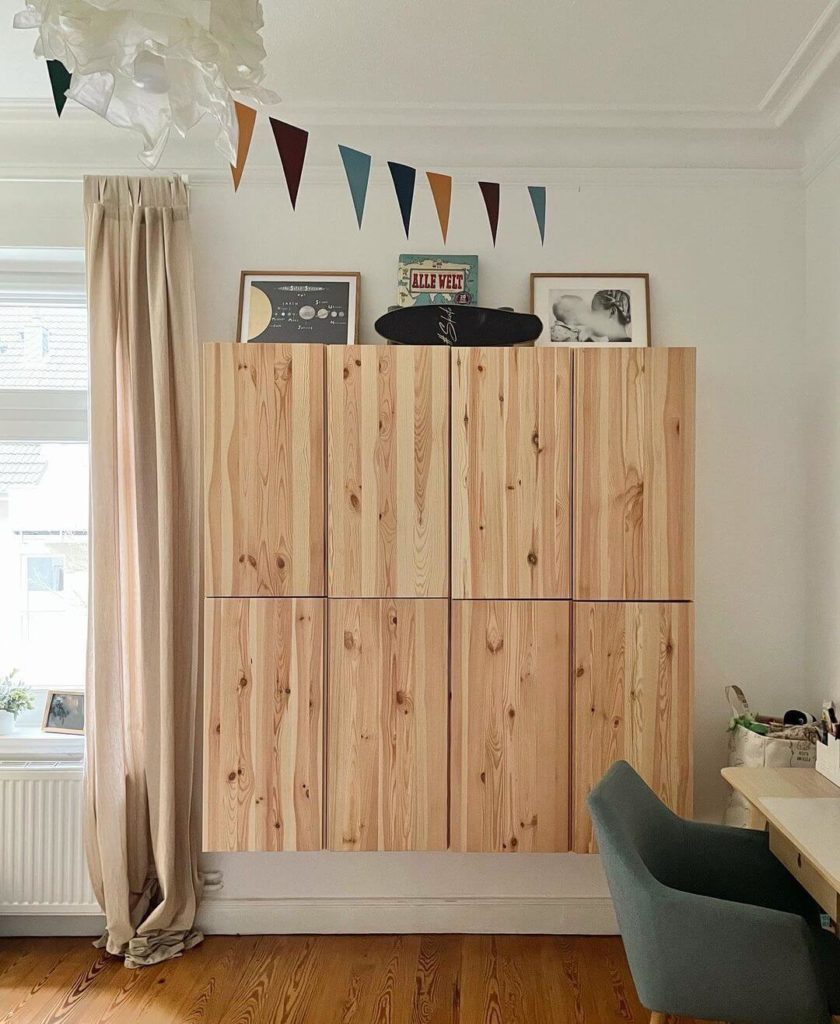
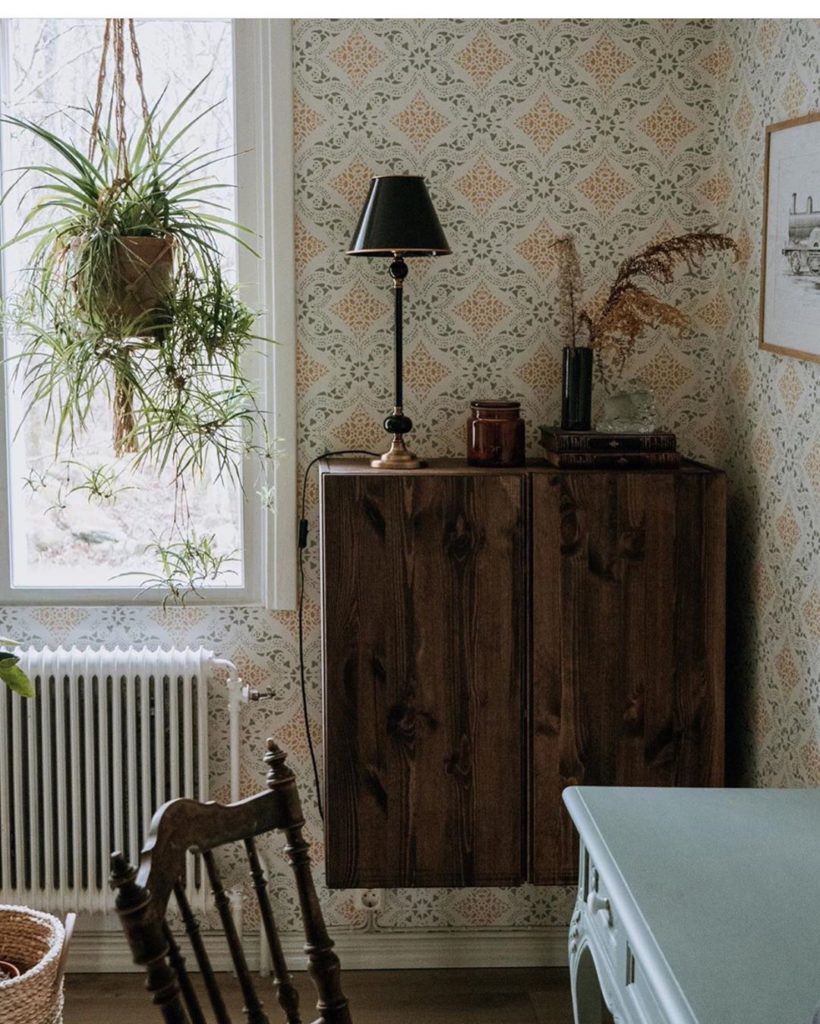
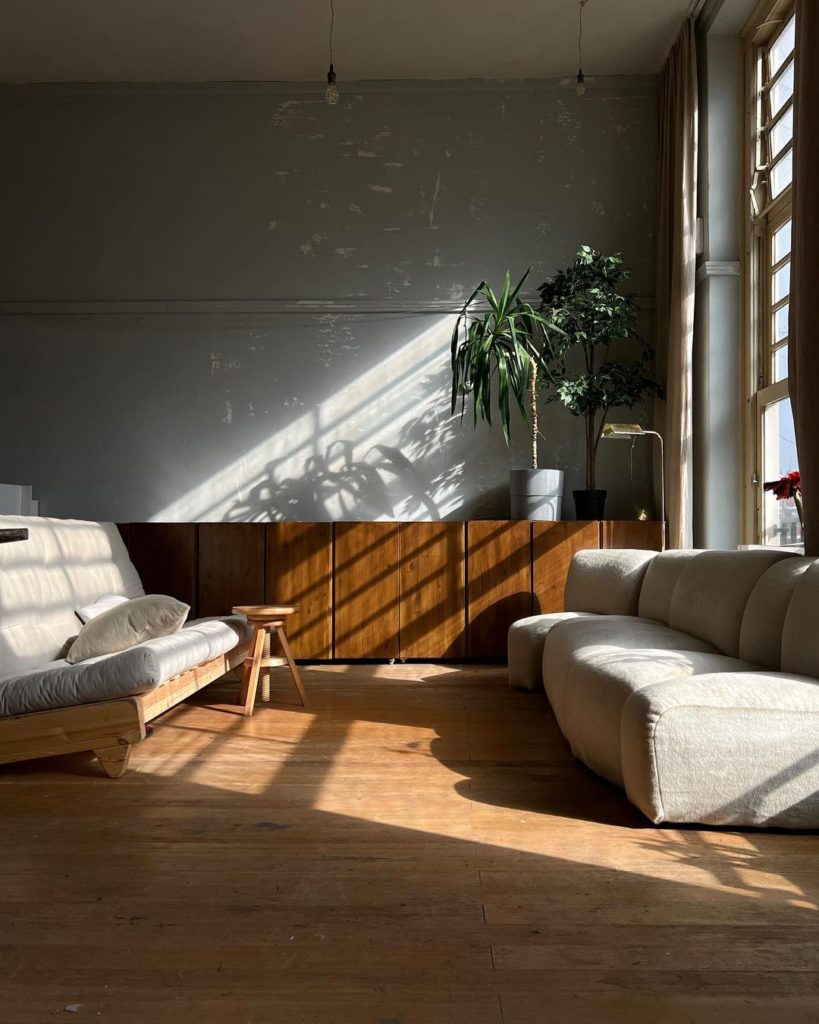
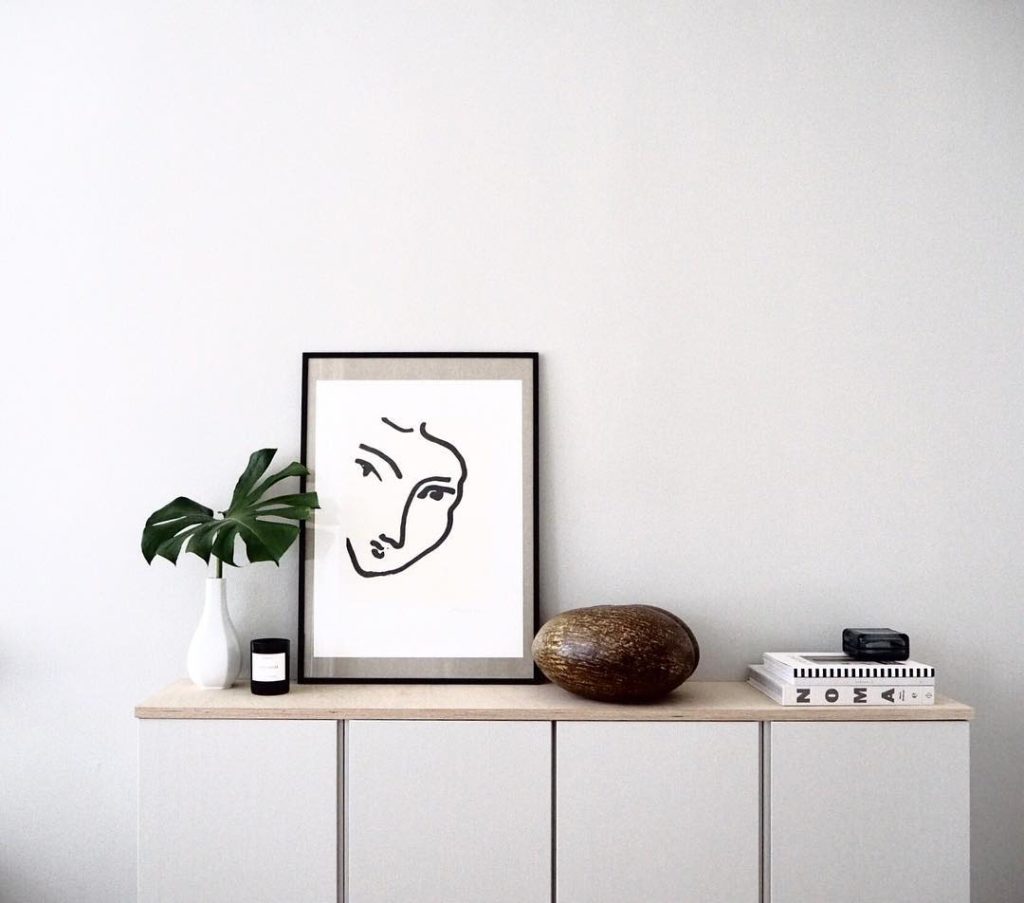
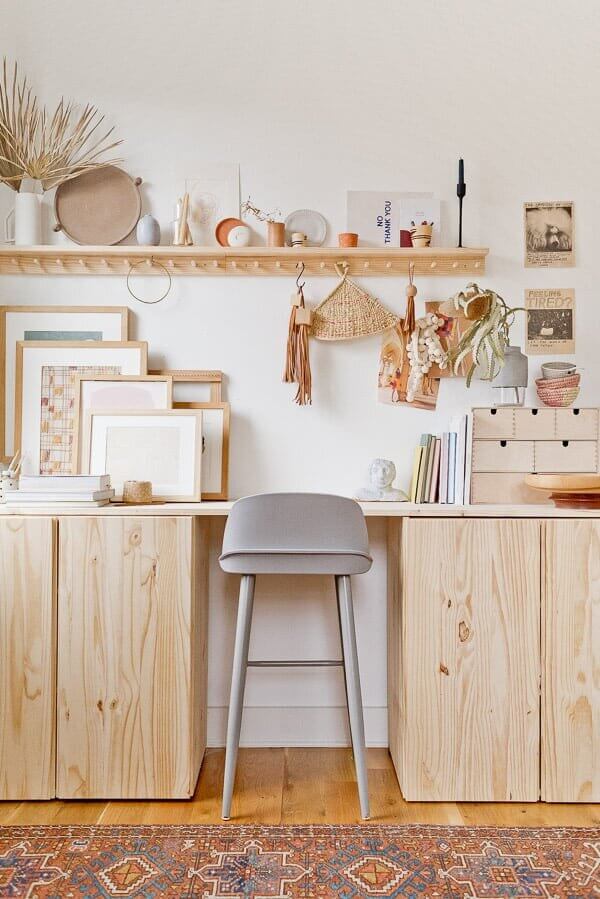
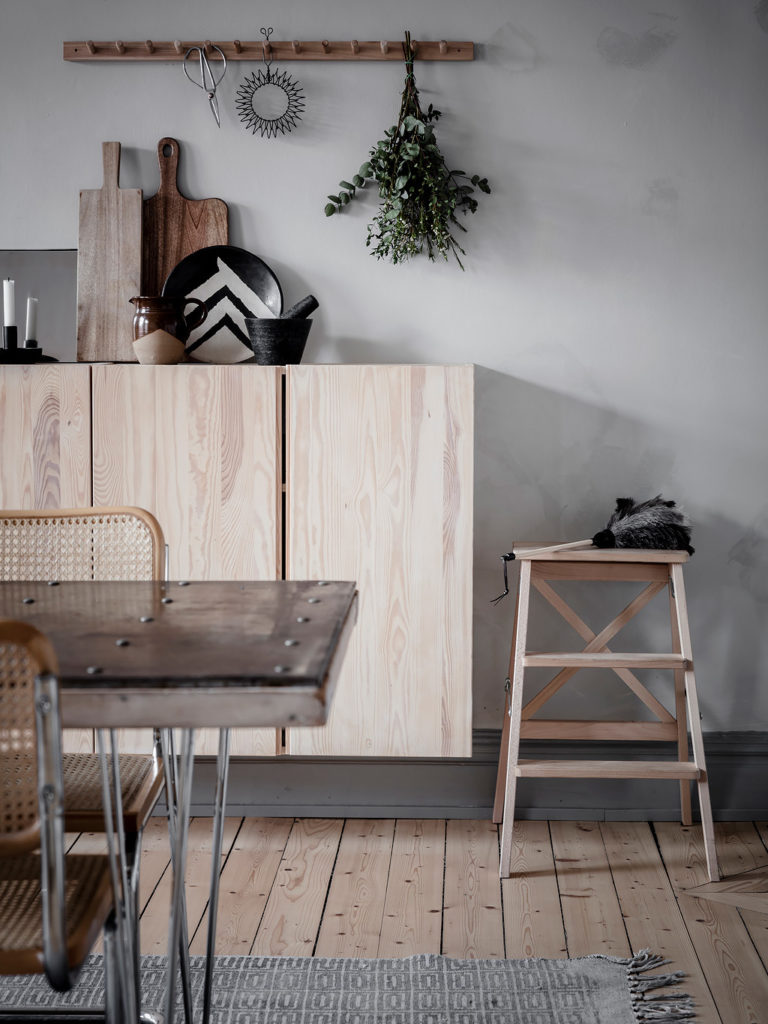
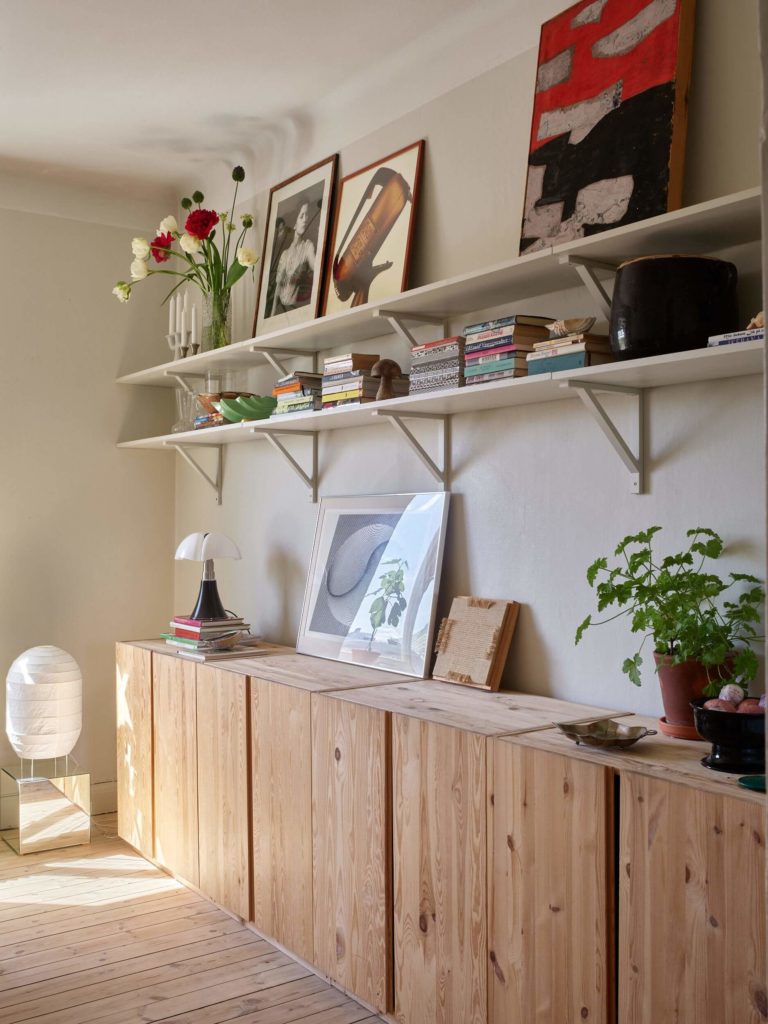
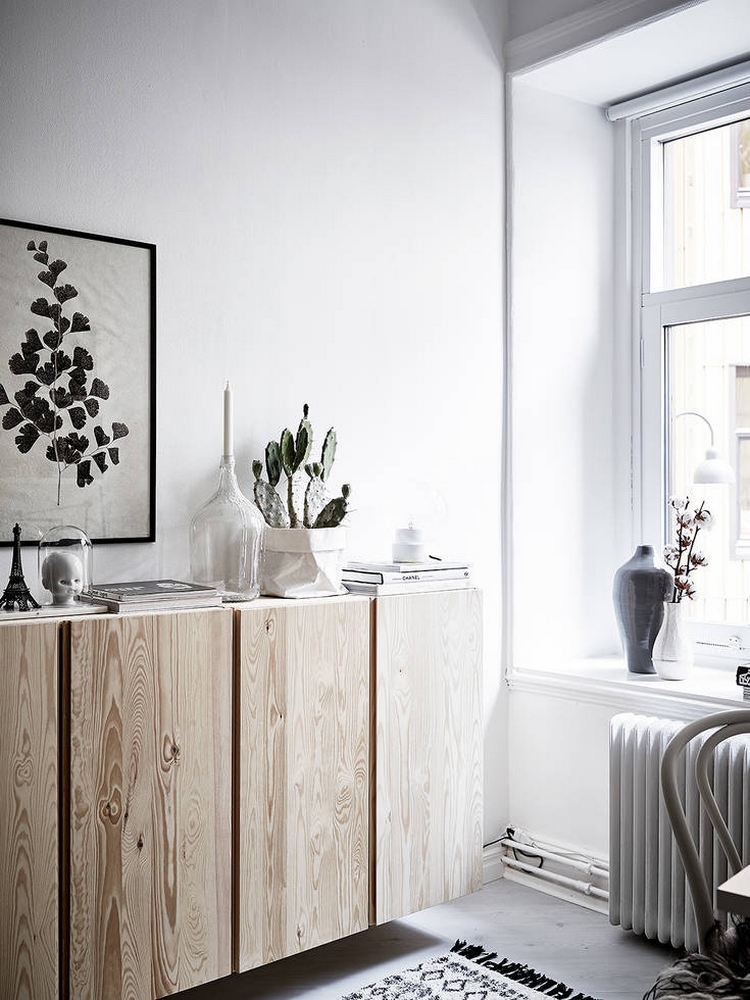
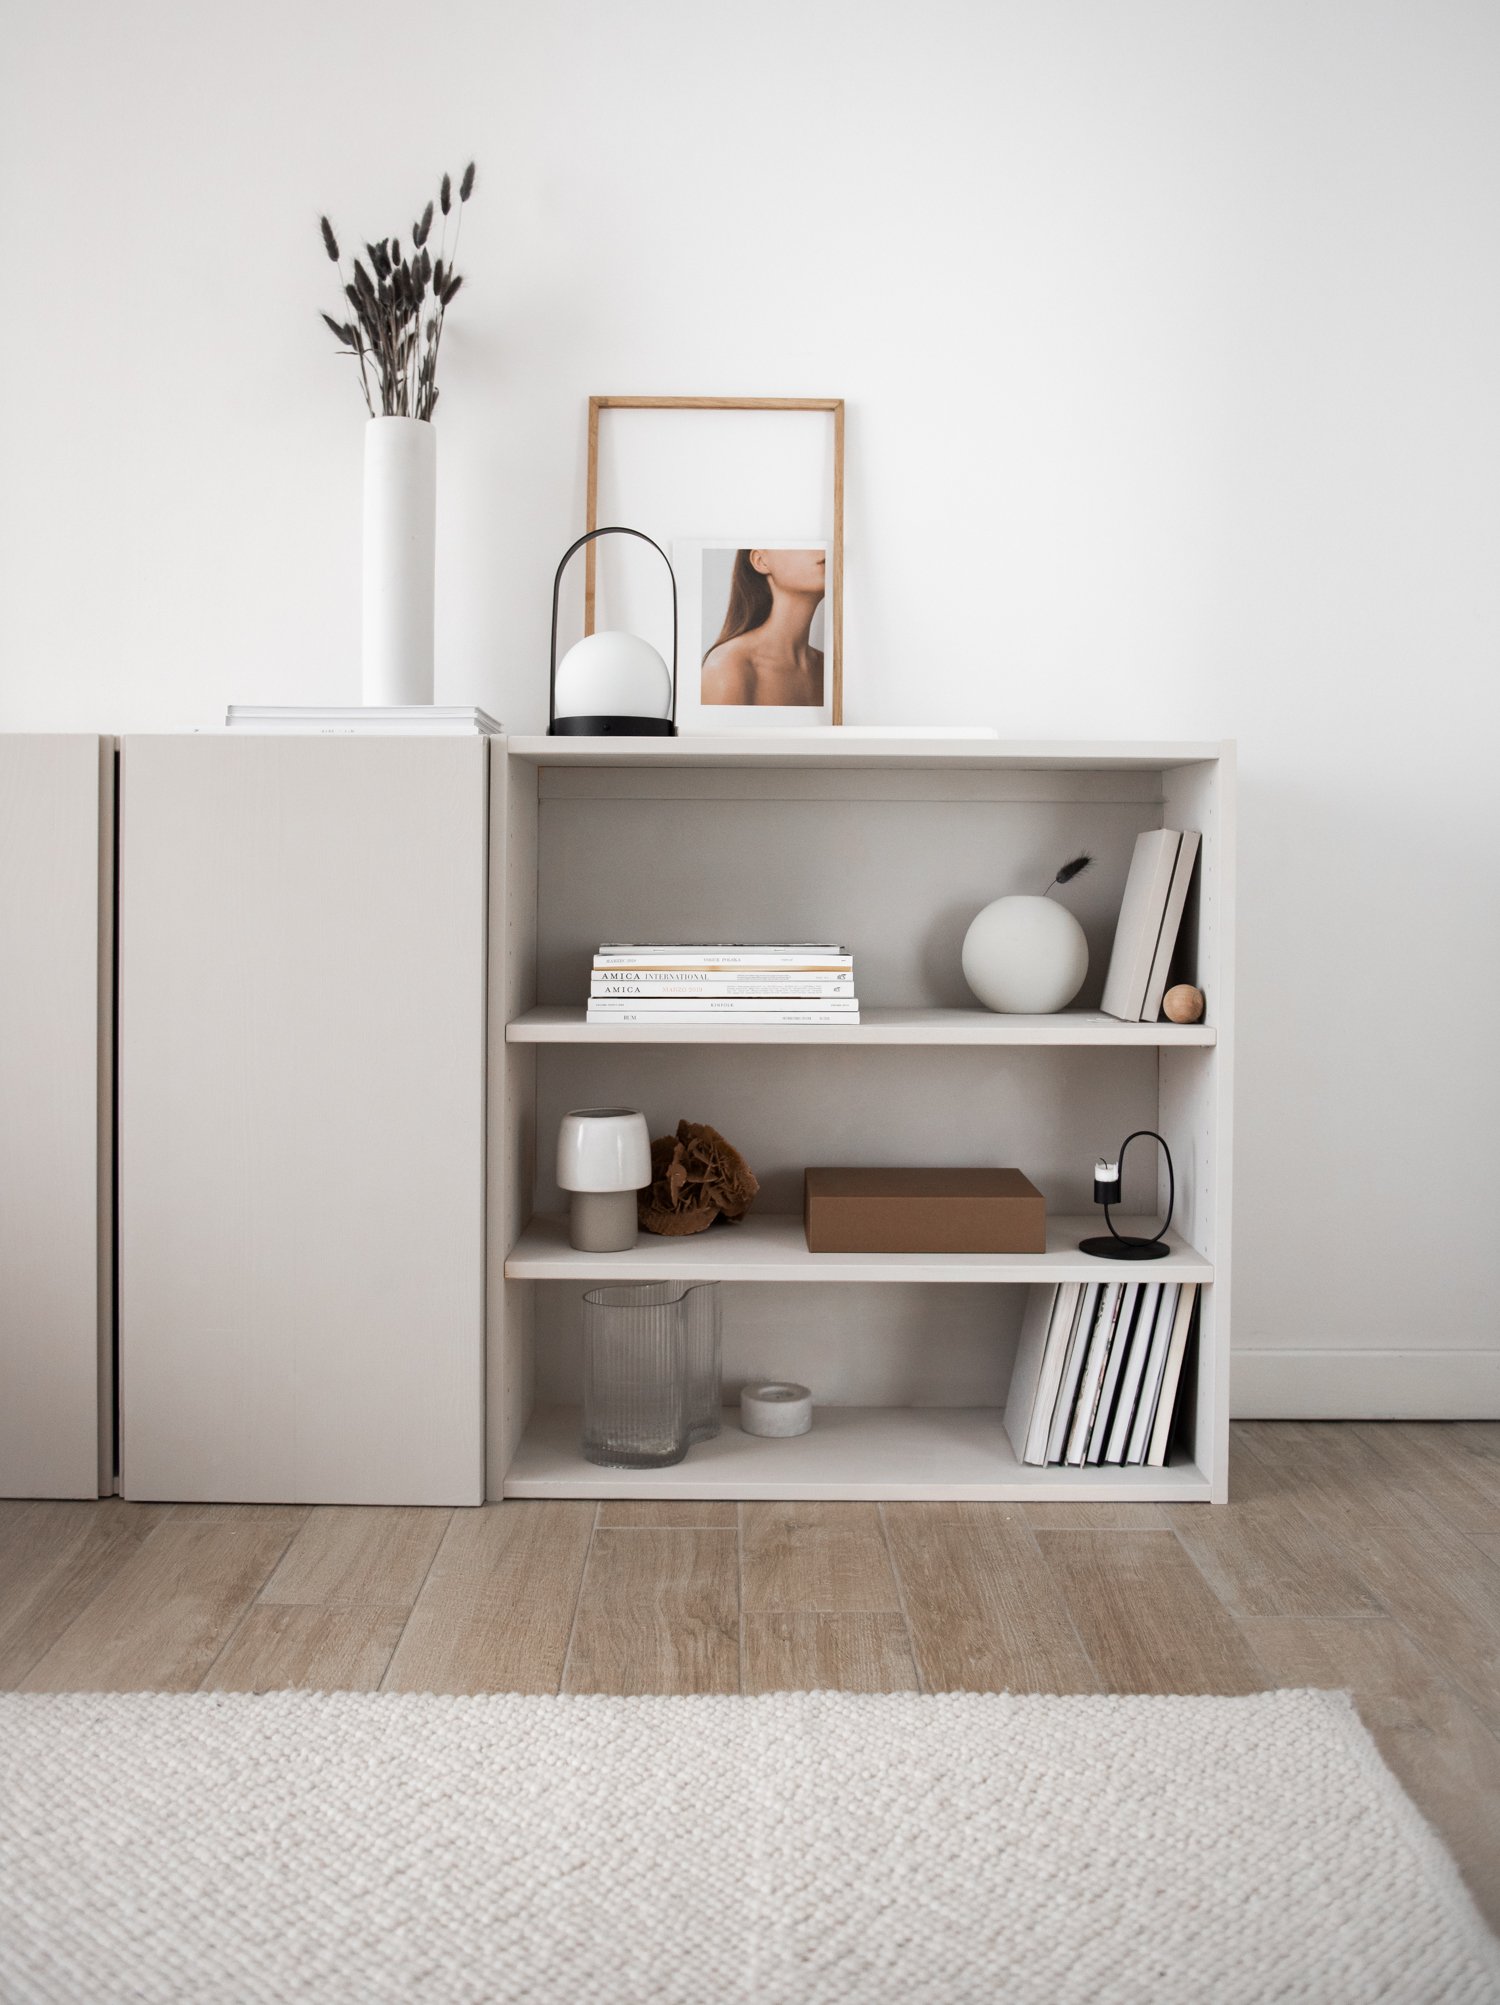
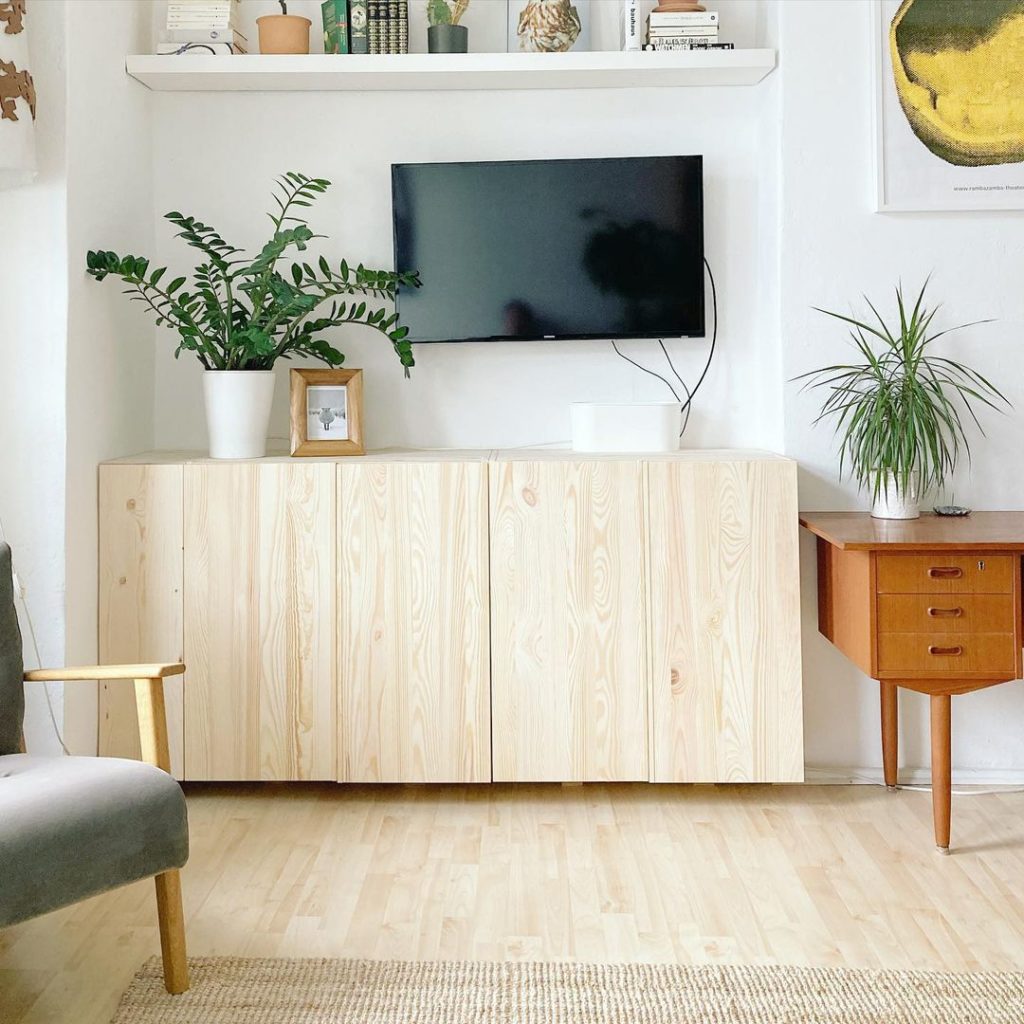
8. Keep the Ivar cabinet natural
The Ivar cabinet is also a beautiful piece just as it is. So don’t be afraid to leave it bare. If it fits your interior, it can make the room cozier thanks to its raw wooden panel. Just like in these beautiful interiors:

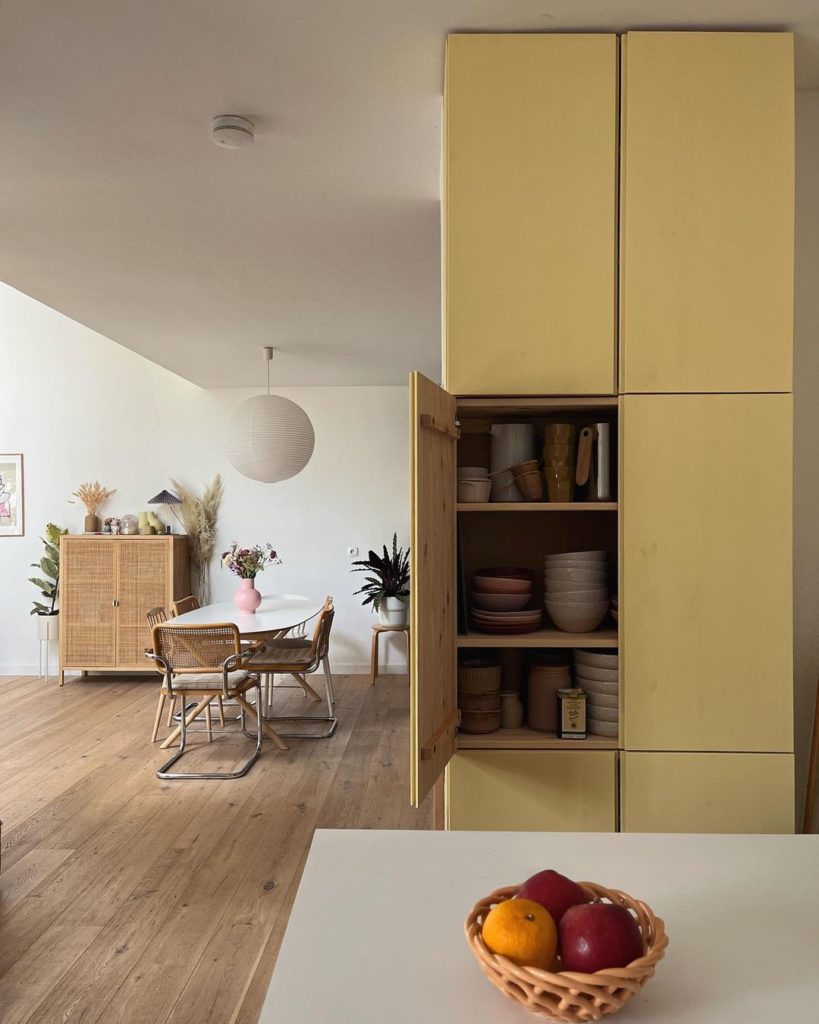
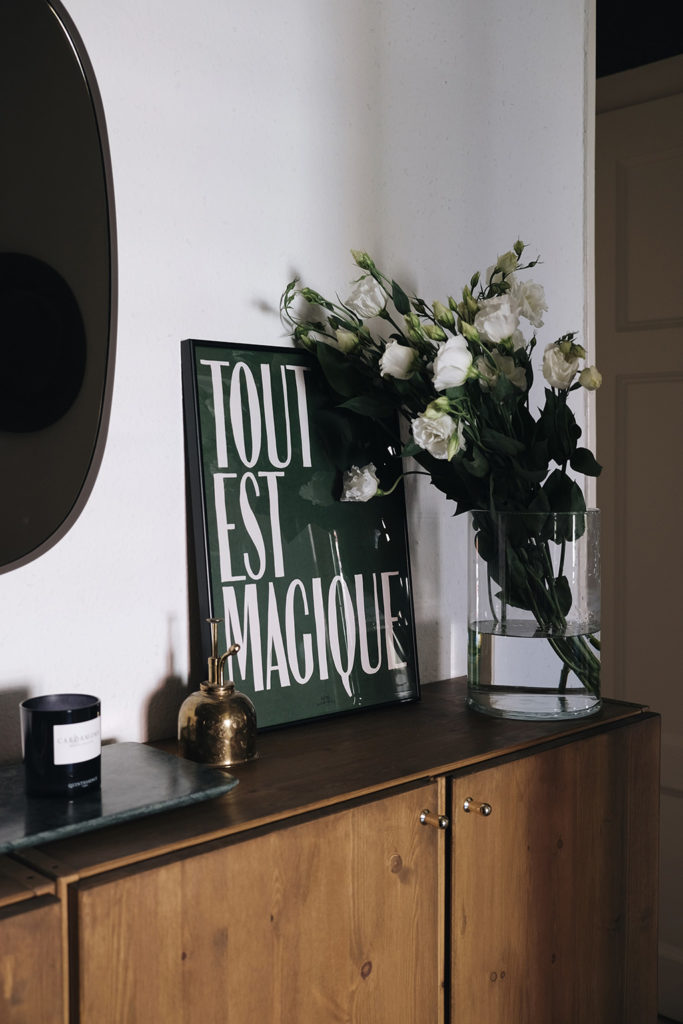
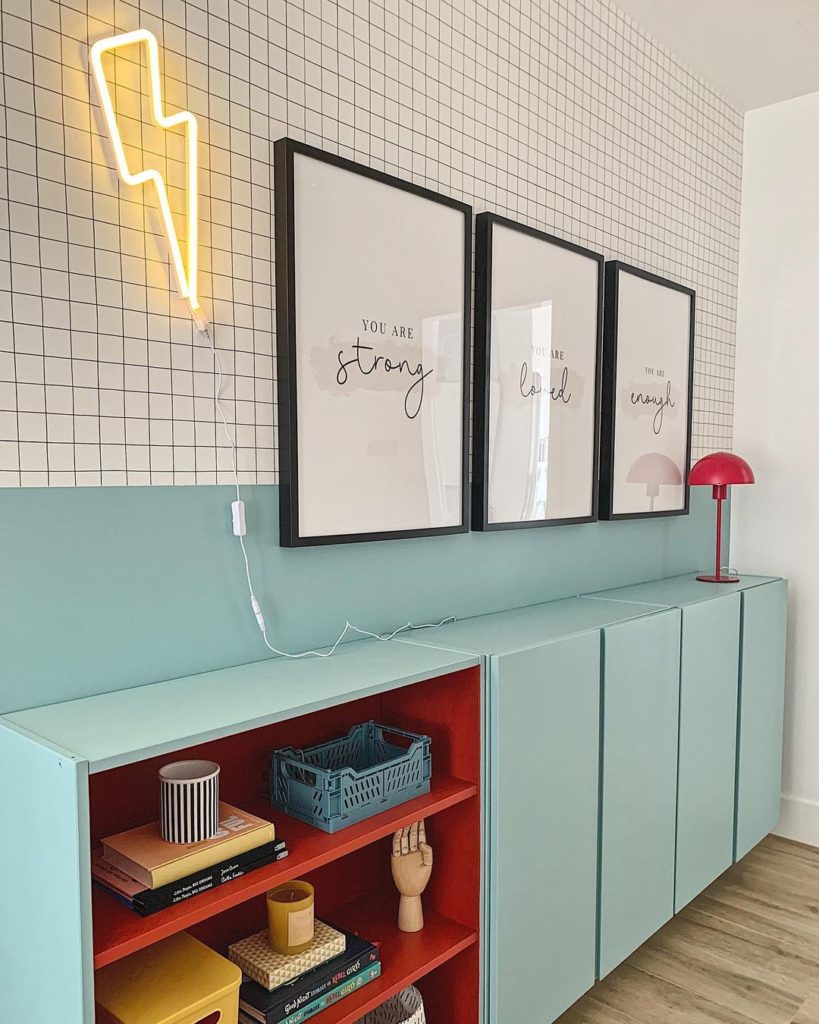
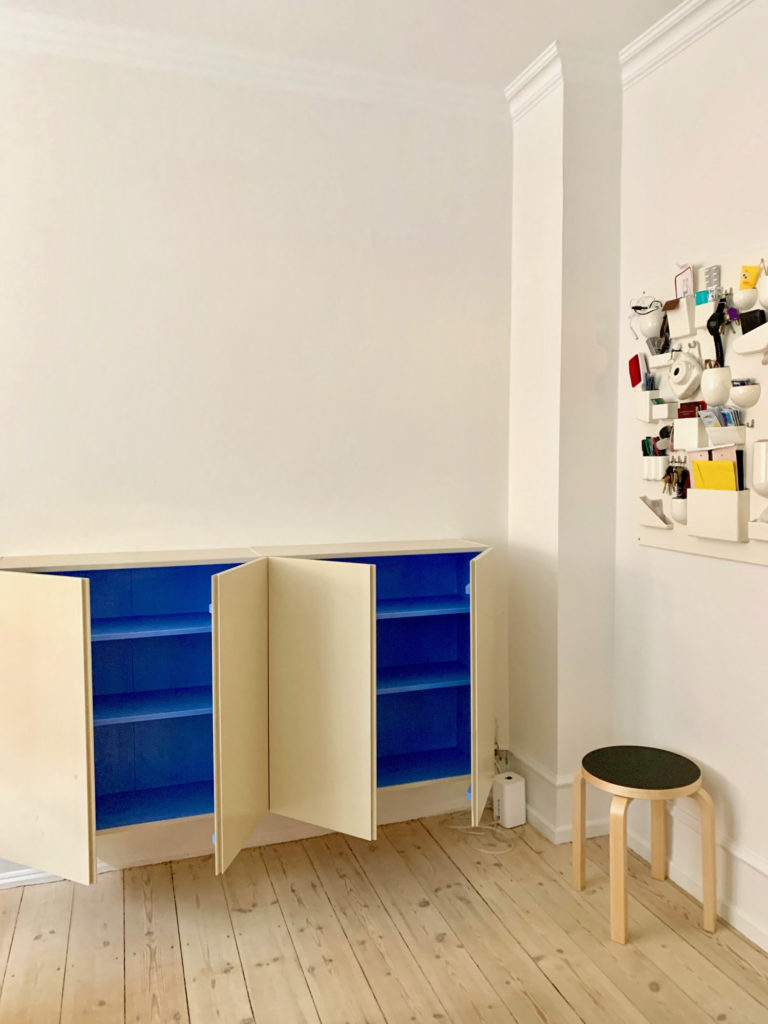
9. Paint the inside in another color
Consider painting the interior of your IVAR cabinets with a different color. Opting for a complementary hue allows you to craft a unique statement piece that seamlessly blends with your home decor.
While this trick may appear trivial, it significantly enhances the overall appearance of the Ivar cabinet. Personally, I initially refrained from painting the interior of my Ivar; however, if I were to redo it now, I would undoubtedly choose to do so. The slight mismatch each time I open it bothers me, and the visual appeal in the image below speaks volumes. The harmonious blend of the two colors elevates the experience of opening the cabinet. Indeed, the magic lies in the details…
10. Remove one (or more) cabinet door(s)
If you’re looking for a way to make your IVAR cabinets feel even more unique, removing one of the cabinet doors can be a great option.
This easy trick can help create a more open and airy atmosphere. Whether you wish to display a collection or simply add some breathing space, taking off a cabinet door is a simple way to achieve this look.
Taking off the doors of the Ivar cabinet is a straightforward yet impactful way to switch things up. In the examples provided, a doorless Ivar unit is used to showcase beautiful items. In the third image, horizontal wooden sticks are added for visual interest and to partially conceal the items stored in the Ivar cabinet.
This is a very simple way to pimp the Ivar. Just paint the inside the same color as the outside, then buy wooden sticks, cut them in the center lengthwise, and stick them at the distance you want to the structure.

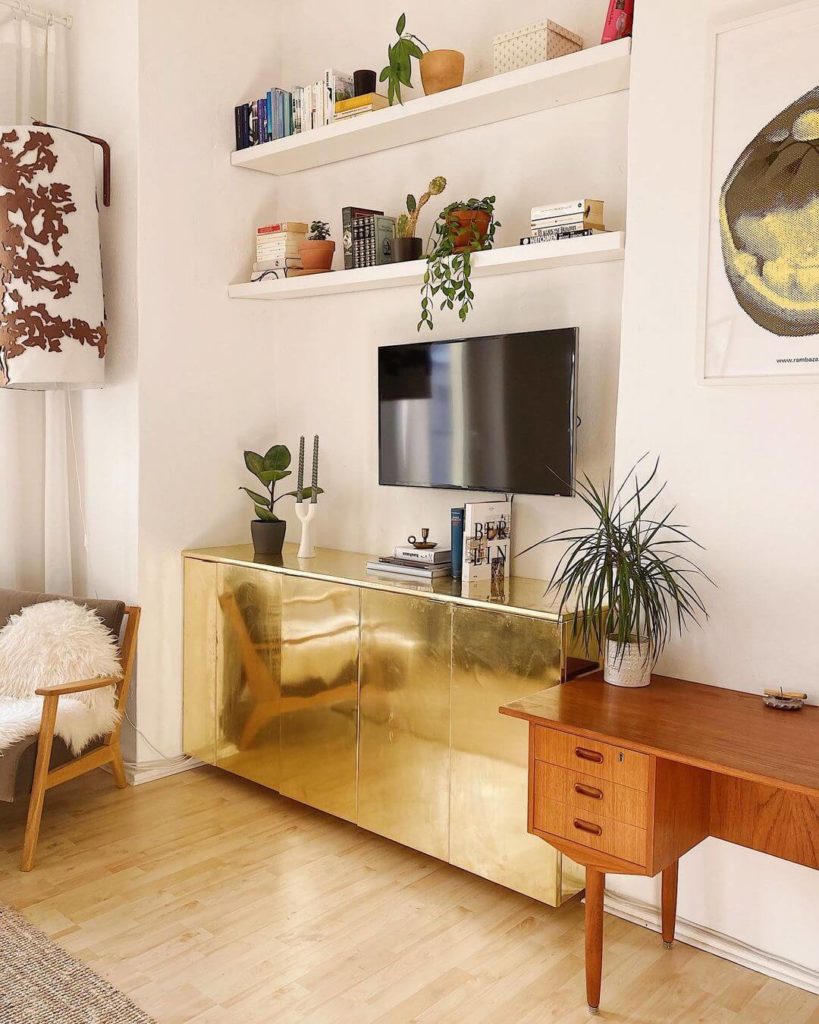
11. Cover the Ivar with golden foil
Probably the most show-stopping Ivar IKEA hack ever seen. Covering it with golden foil gives it a totally different look than the original Ivar. It creates a bold statement piece that will stand out in any room. This versatile hack is perfect for adding a touch of glam to your decor.
So which one is your favorite hack?
Renter’s go-to IKEA piece
It’s no surprise that tenants swear by the Ivar cabinet so much. It’s so versatile, inexpensive, and practical in terms of the storage it provides, it’s the piece of furniture that has it all.


[…] I used it in my hallway as en entryway cabinets to store everything related to the entryway. Also as the hallway is pretty long and I needed some storage space, I bought two cabinets. Of course, you can have more than that, 3 to 4 cabinets side by side or even one above the other.>>check out 8 creative ways to use Ivar cabinets<< […]
[…] On the bright side, IKEA makes very good sofas that nowadays are customizable. Thanks to that I was able to pimp my IKEA sofa so it could fit with the rest of my living room perfectly. All that at a very affordable price. The same goes for our entryway where we decided to go with the IKEA Ivar cabinets. We needed storage but not too large because of the small width of the entryway. These cabinets couldn’t be a better fit even though they didn’t look like much at first. We pimped them as well so that they could be to our liking and the result is stunning. […]
Could you please share the stain colour you used for the entryway IVAR cabinet?
Hi Erin, yes, of course, the stain I used is from the french brand V33 and it’s called “chêne rustique mat” (rustic mat oak). I applied two coats to obtain this particular tint. Hope this helps!
[…] I need to have a few pairs of shoes as well as gloves scarves in the winter. So I found that the Ivar cabinets were perfect to fit what I needed (c.f. picture below). So think of what is it that you really need […]
[…] to customize IKEA pieces. Which gave birth to a new kind of DIY: IKEA hacks. I have tried a few IKEA hacks myself but it never involved a sofa. So how do you customize an IKEA sofa? There aren’t a thousand […]
[…] Source by thegempicker.com […]