This article was first published on August the 27th 2018.
Open wardrobes have been on the rise for a while now. This is not to our displeasure because it is a good way to display all our most beautiful pieces of clothing and accessories. It’s also an efficient solution when you live in a small space because it allows you to keep a feeling of spaciousness, unlike a closed closet that will often make the room feel smaller.
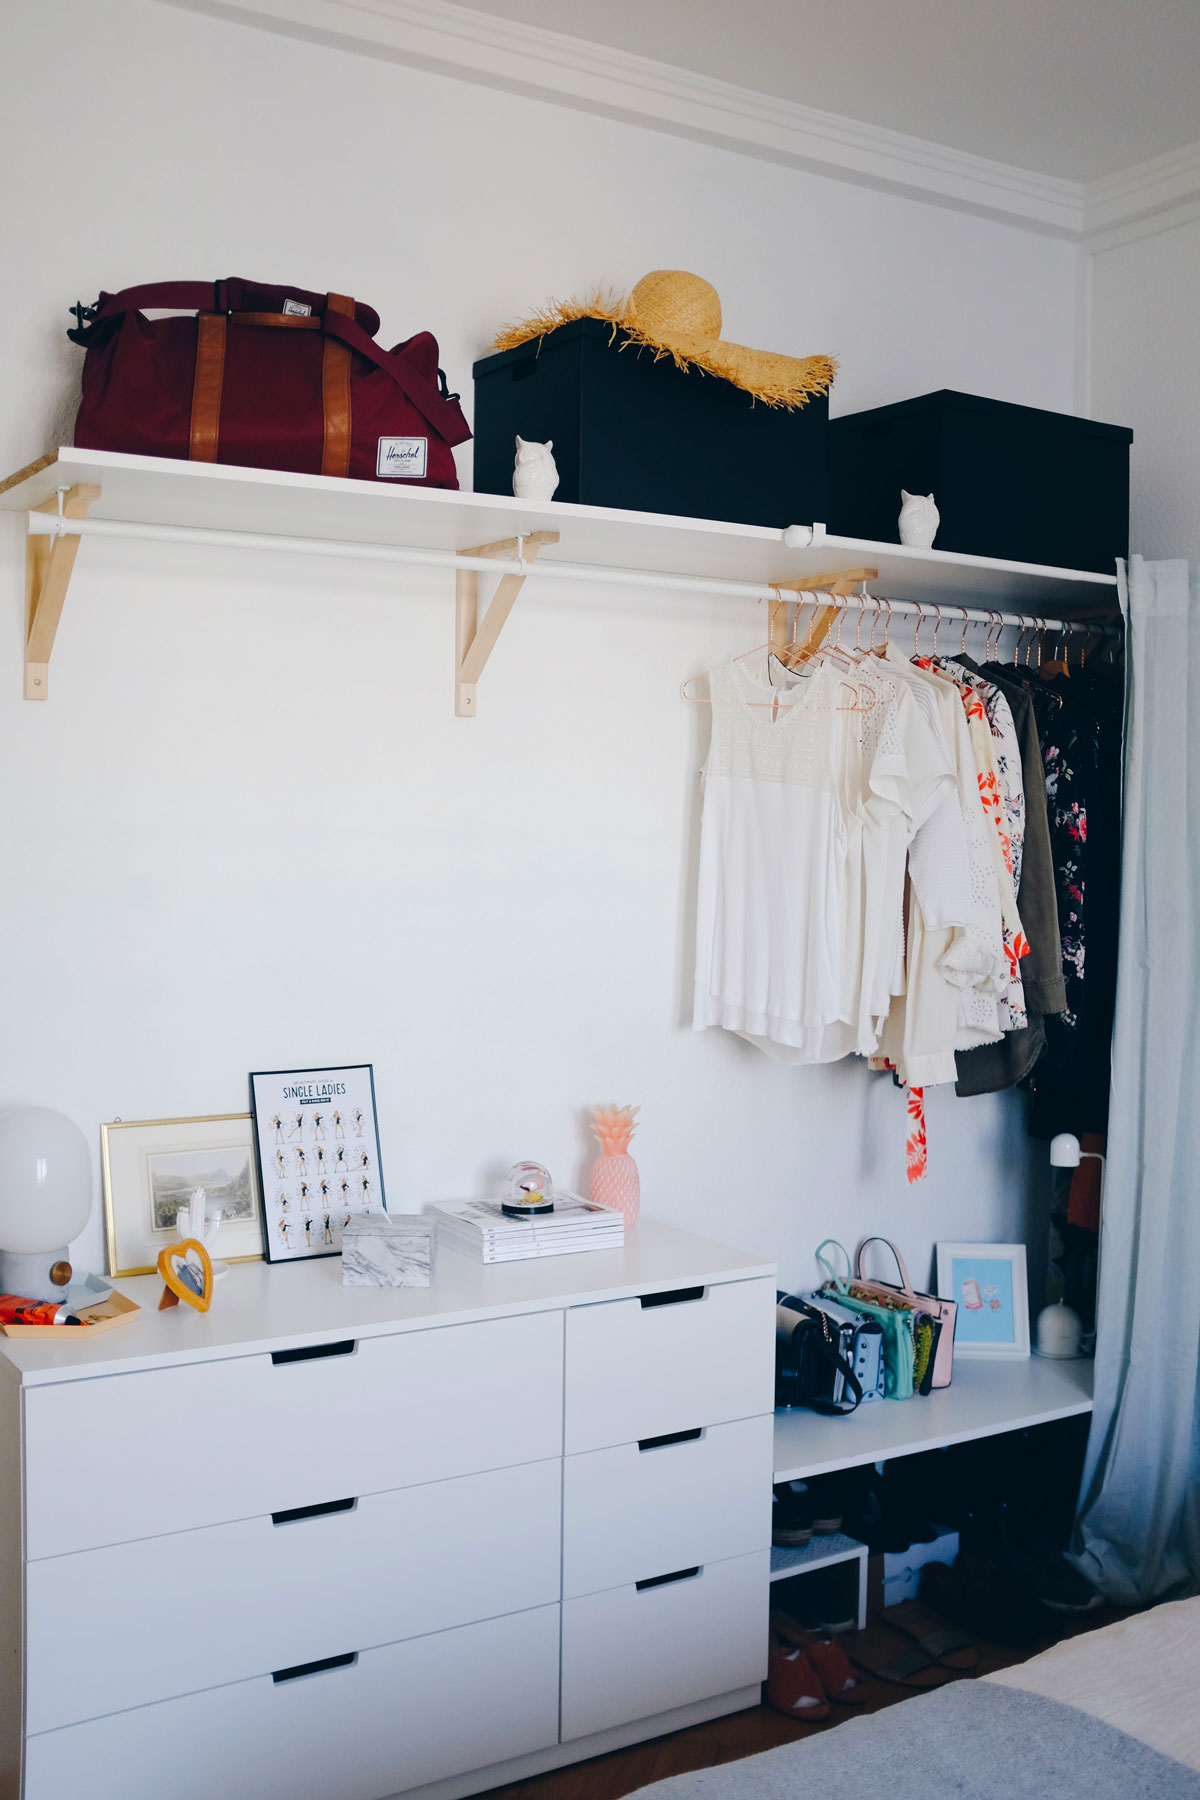
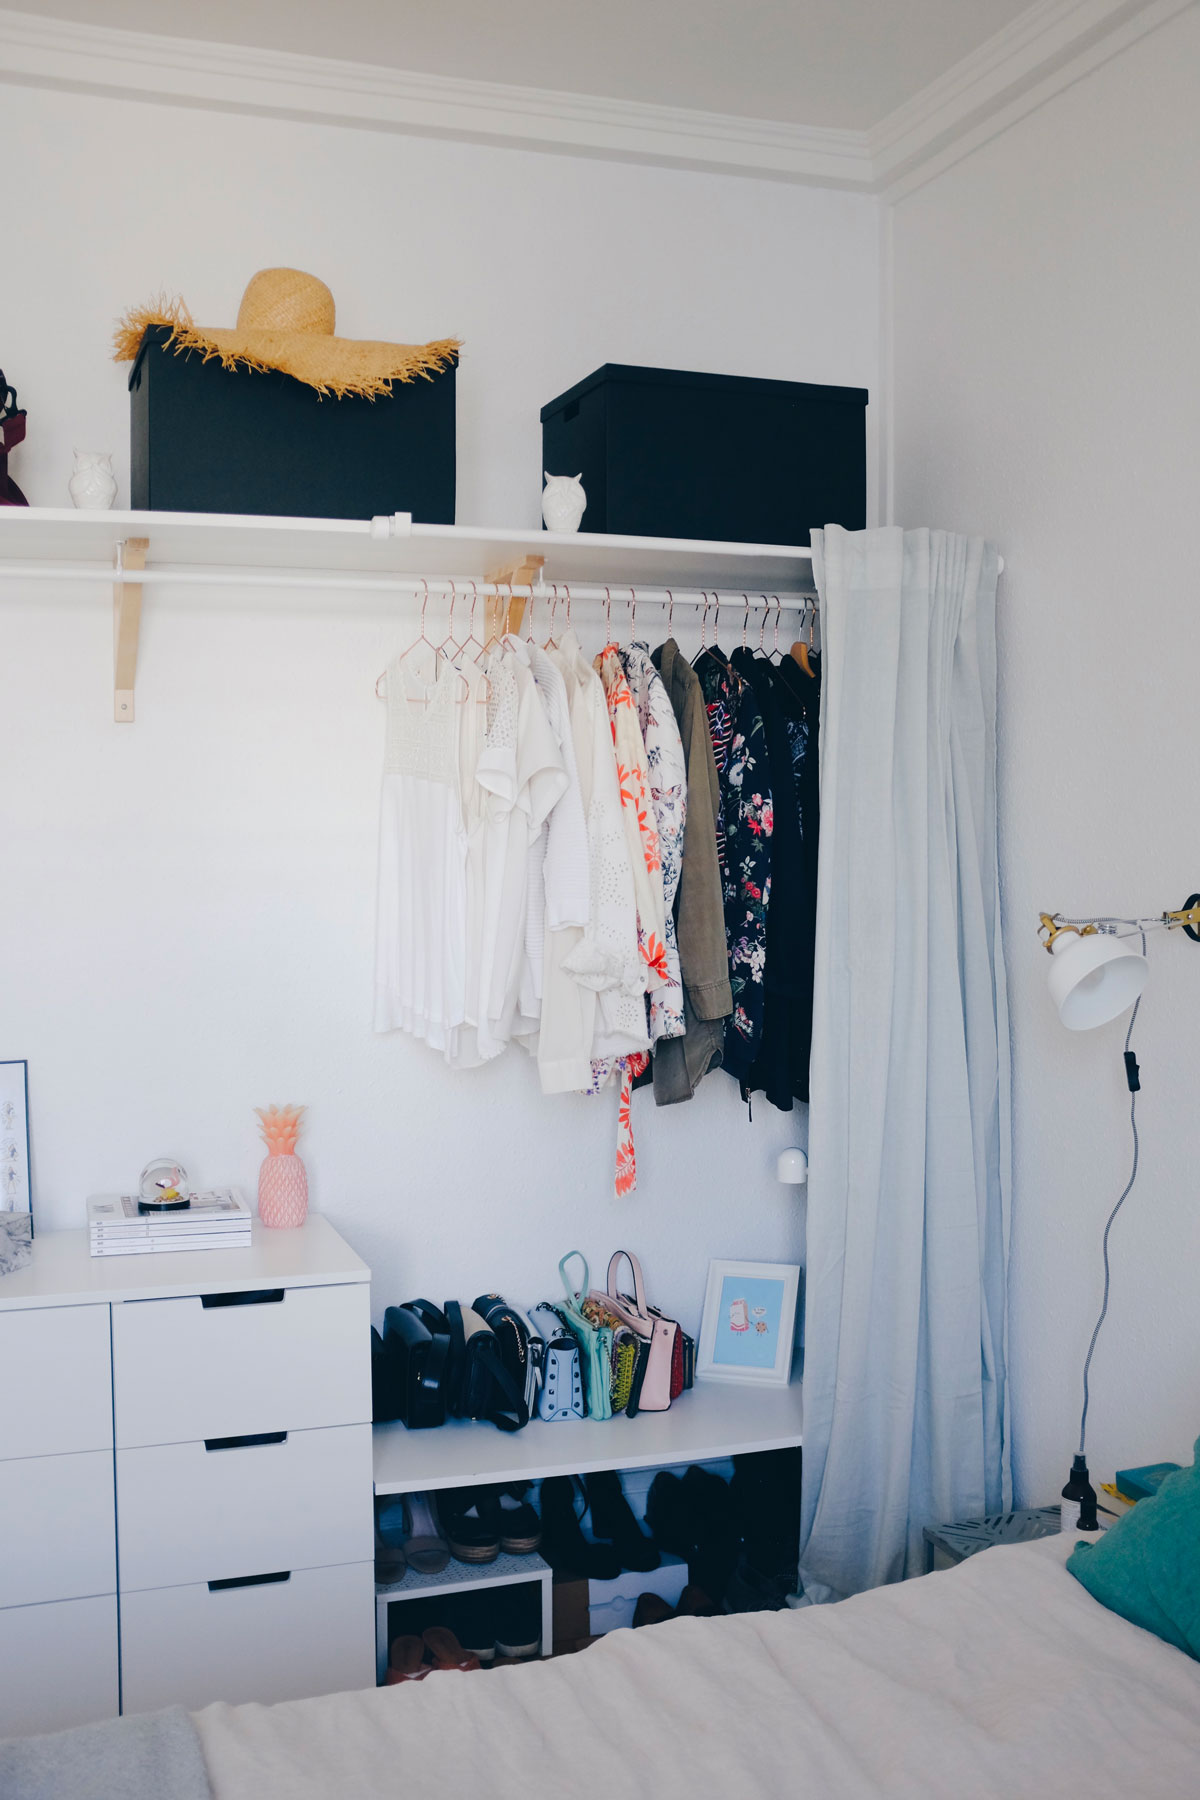
Here’s a simple DIY open wardrobe we put together in our 12m2 bedroom. You don’t have to be a master at building things, this DIY wardrobe is pretty simple to make. Let’s see:
1. Feeling the bedroom space before planning
I like to live in a space for a while before buying stuff and making projects. It allows you to see how you function and how you interact with your surroundings. It gives you insights on how to furnish your room as well. For our bedroom, I knew that we were going to need extra storage space. We had only one tiny built-in closet and a chest of drawers from IKEA. even though we got rid of a lot of our things, it was really not enough for both of us.
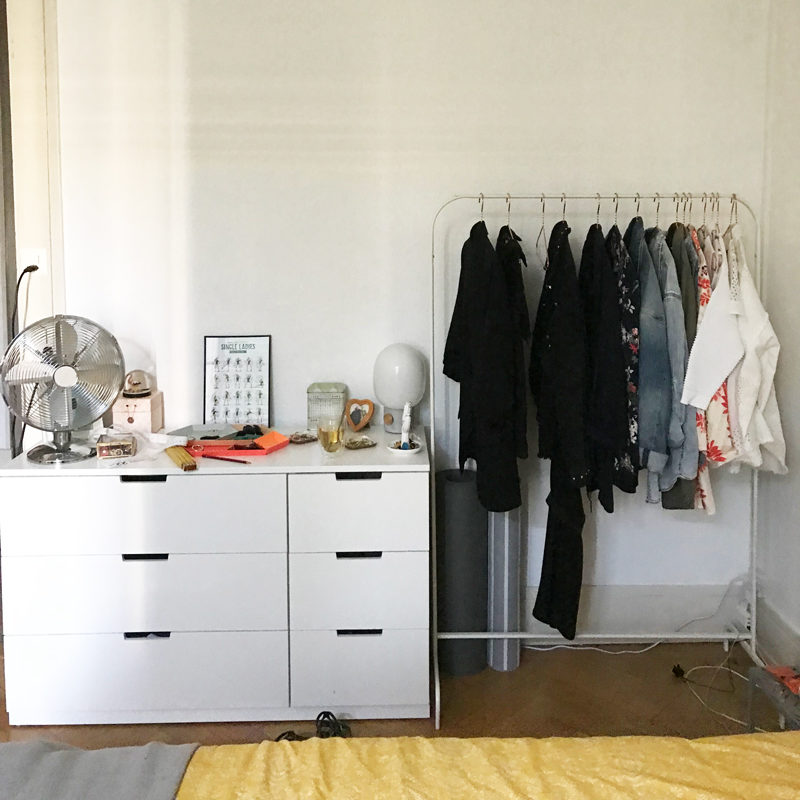
Before I had an Ikea rack that I used to hang my seasonal capsule wardrobe. It was okay but not ideal since I couldn’t really put my bags and shoes on it. So the idea was not only to add hanging space but also room for shoes and bags. We were first considering two options, build a closed wardrobe or an open wardrobe here is what helped us make up our minds.
Pros and cons of an open wardrobe
Cons of open wardrobes:
- Clothes get dusty if you don’t move them often
- Accessories and clothes must always be well arranged otherwise it can quickly look like an open mess.
- Having to respect a certain color code in the choice of pieces on display so that it doesn’t become a visual cacophony.
- The smaller amount of clothes you can store
Pros of open wardrobes
- Airier and lighter than a closed dressing system, it takes up less visual space. (Great for small spaces).
- Using your favorite clothes and accessories as decoration.
- Streamlining the process of getting dressed every day.
- the very low cost of an open wardrobe.
- Using it to keep your capsule wardrobe easily accessible and change the clothes every 3 months or so.
DIY Open Wardrobe, it is!
As you can see, some of the cons can also be viewed as pros. It really depends on the amount of storage you need and how tidy you are as a person. We chose to embrace the open wardrobe because we are both very tidy and that living in a small space we were really feeling that a closed dressing would make the room feel stuffier and smaller. Thus we went with the open wardrobe DIY.
2. Planning ahead your open wardrobe
I made some research online and I found this great DIY by Rachel from Made from scratch that really inspired me and made me confident that we would be able to build ours as well. To build something that was in line with our needs, we first had to think about what sort of clothes and accessories we would store in our open wardrobe.
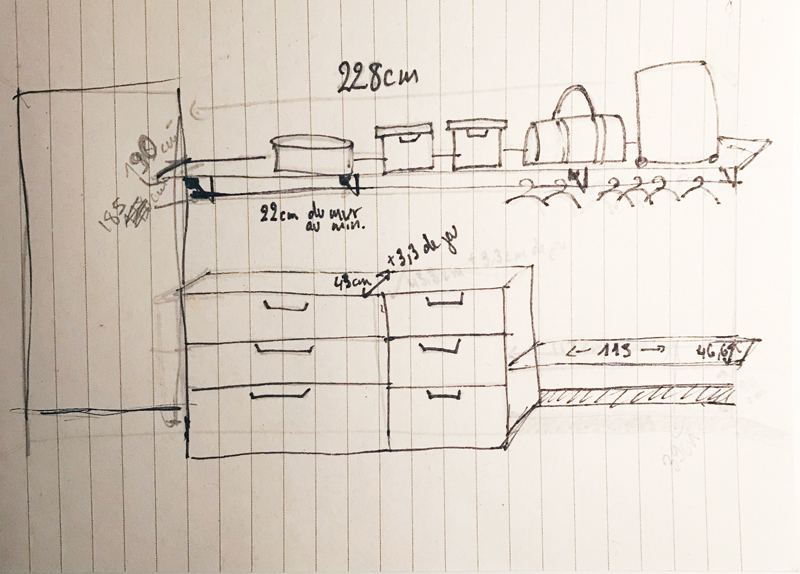
So we made a list and we fastly realized that what we needed the most was some hanging space and a better way to store my shoes and bags and purses. We also knew we would have to include our IKEA Nordli cupboard somewhere on this side of the room. So, with all that in mind, we started imagining our open wardrobe. And it easily came to us. I did a quick drawing of it and the project was launched.
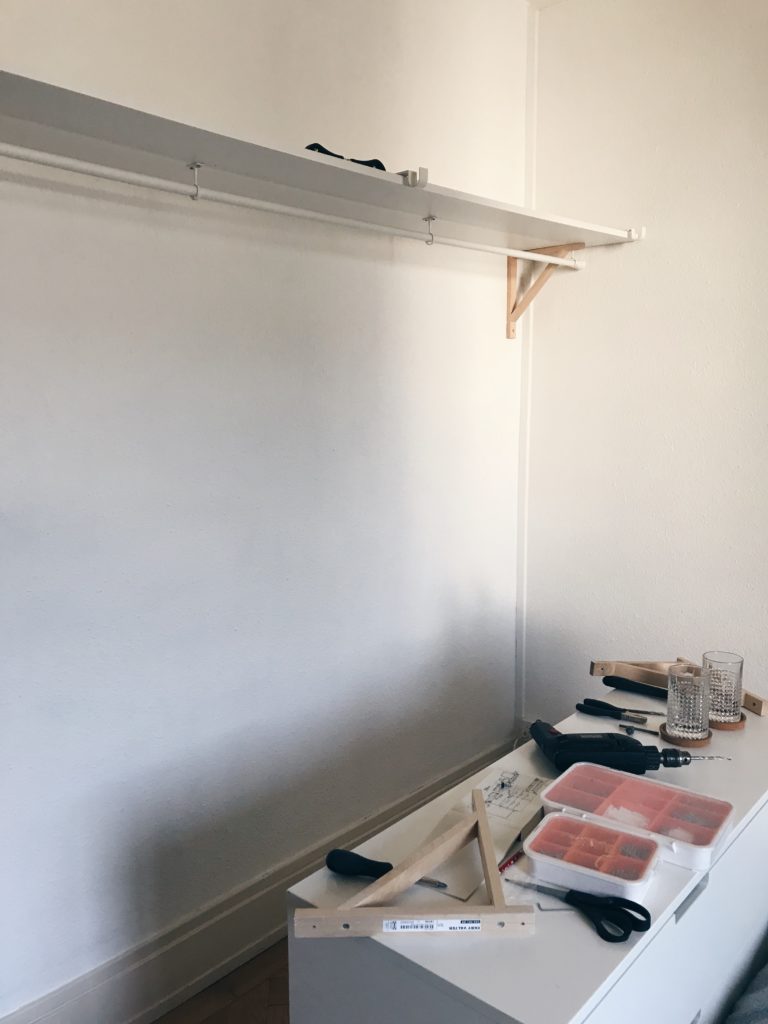
3. Taking your measurements
First, we needed to know what size the wooden boards would be so we measured the wall from one end to another. Based on my drawing, one of the boards goes from one end of the wall to the other while the second board starts after the cupboard.
Also, we needed to figure out how deep our boards would be. The one supporting the wardrobe would have to be roughly the width of our hangers ( 41 cm).
Also, keep in mind that your brackets need to be at least 2/3 of the depth of your board for good support (here 26 cm). As for the lowest board, we wanted it to be as deep as the chest of drawers so when they would be side by side it would look seamless (46cm).
Quick tip: Make sure to measure the depth of your chest of drawers from the wall to the end of it and not only the cupboard itself. There is always a difference of a few centimeters.
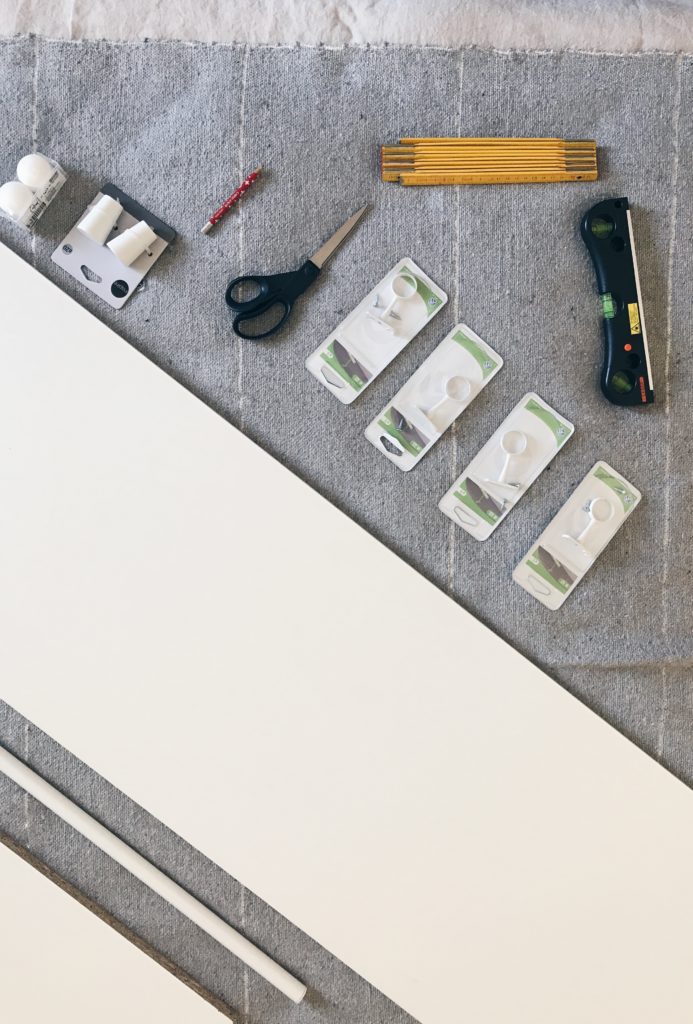
4. Shopping list for our open wardrobe
So we were finally ready to go shopping and here is what we bought:
- 2 chipboards of customs sizes that we had cut at Leroy Merlin.
- 4 rods holders (for the wardrobe ) from Leroy Merlin
- 2 rods holders (for the curtain hiding the wardrobe) from Ikea
- 4 brackets for the upper chipboard from Ikea
- 2 brackets for the lower chipboard from Ikea
- 2 rods, one for the wardrobe (Leroy Merlin) and one for the curtain (Ikea)
- one light curtain (to not overcharge the chipboard) from Ikea
- 4 tips for the two rods (a pair from Leroy merlin and a pair from Ikea)
Total: 136 CHF (around US $138)
5. Building our open wardrobe step by step
So, we had what we needed to actually build the thing. And that’s usually when you realize there is a lot of tiny decisions you need to make before actually building your open wardrobe.
What to consider before building your open wardrobe:
- Determine at what height your lowest board should be.
We planned to have shoes under this board. But we also had to take into account that the plinths were pretty high, that the wall socket was just above it, and not forget about the height of the brackets that would support the whole board. So really try to consider every constraints you have before doing anything. - What height should there be between the two boards?
An important point as you want to have your clothes hanging and not laying on the lowest board. To determine that, I used my longest dress that I wanted to hang there to give me the minimum height between the two chipboards. - Make sure your highest board is not too high so you are still able to access your clothes.
Of course keep in mind that you still need to be able to reach your clothing easily, so do adjust if you feel like your higher board is too high.
Once we were clear on these points. We were ready to build it.


step 5, 6, 7 step 8


1.The wardrobe rack :
- Screw the two rods holders for the curtain on the board. Since it comes on top of the board, it was easier for us to do this first. We had to take into account the length of the tip of the rod to make sure it would fit. Also, we purposely didn’t want the curtain to be as long as the board. Simply because I didn’t need that much hanging space for my capsule wardrobe.
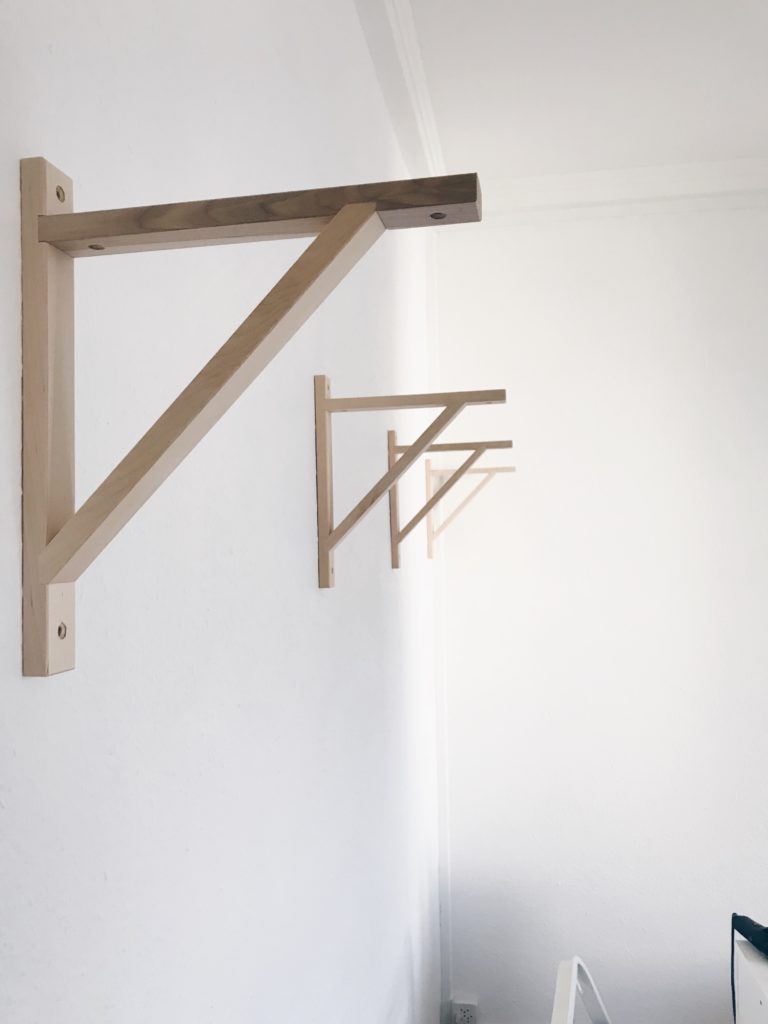
- Decide how you are going to distribute your brackets on the board.
- Mark the wall, at your chosen height, for the two brackets that will come at the ends of the board. Make sure that your floor is even. if it’s not, try to play with the height of the brackets to avoid having a crooked board.
- Choose some pretty long screw and wall plugs*.
- Drill the wall, install the wall plugs and screw the first bracket on the wall.
- Repeat this for the other bracket at the end of the board.
- Measure the space between the brackets and divide it by 3, so you’ll know how much space you need to leave between the brackets. Mark the wall for the middle brackets.
- Drill the wall, install the wall plugs and screw the two middle brackets on the wall.
- Place the board on the brackets. but don’t screw it for now.
- Calculate at what distance from the wall you are going to place your 4 wardrobe rod holders on the board. It should be in the middle of it but not necessarily. Make sure that your hangers are just brushing the wall.
- Mark the position where your 4 rods holders are going to be.
- Remove the board from the brackets and then screw the rod holders where you draw your marks.
- Put the board back on the brackets and now you can screw the board to the brackets.
- Place the wardrobe rod in the holders and put the tips at the ends.
- Repeat this step for the curtain rod.
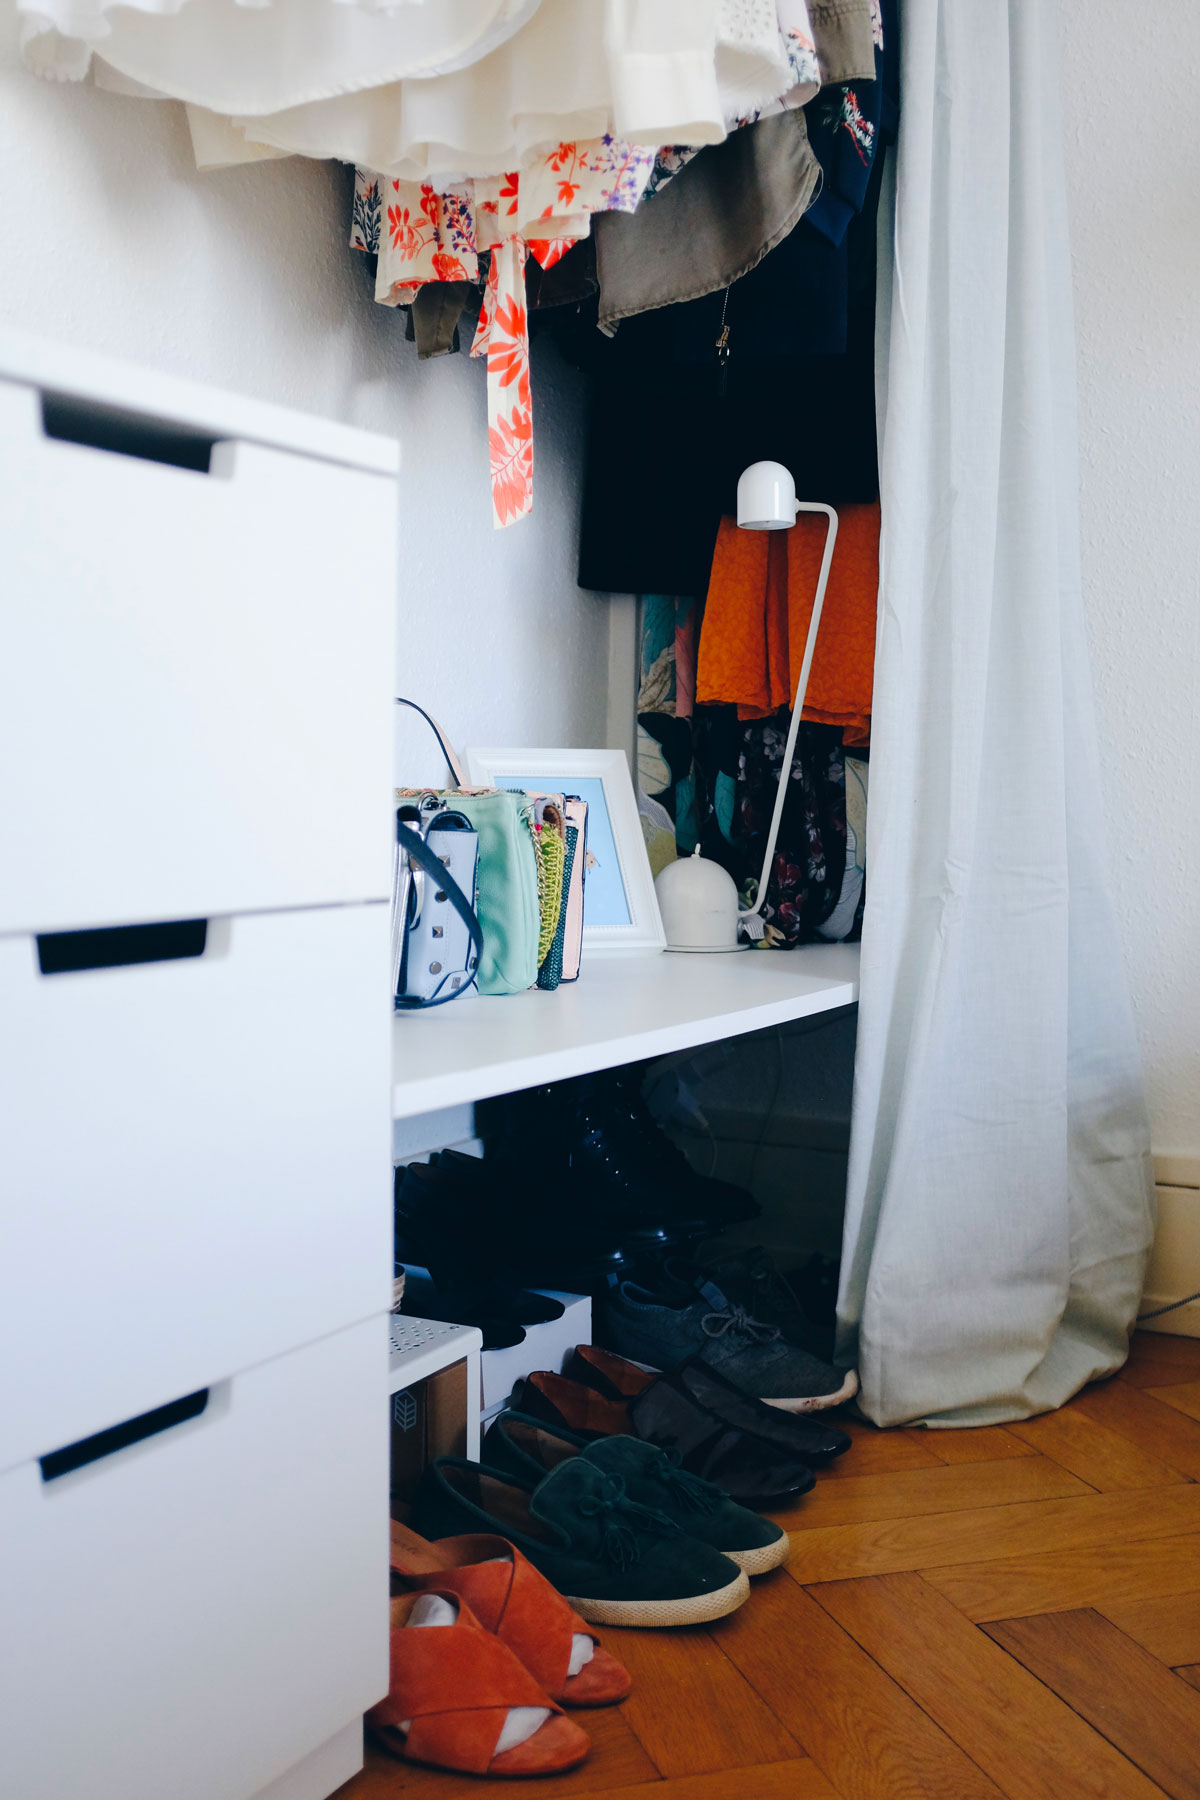
2.The shoe board:
This part was easier, we didn’t need the brackets to be all perfect since no one would see them. So we just decided where we wanted to put our brackets, drilled the wall, and screw the board to the brackets and we were done.
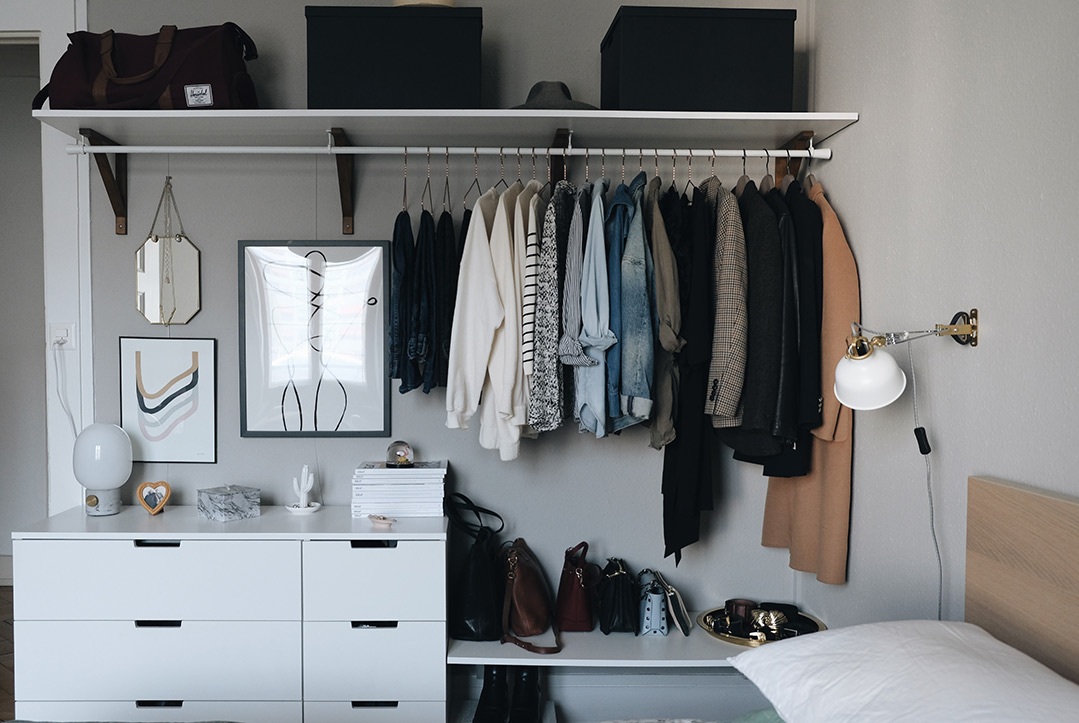
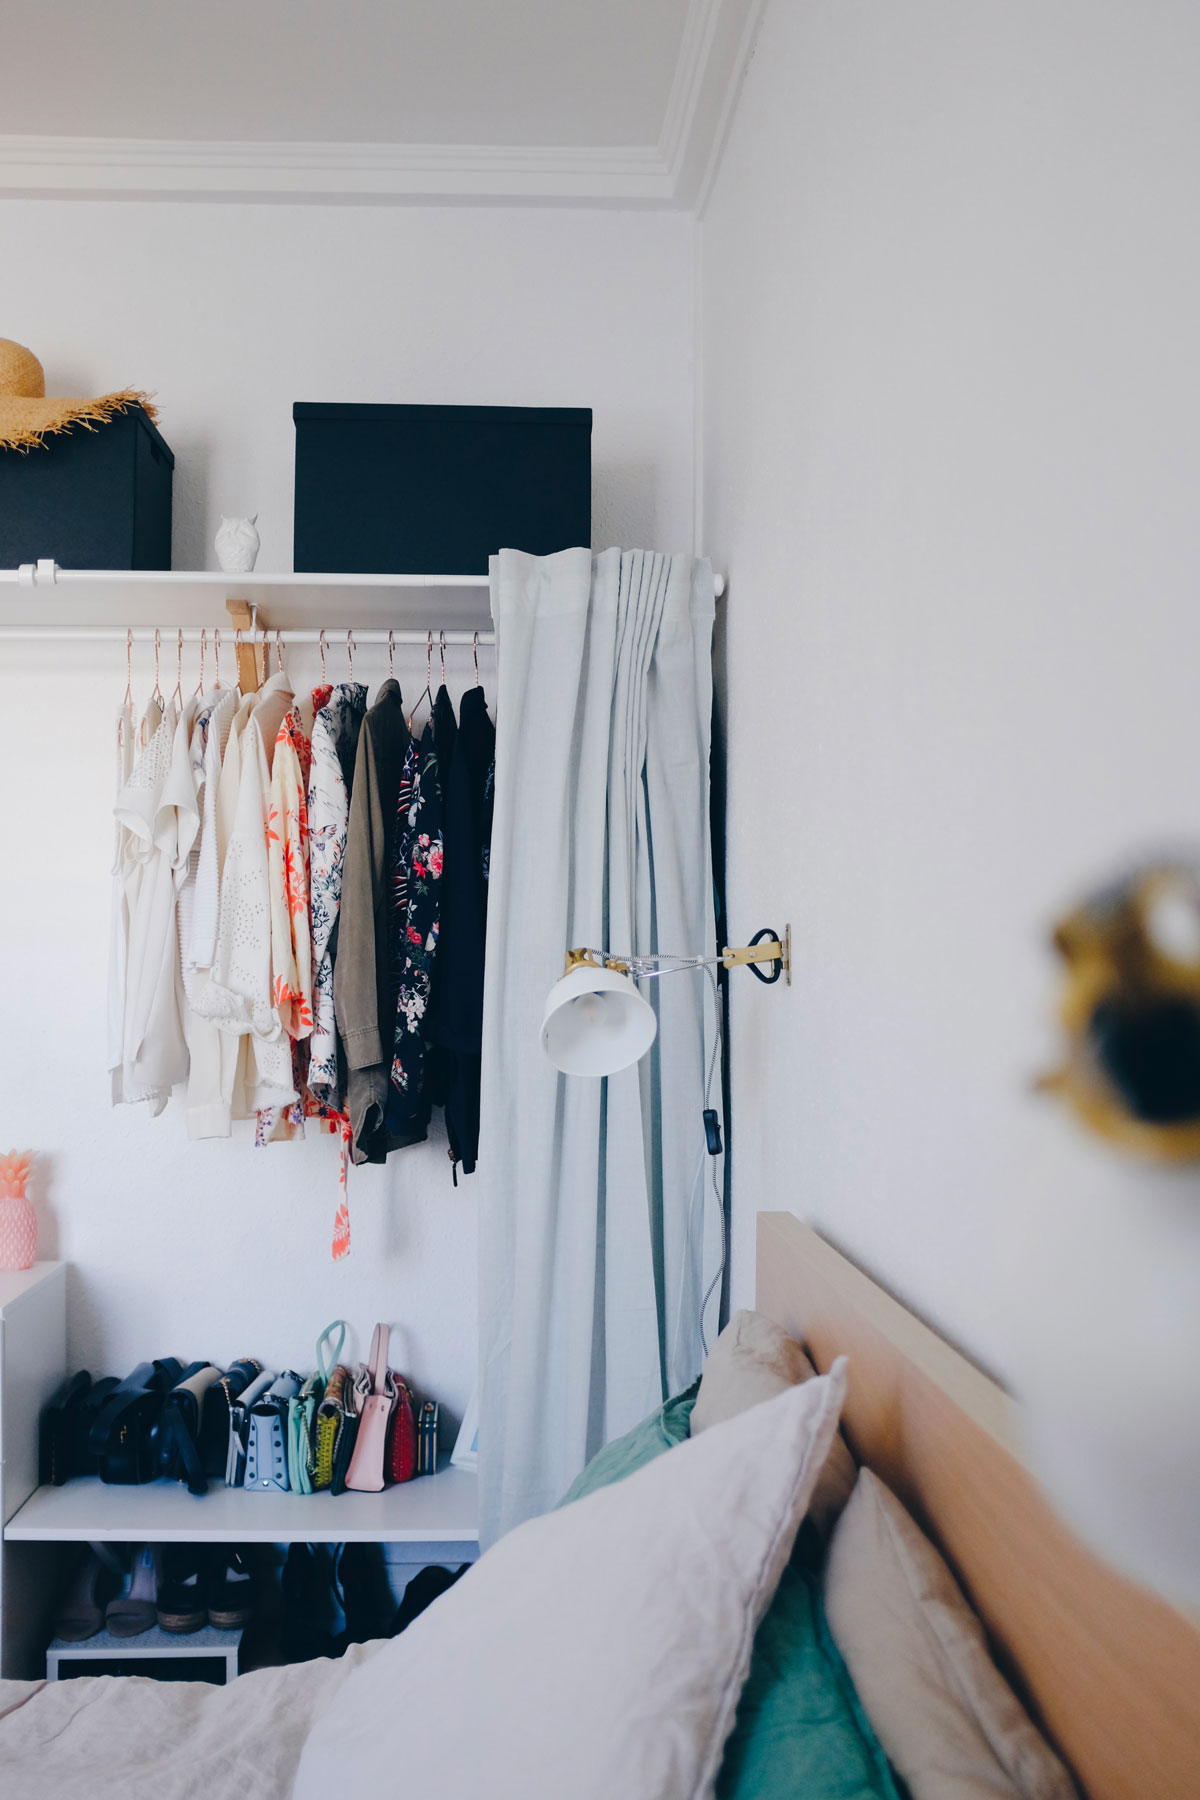
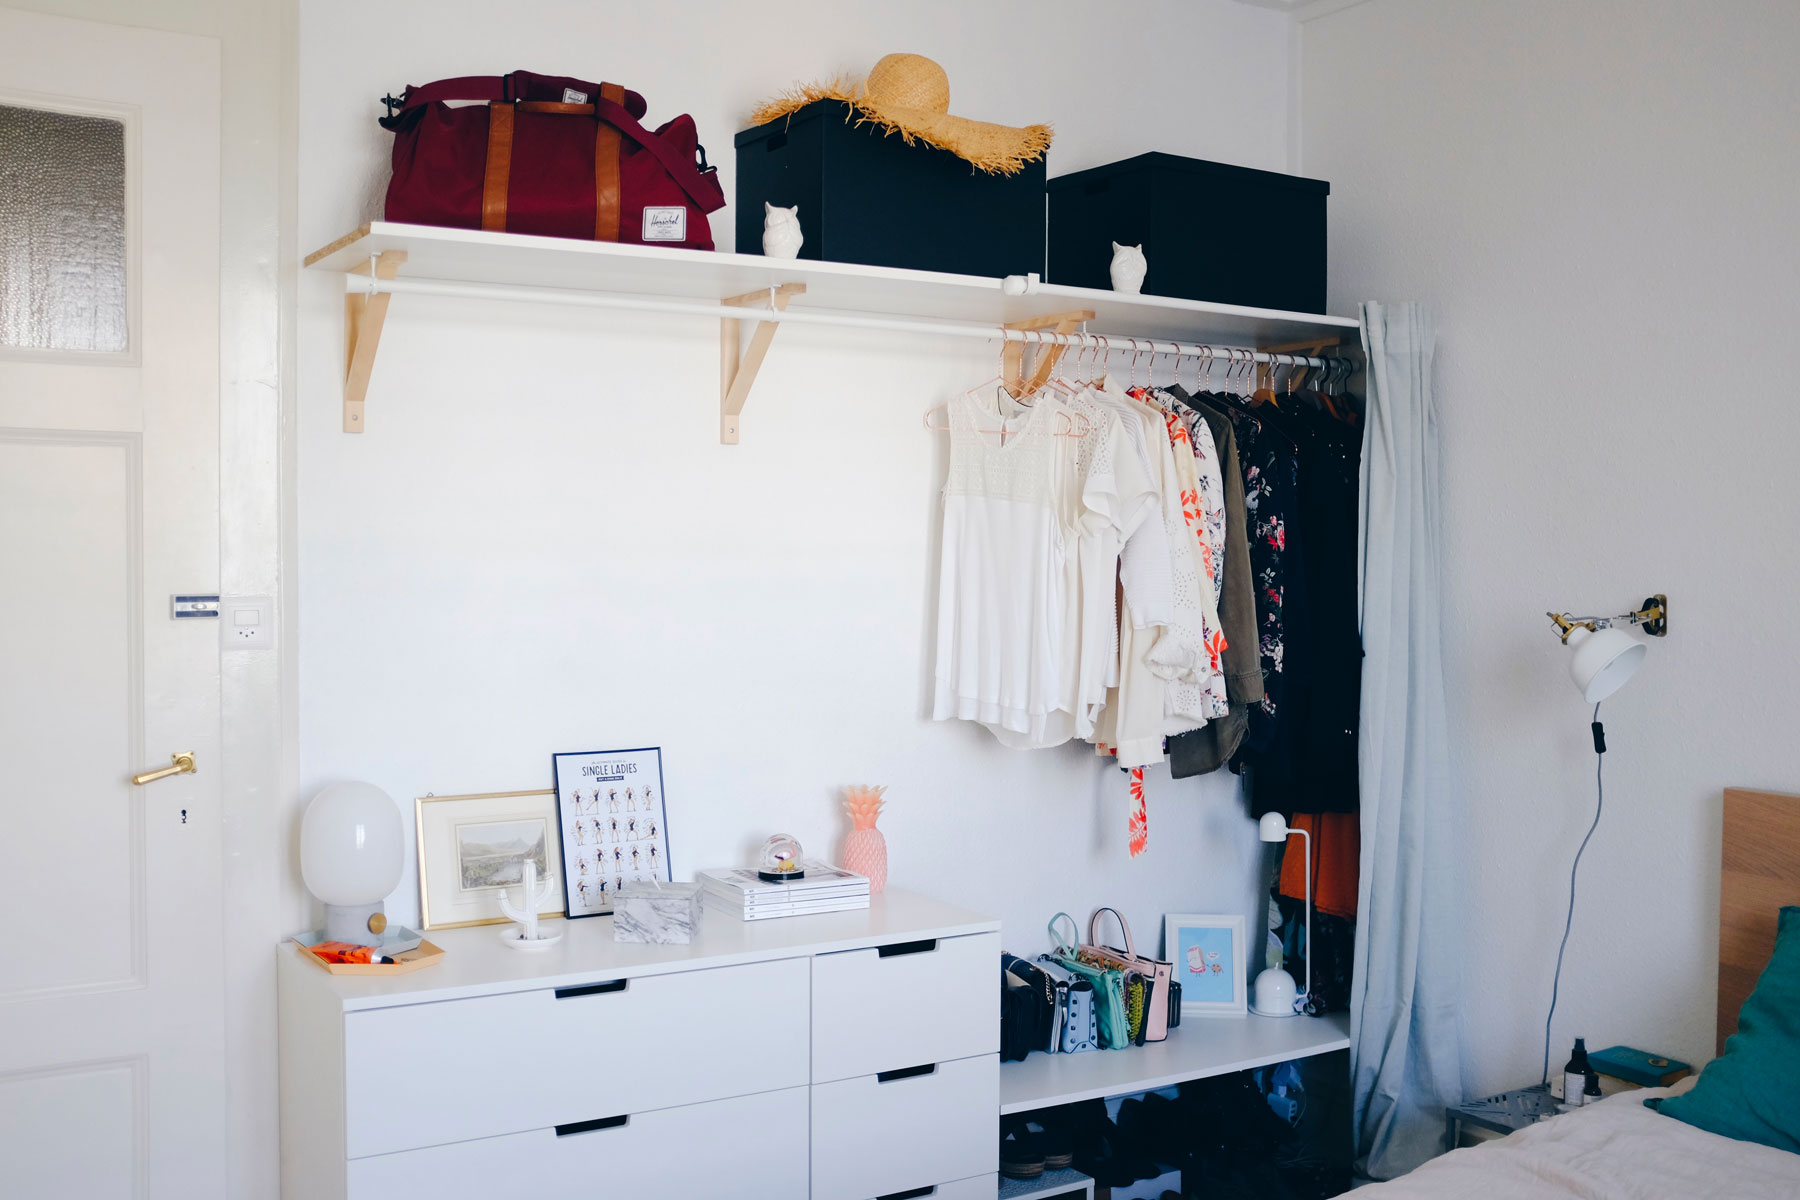
6.The final result
Then I installed my capsule wardrobe (and even a little bit more stuff) and arrange on our brand new DIY open wardrobe!
It’s not really complicated but since we are not exactly handymen, we were pretty proud when we finished it. It is kind of nice to actually make something from scratch. Anyway, I hope you’ll like it, and please share your thoughts or idea in the comment box below.
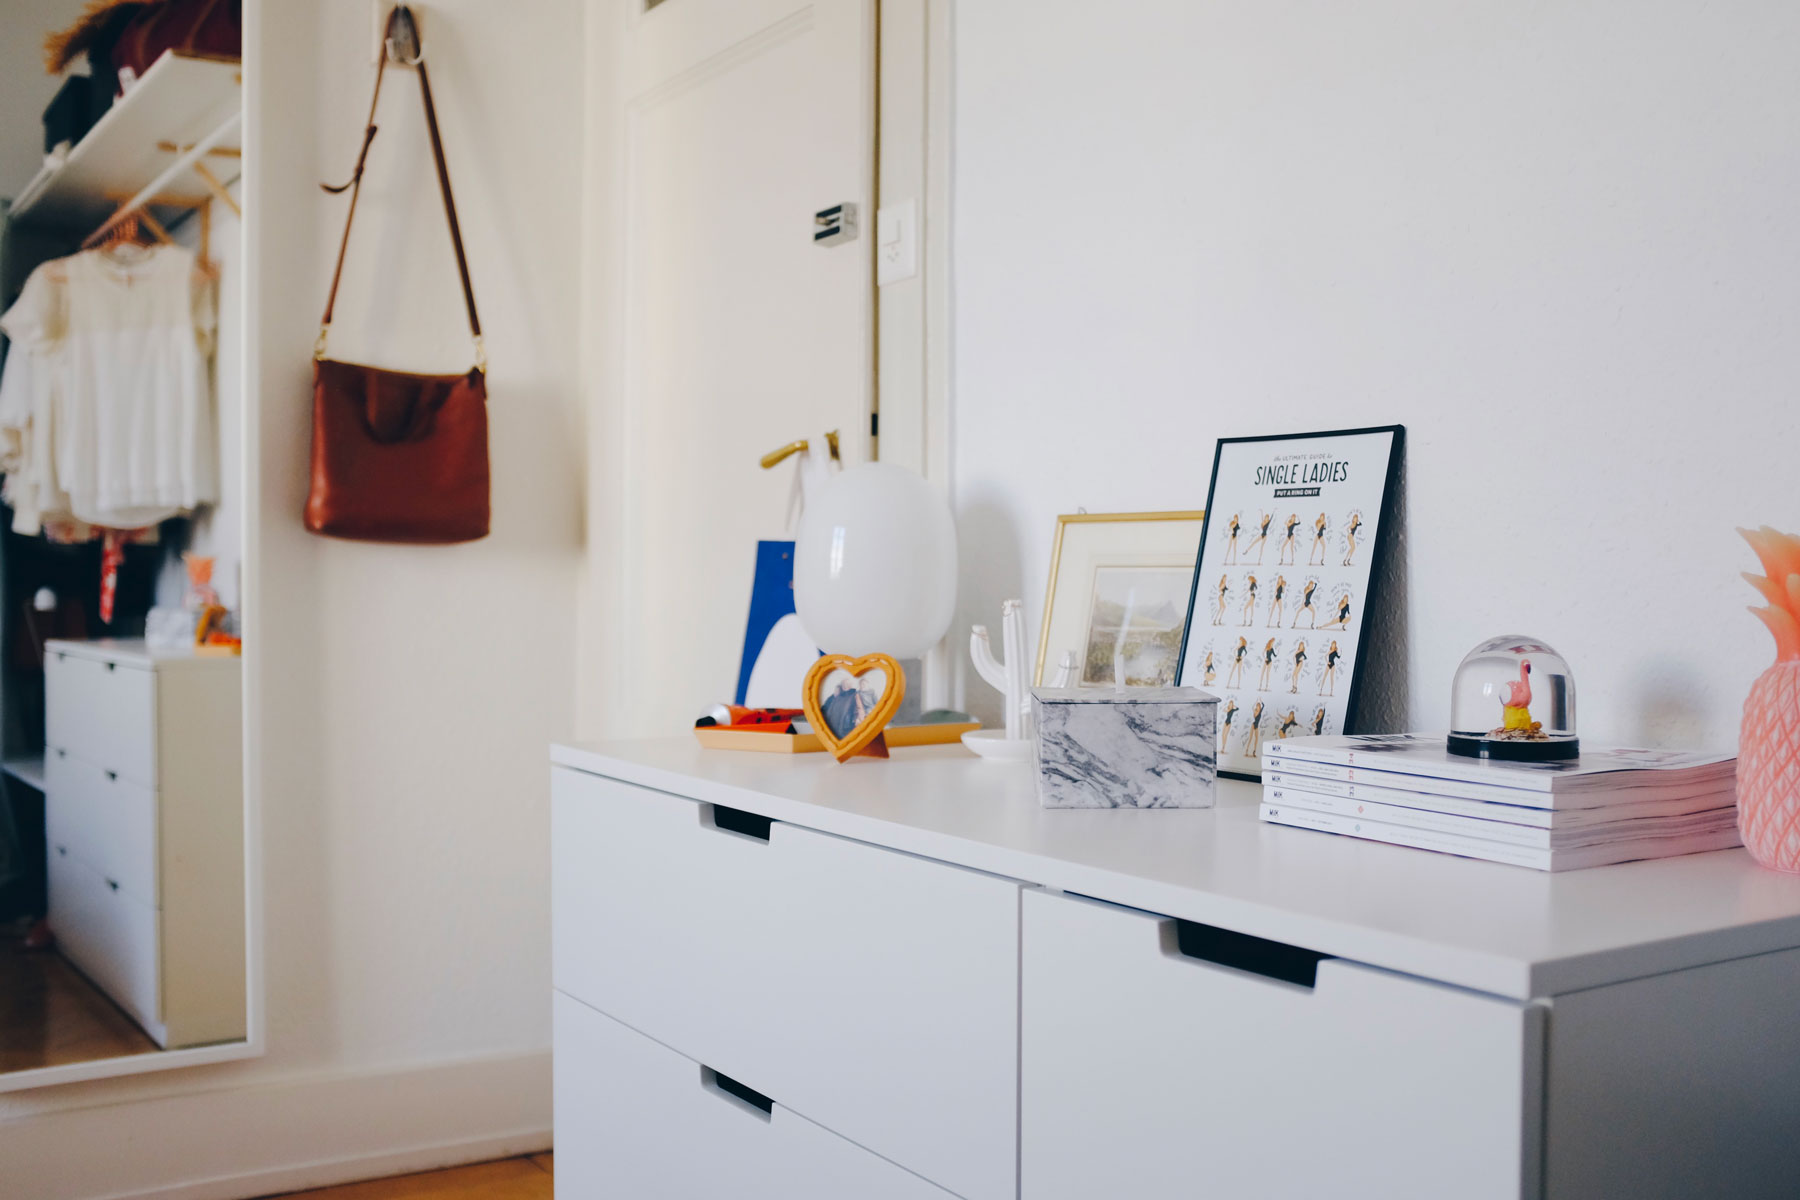

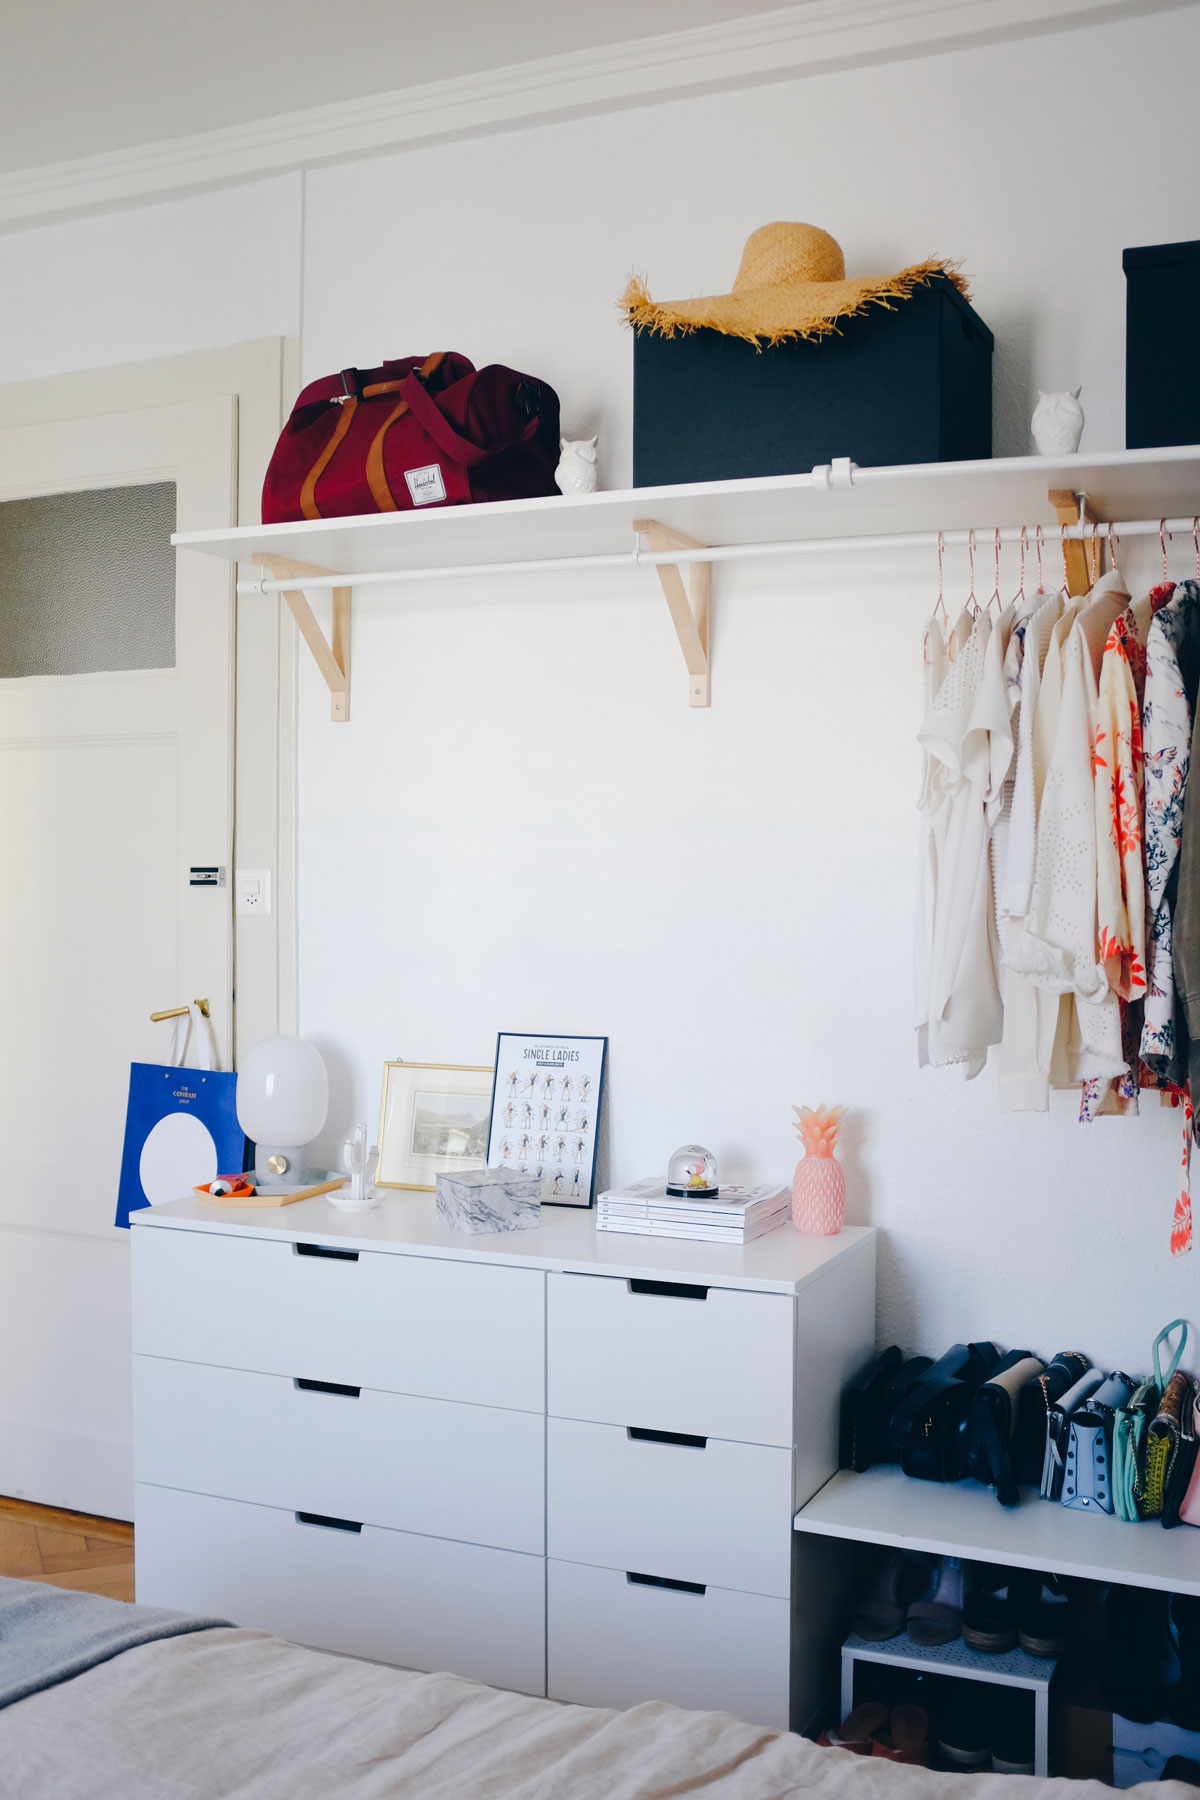
Update: 2 years after building this open wardrobe
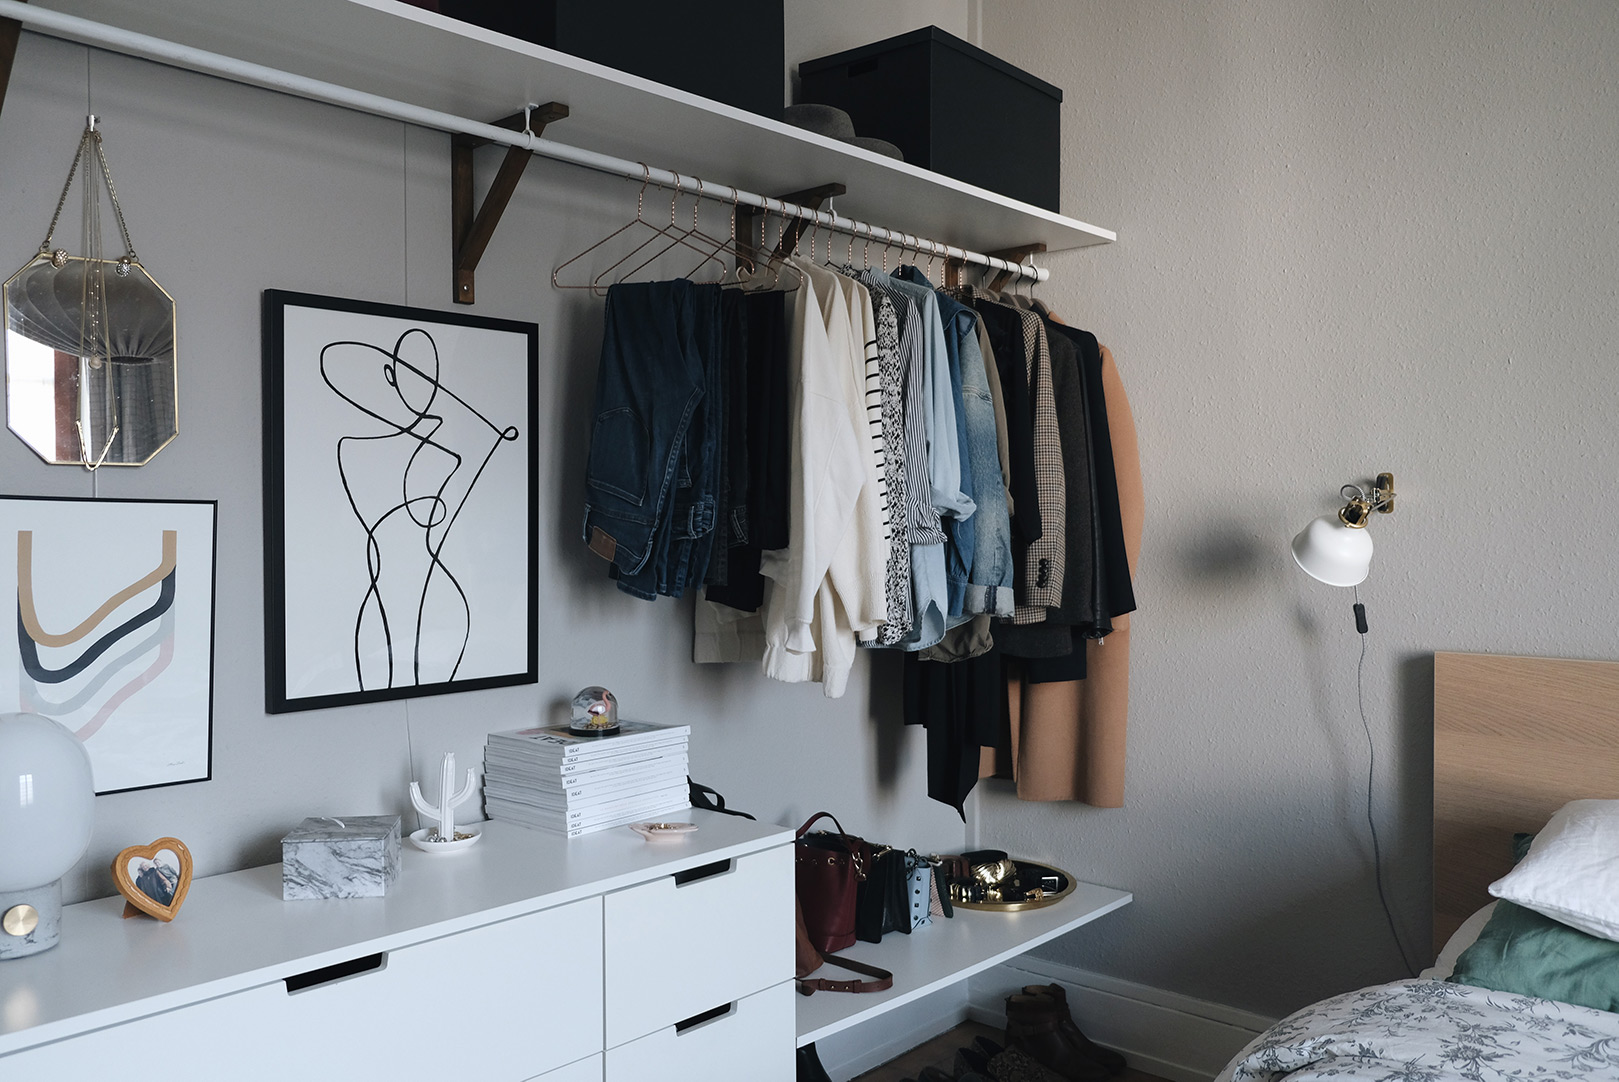
I thought it would be interesting to give feedback on what it’s like to live with an open closet more than 2 years after building it.
First thing first we did a little design upgrade as you can see on the picture above so if you wish to see more pictures of it just check out this article.
What worked well
Everything at your fingertips
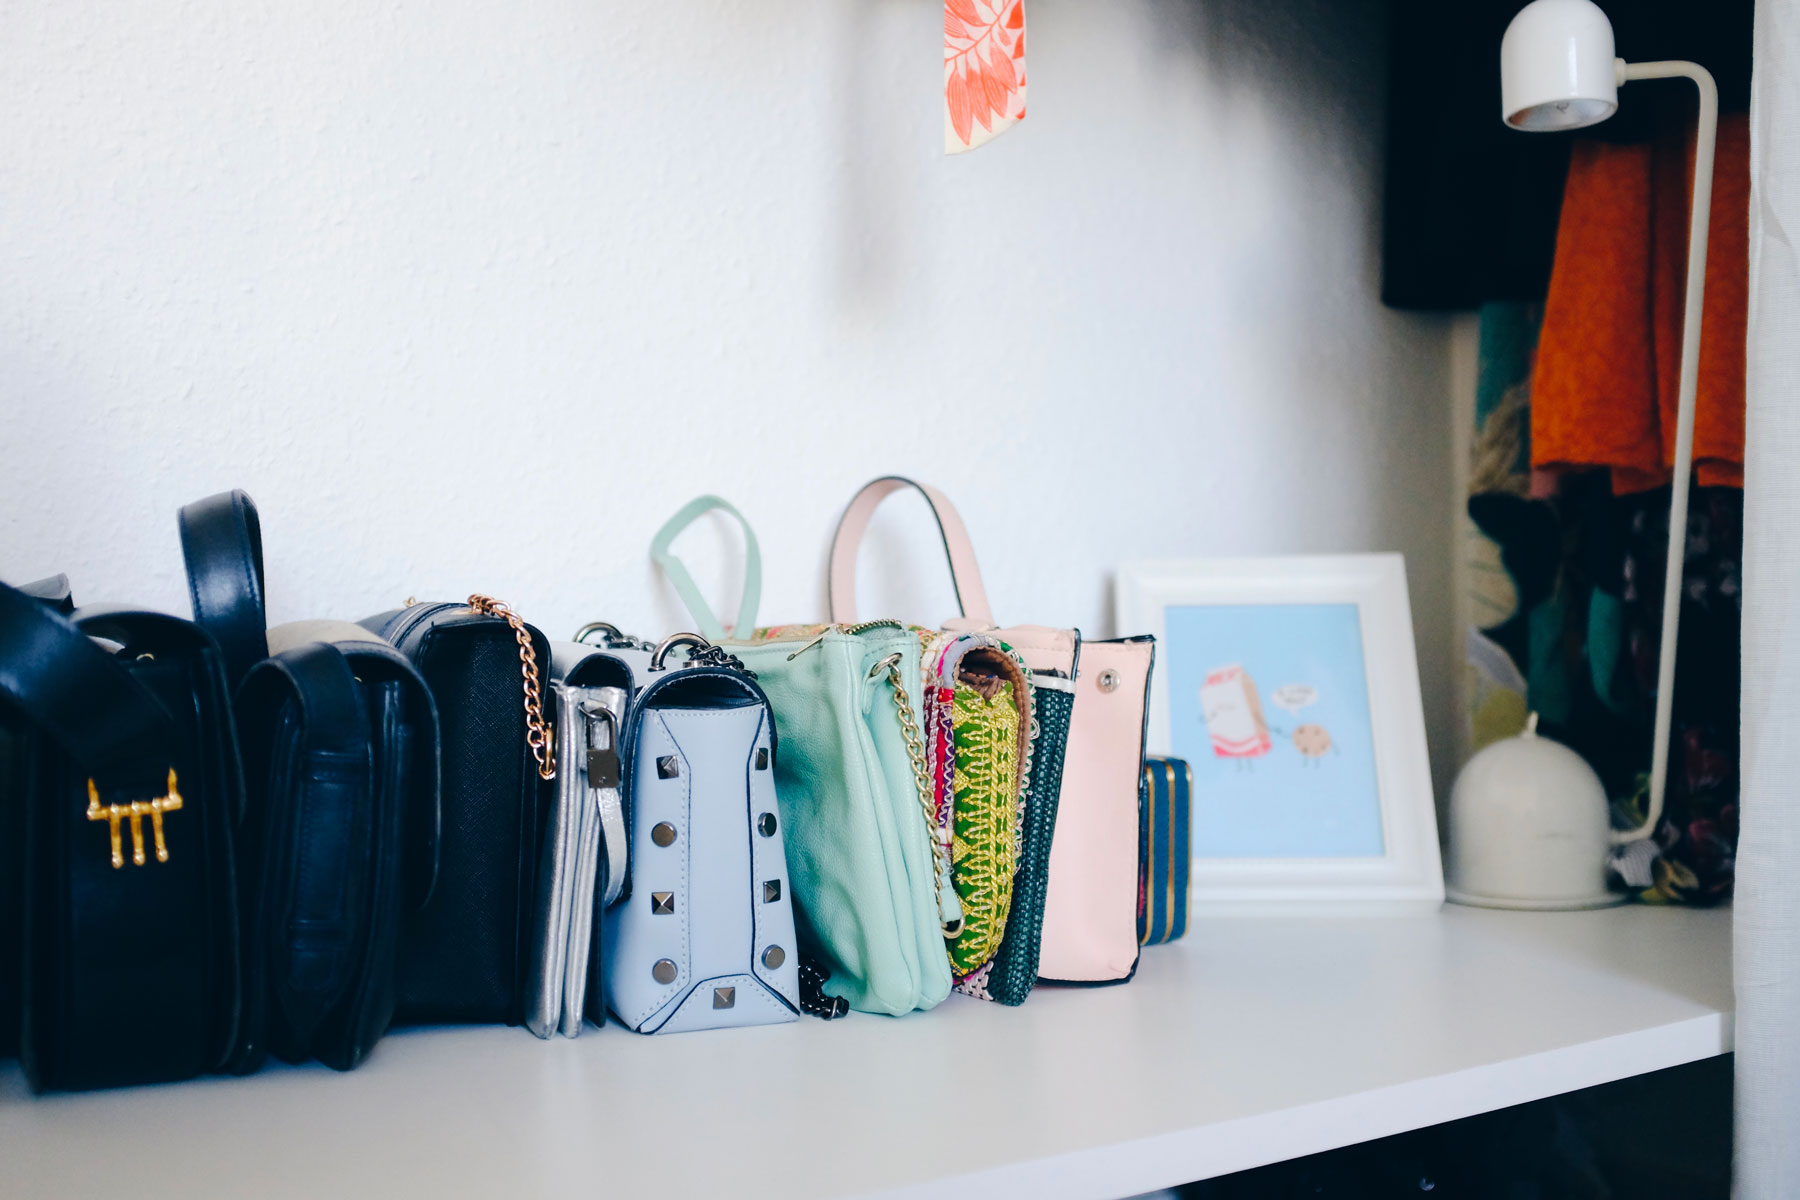
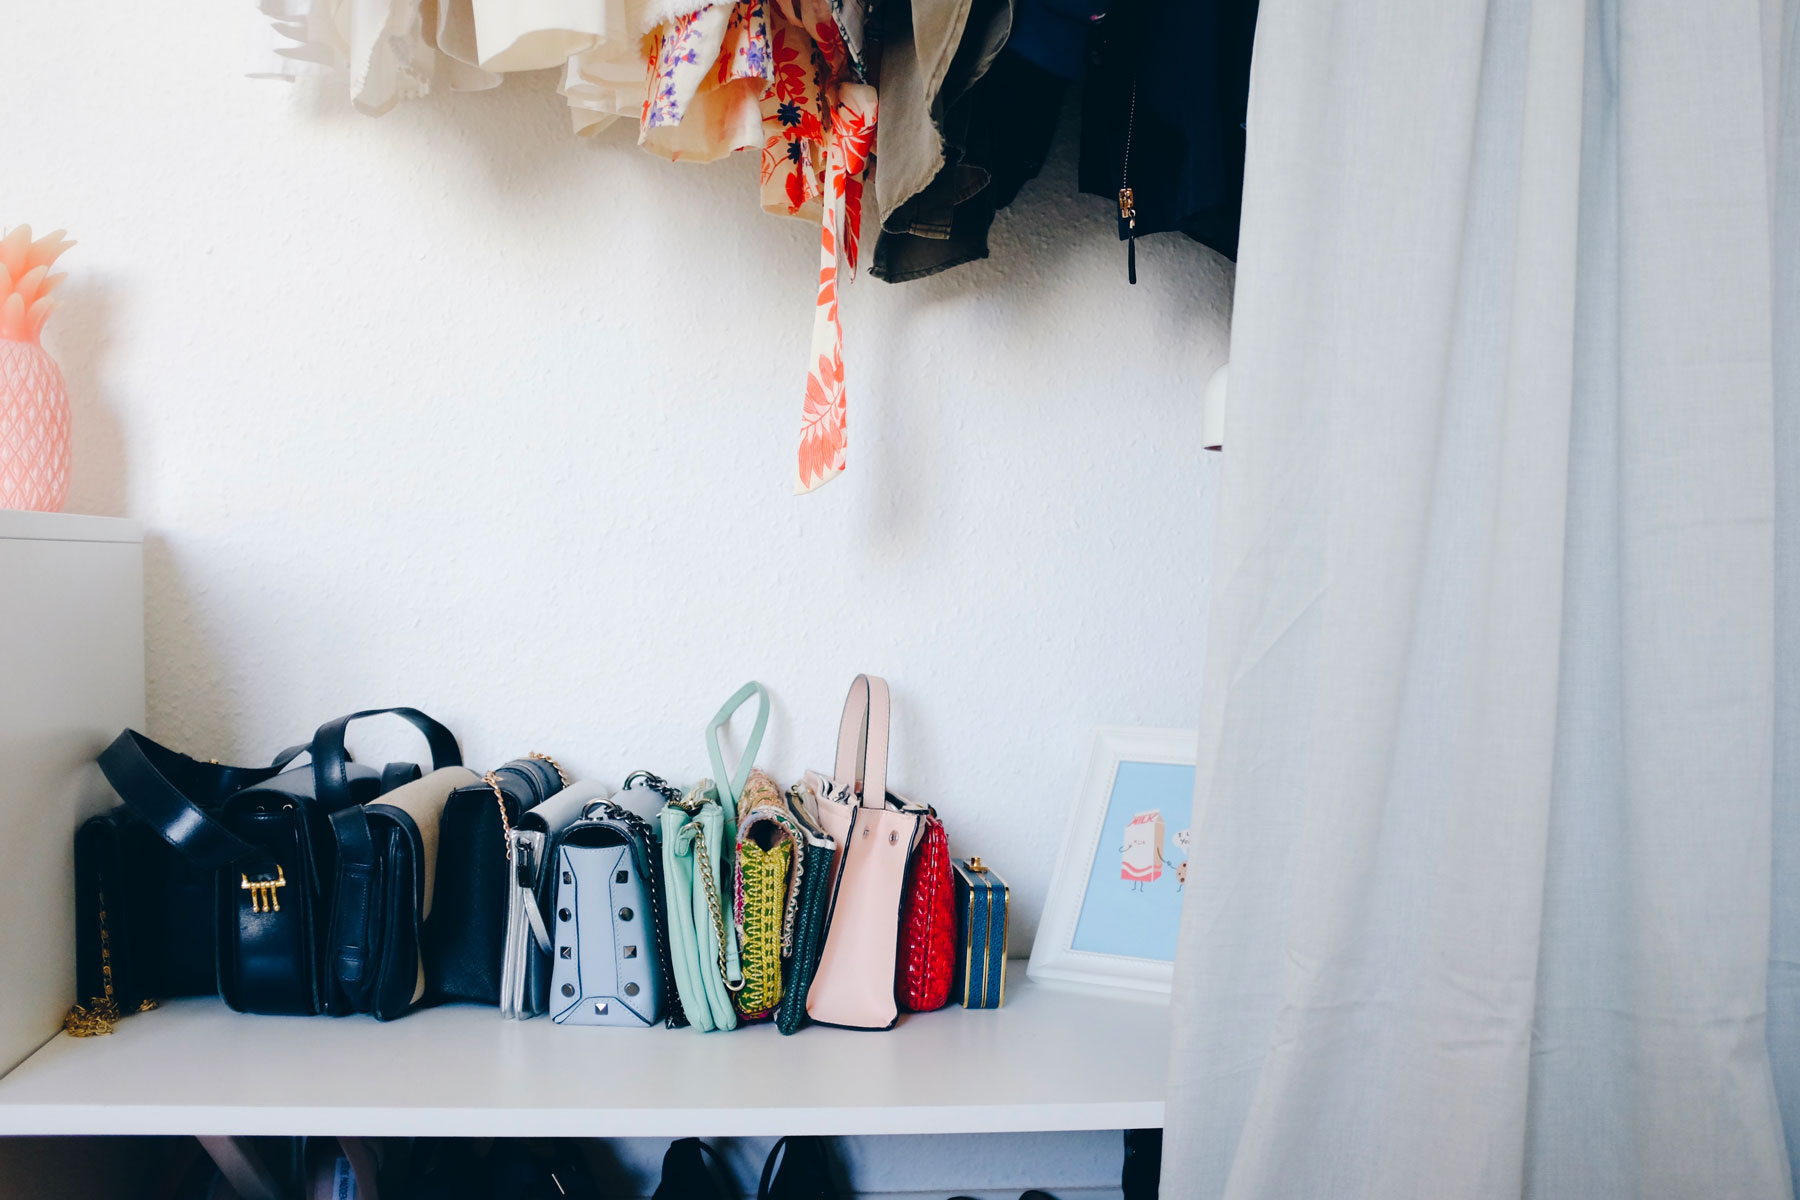
One of my favorite features of this open closet is to have an overview of my wardrobe in one glimpse. Every day I have my shoes, clothing statement pieces, and purses within reach (the basics are in the chest of drawers). This makes getting dressed a hundred times easier.
Always tidy
Keeping everything tidy was never an issue for me and I really mean that. Of course, sometimes my hanging clothes were looking less harmonious, but overall it never became a huge cluttered mess.
Quick tip: The secret to keeping an open wardrobe like this one tidy and pretty is to prepare seasonal capsule wardrobes. So your open wardrobe never looks crowded or disparate.
What didn’t work
Dust
Honestly, the only thing I find annoying with an open wardrobe is the dust. You have to dust the shelves at least once a week if you want them to stay ok. As for the hanging clothes, there are some pieces that I wear less often and that of course get a little dusty but it doesn’t really bother me too much
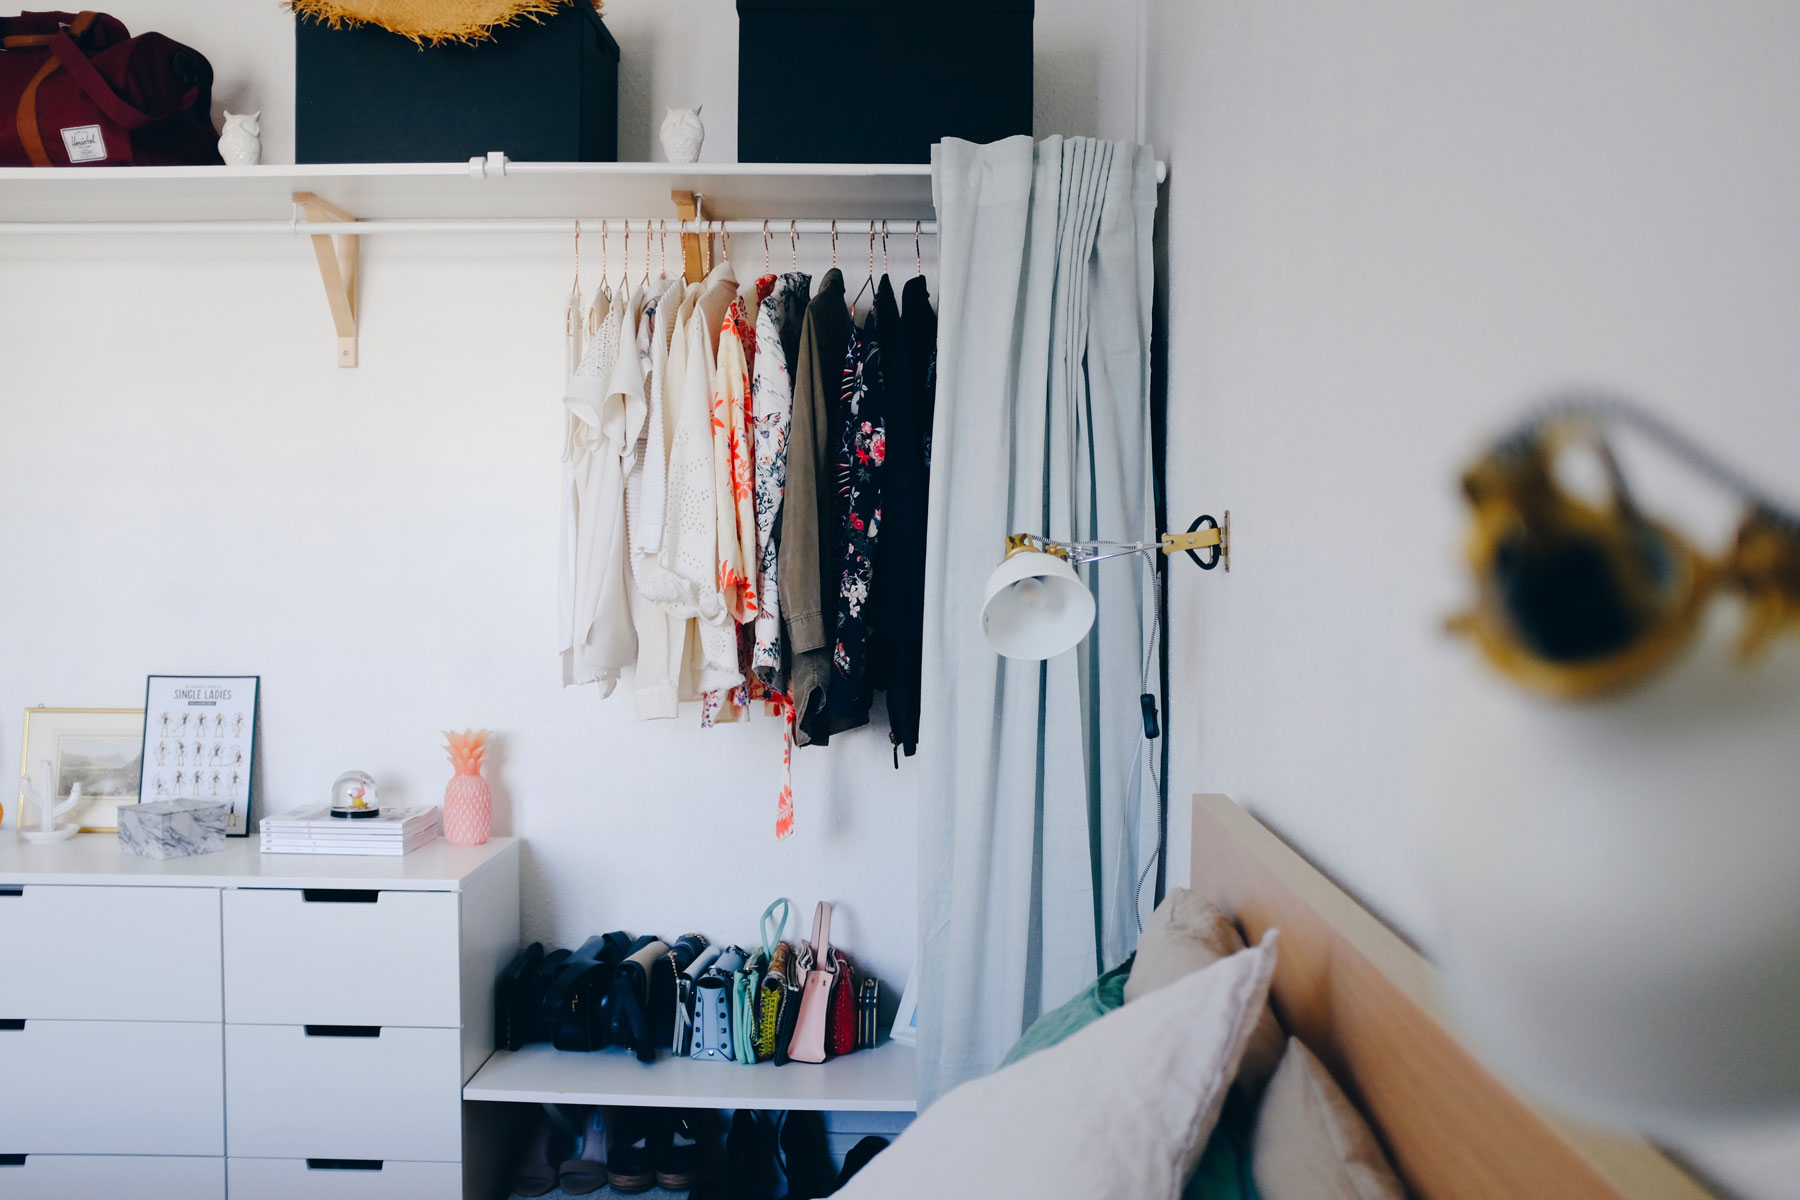
Curtains
You may have noticed that between the current photo and the one before, we removed the curtain. In the end, it was more of a decorative trick than a useful item, so I got rid of it. Also, it looked a little weird when it was closed because it didn’t cover the entire wall. As a result, it was always open and just taking up space.
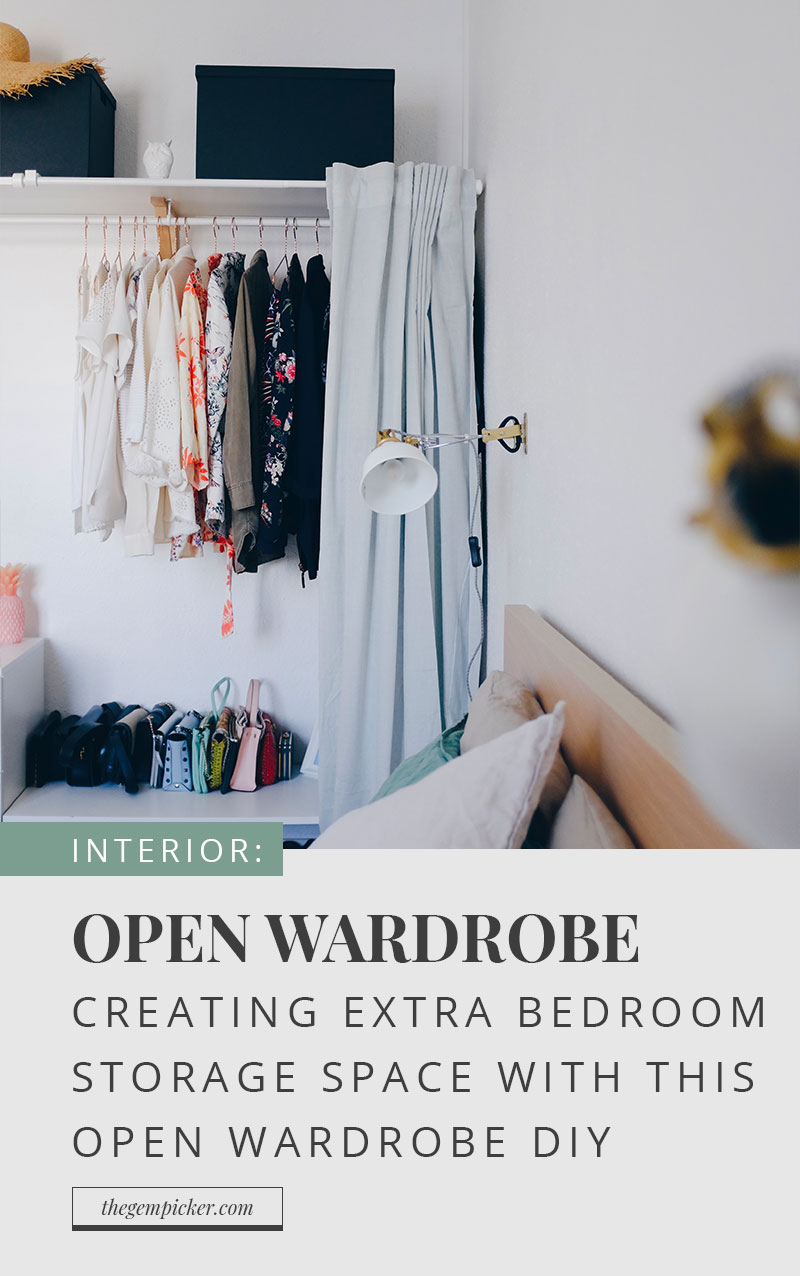
Pin it so you won’t forget it


[…] Source […]
[…] Pinterest to try and find inspiration for an open wardrobe that would fit better. I was inspired by The Gem Picker’s open wardrobe and started designing my own using a MALM dresser, shelves with a curtain rail attached and […]
[…] of laid-back look? Those are questions I’ve been asking myself as I’m not really happy with the way our bed is looking right now. So I took matters in my own hands and started to analyze what are the elements that speak to me. […]
[…] up a blank wall or a spot that look weirdly empty. As we just built that open dressing of ours (read about the DIY), I realized that we have a part of our wall that feels really naked now. It struck me as the […]