*Disclosure: This article may contain affiliate links. Rest assured I only recommend products I use myself and all opinions expressed here are my own. I may earn a small commission when you click on the links that are at no additional cost to you. This helps me keep going. Thank you for your invaluable support.
Are you tired of the lack of color choice when it comes to cabinets or modern furniture? Do you yearn for a more personalized and unique touch in your home decor? Look no further than this Montana Furniture-inspired hack that will transform your IKEA Eket cabinets into stunning and unique pieces.
Famous Danish Brand
Montana Furniture, a Danish brand known for its exceptional craftsmanship and minimalist design, has been a source of inspiration for many interior designers and interior decor enthusiasts like me. With its clean lines, vibrant colors, and modular storage solutions, Montana Furniture has become synonymous with contemporary Scandinavian design.
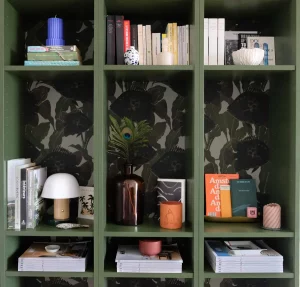
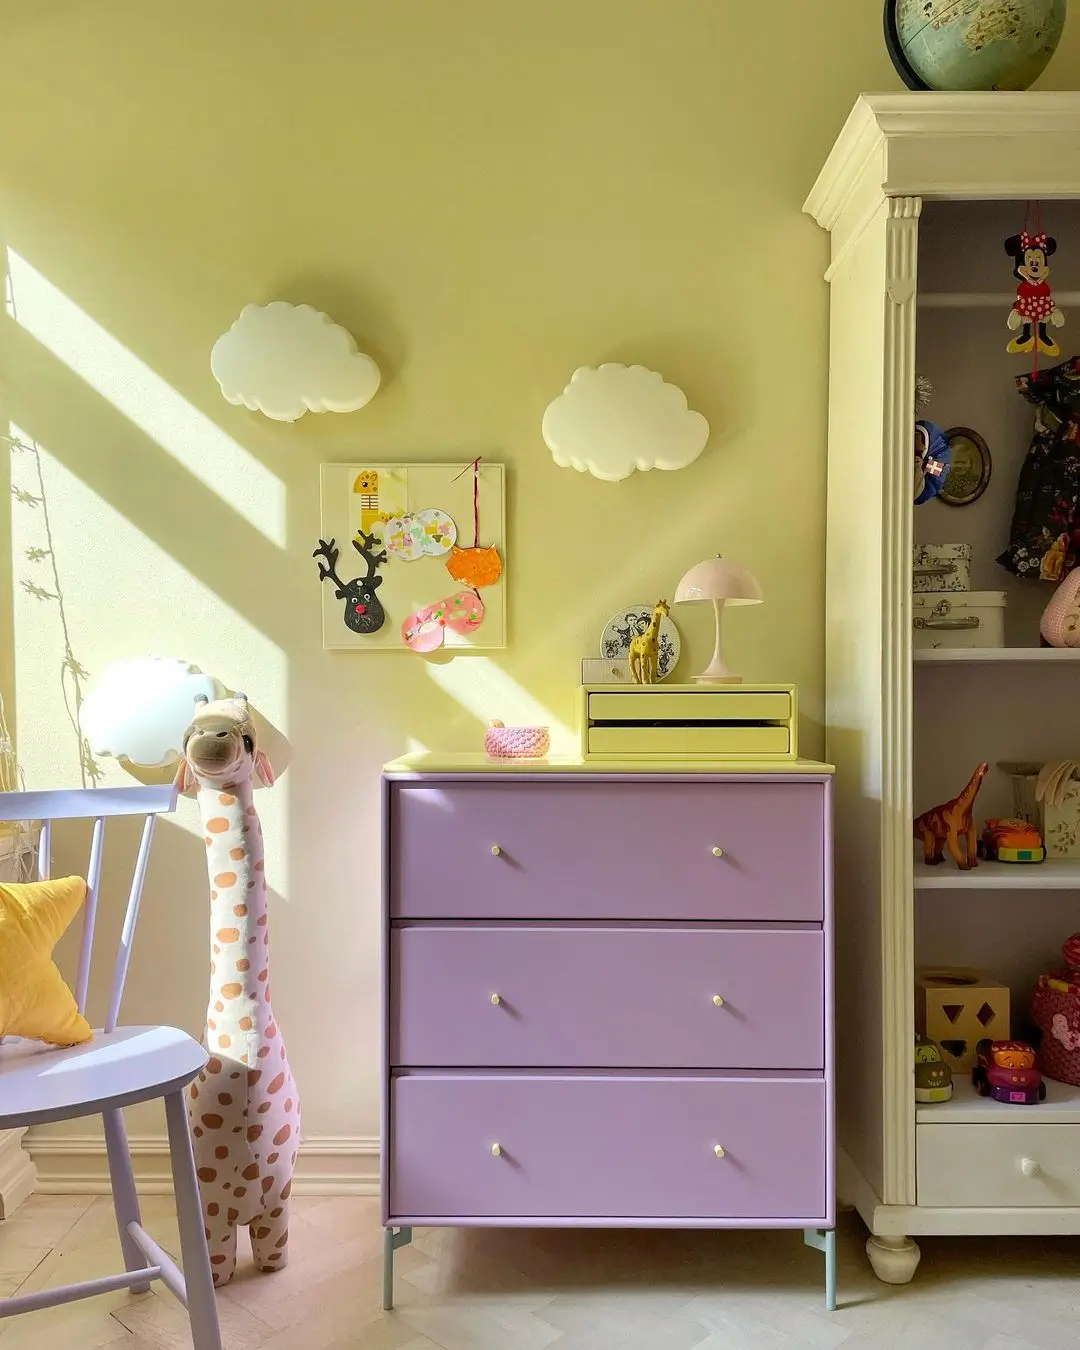
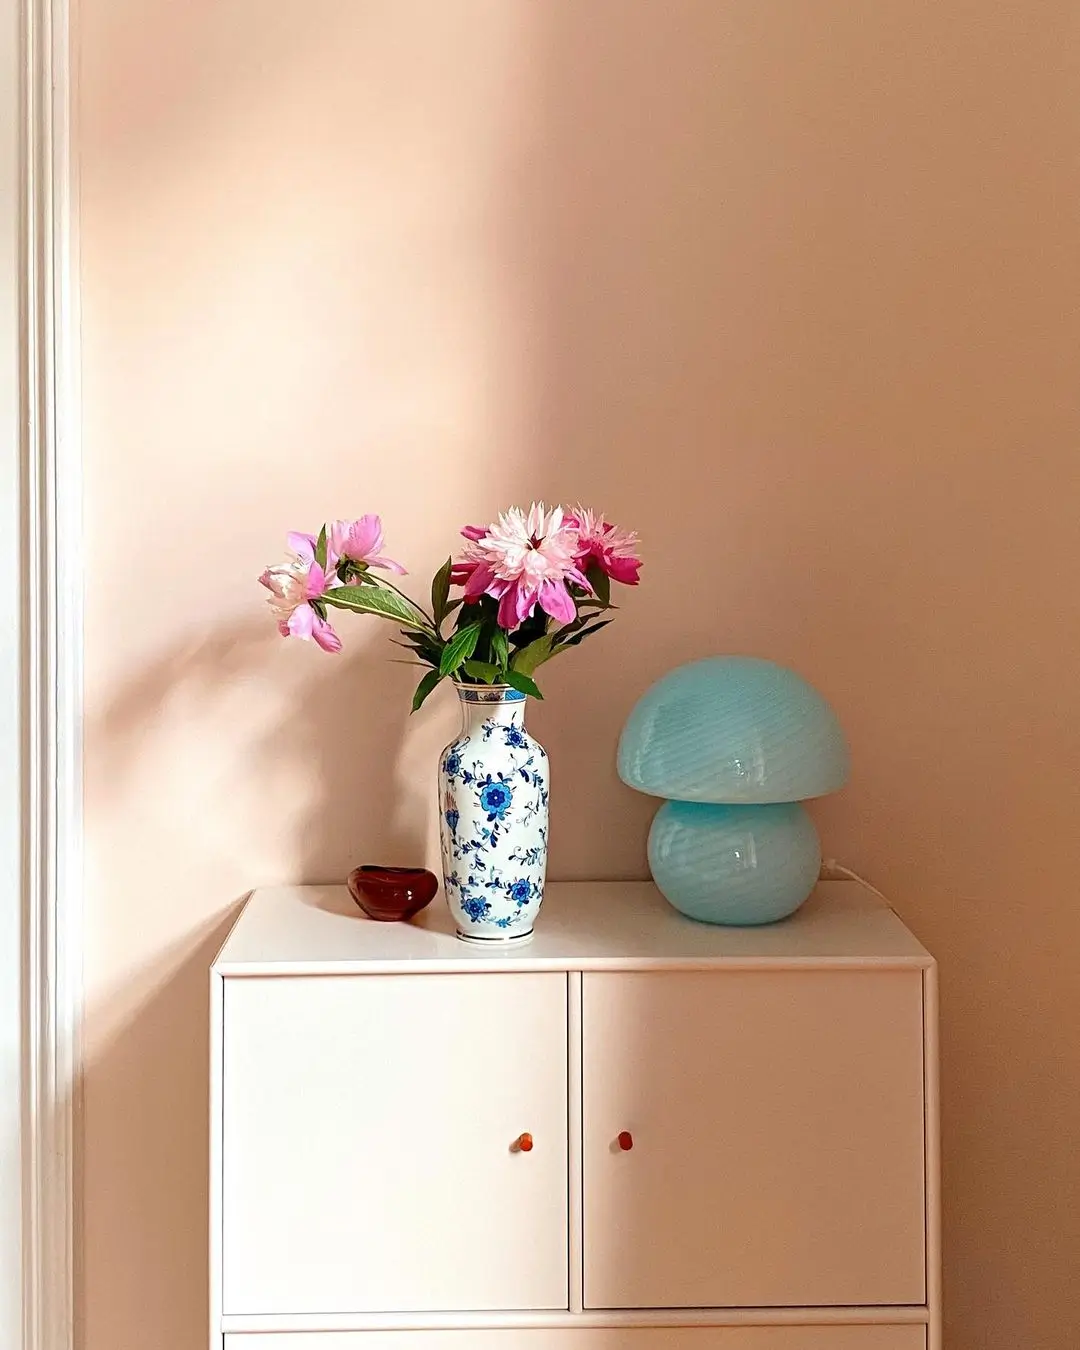
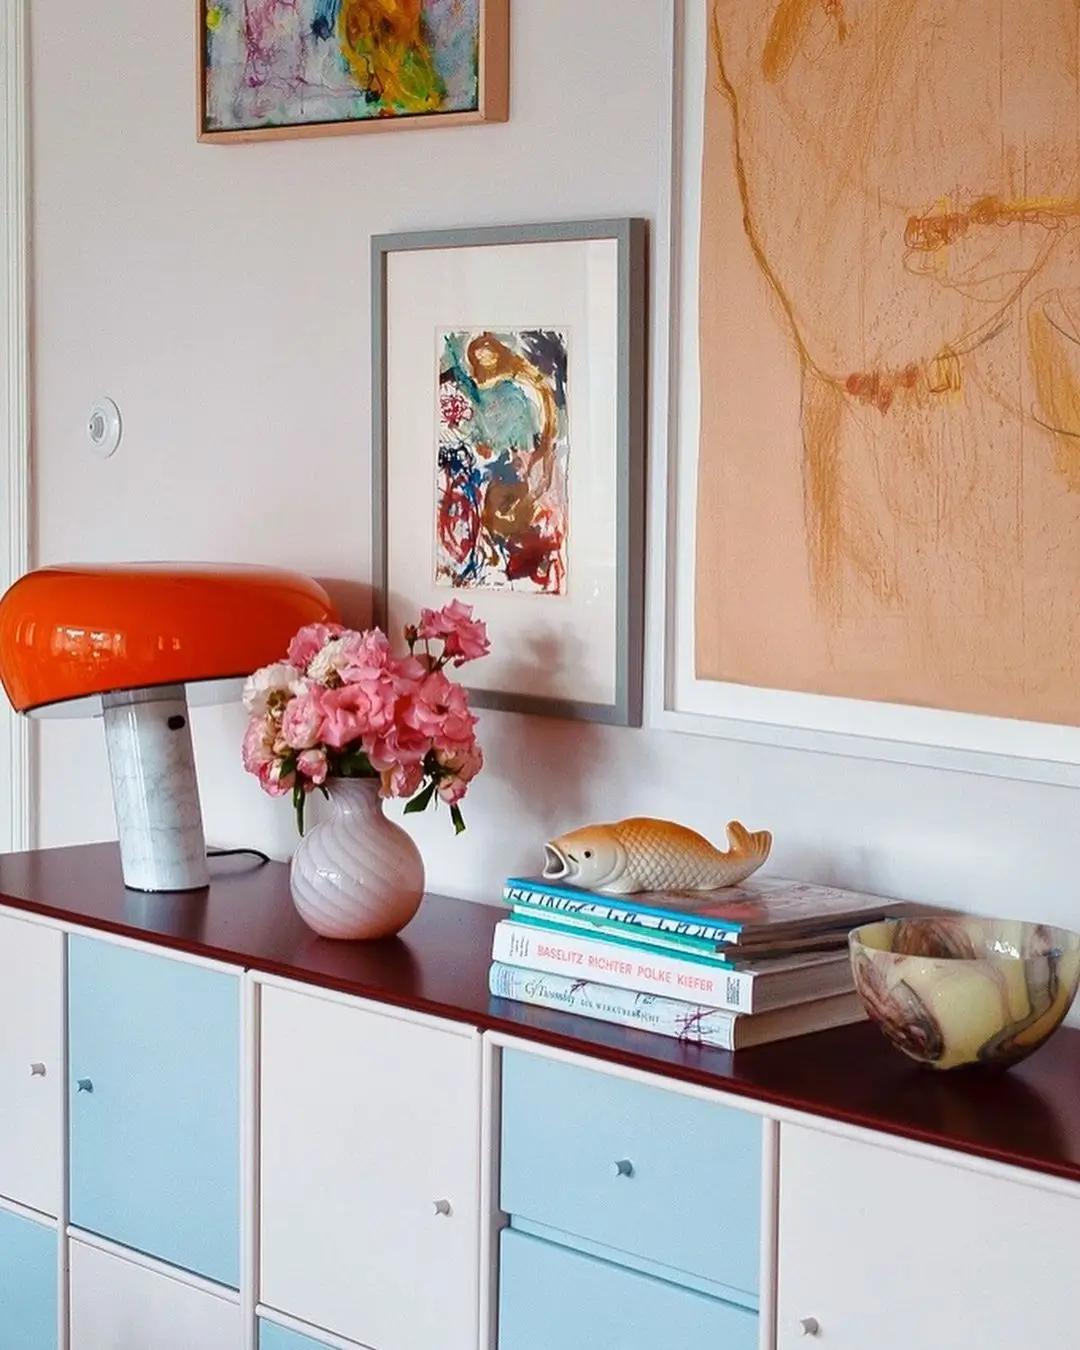
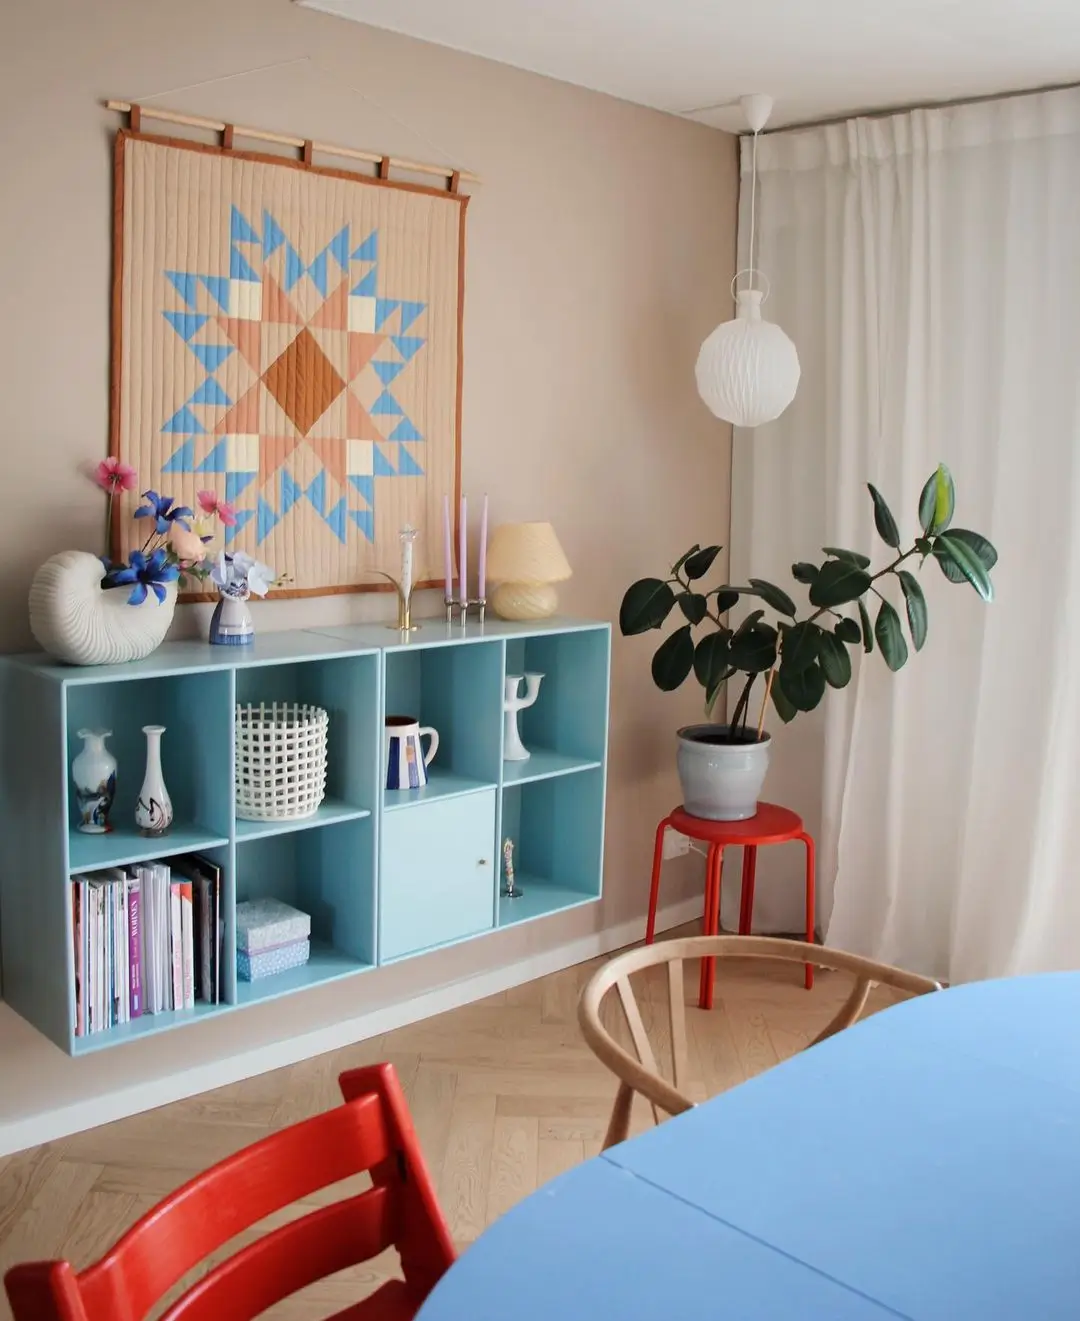
Here are some examples showcasing the creativity and versatility of Montana furniture. Montana offers a selection of 36 modules that come in 4 depths and 43 colors. The ability to select a unique color for nearly every component of your cabinet allows for such a high level of customization that it becomes highly unlikely to encounter an identical piece of furniture owned by someone else. You can also play with the handles and legs as they also come in every 43 colors.


So, you ask, why do a DIY to imitate such perfect furniture? because of their price of course! I don’t mean to say they are excessively expensive, on the contrary, I’m sure they are fairly priced. But it’s not always possible to spend such an amount of money on one piece of furniture.
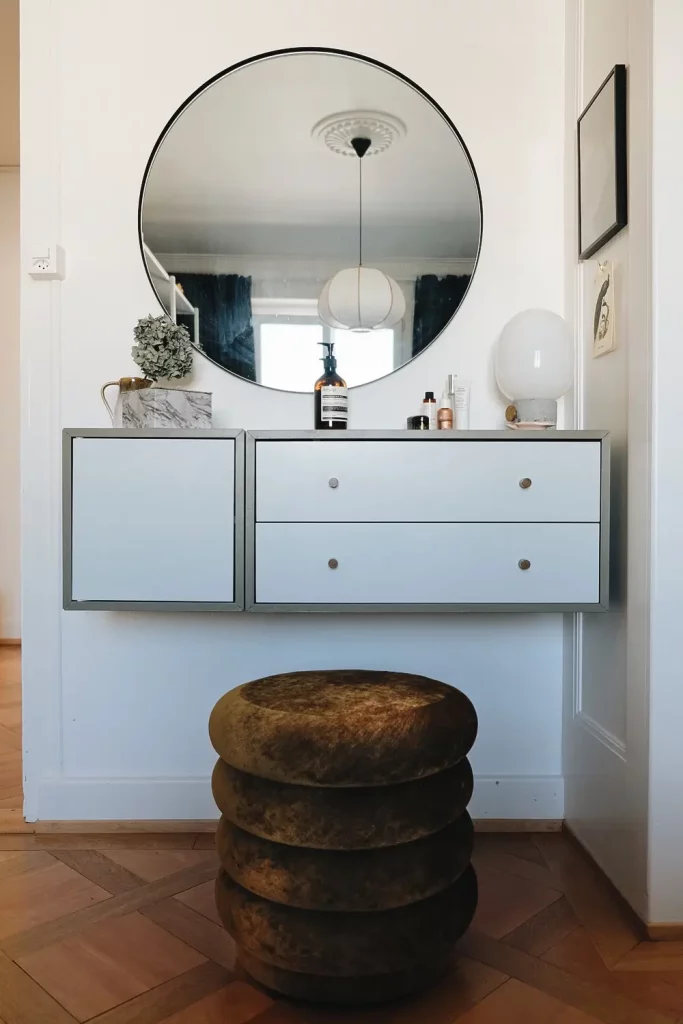
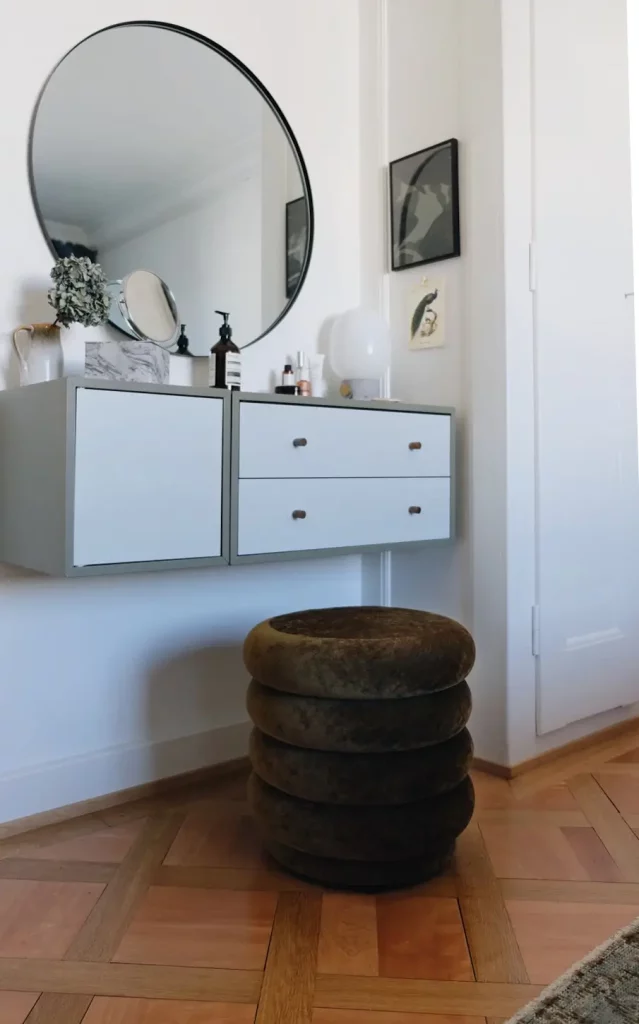
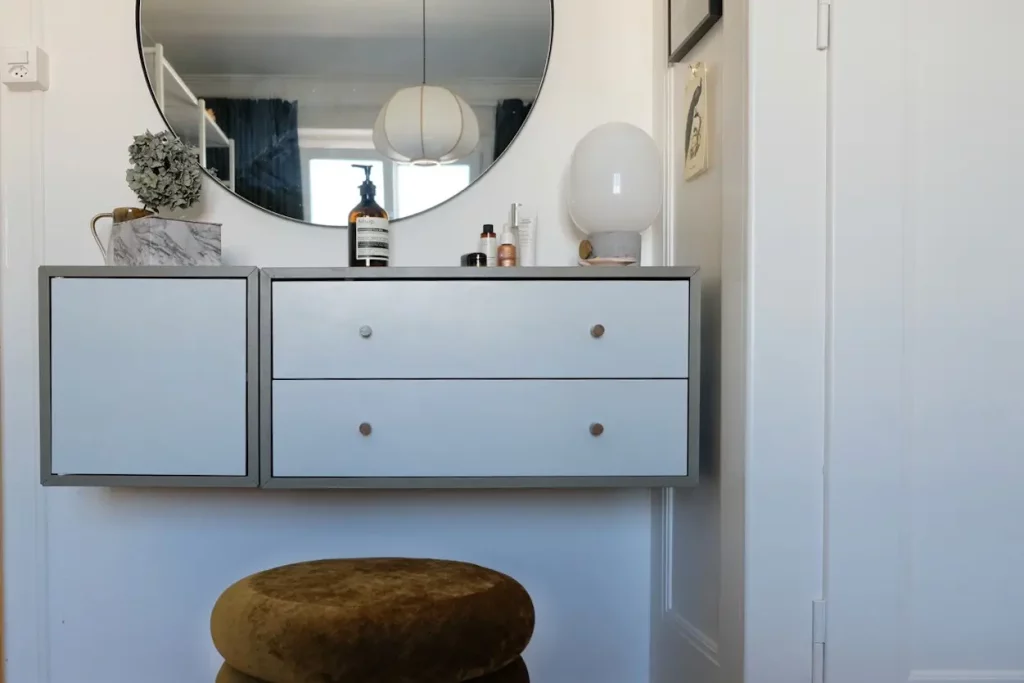
A vanity corner in our bedroom
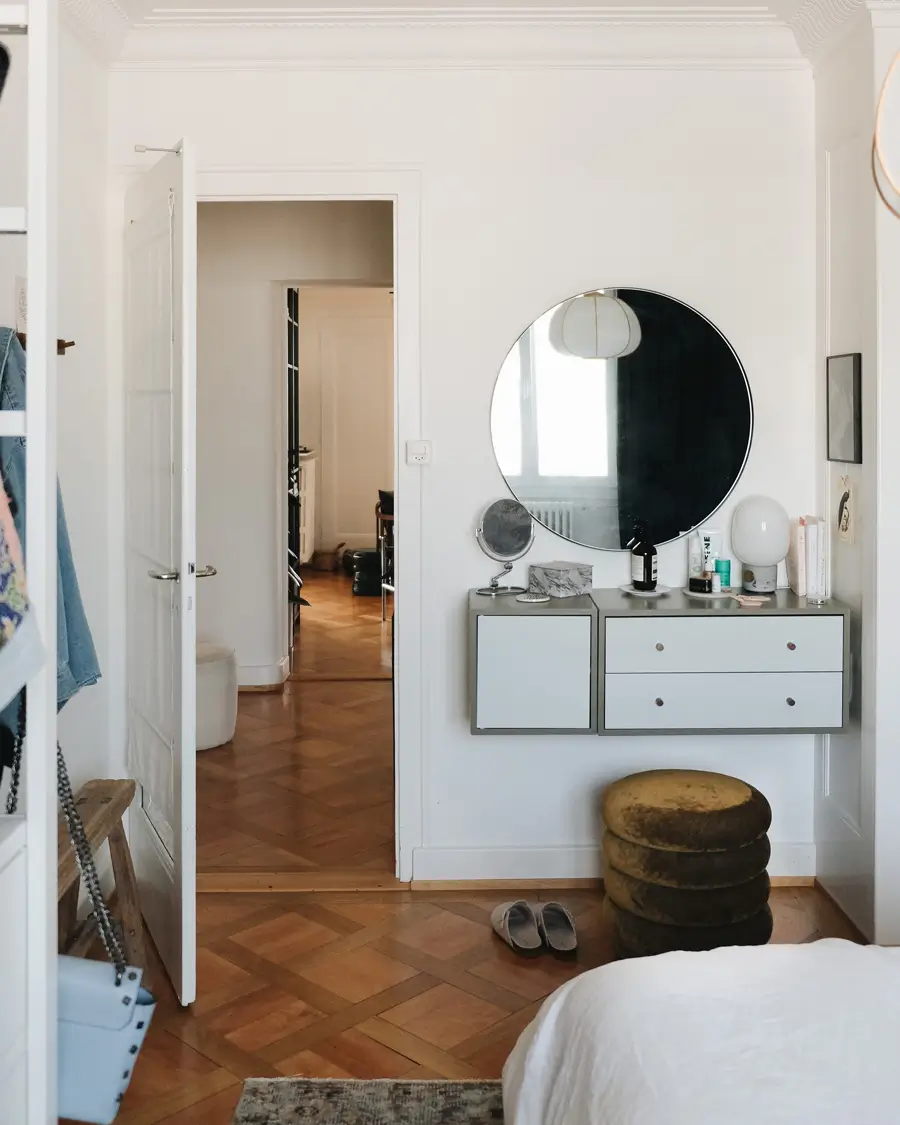
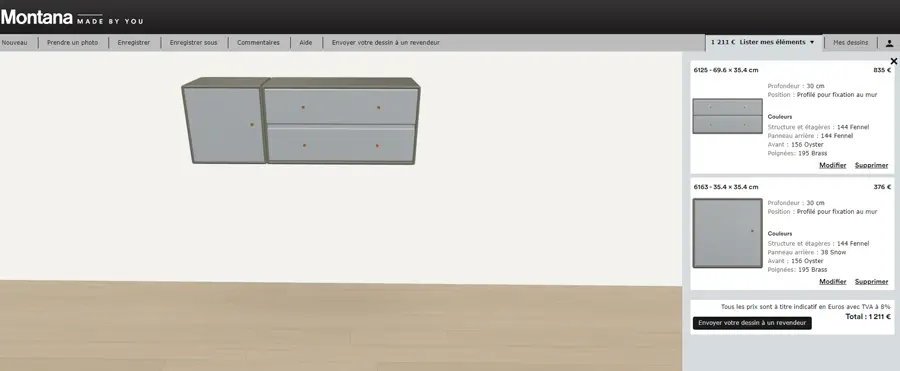
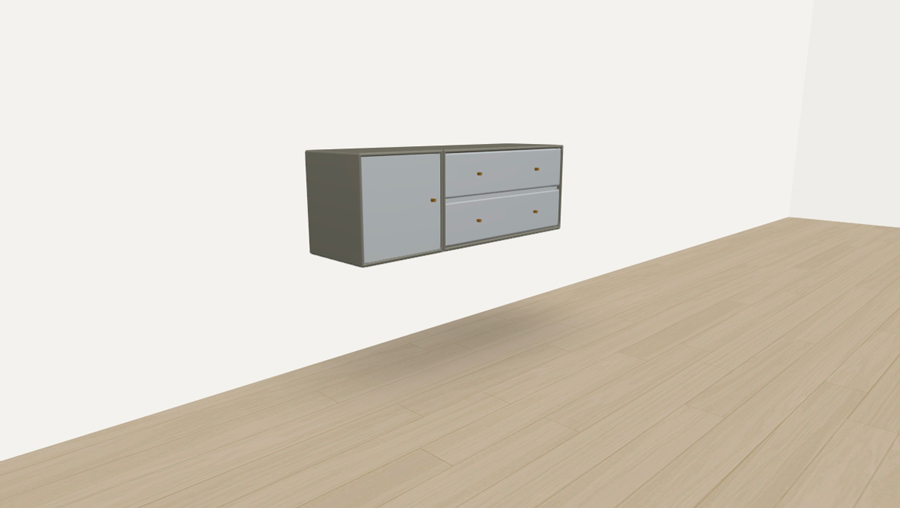
I had planned to create a charming vanity corner in our bedroom, in line with what already existed. I had envisioned the colors and style I desired, as well as the budget I was willing to allocate for the furniture. Montana furniture appeared to be a suitable choice.
Once I had a design I was satisfied with, I took a look at the cost of €1211 and realized it would exceed my budget. As mentioned, I was aware that Montana furniture was not cheap and I was willing to pay a certain amount. However, my design exceeded by far the price range I had in mind initially.
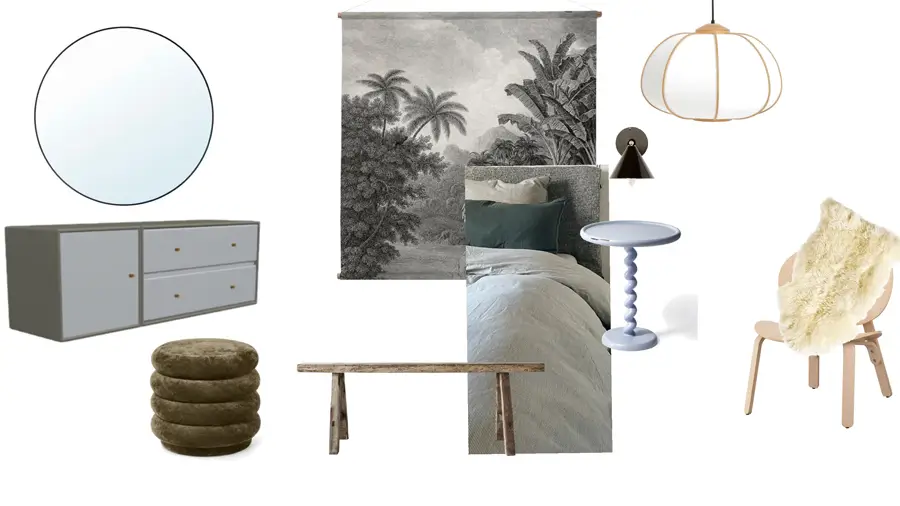
List of items on this Moodboard :
Paper and bamboo suspension by H&M home
Black round Mirror similar here by IKEA
Pouf Round Olive by Ferm Living
Twist side table by pols potten
HK living Poster XXL Jungle available on connox or on nordic nest
Wall lamp black by atelier Areti
Original bench over 100 years old by Snowdrops Copenhagen (I contacted them by email to buy this one)
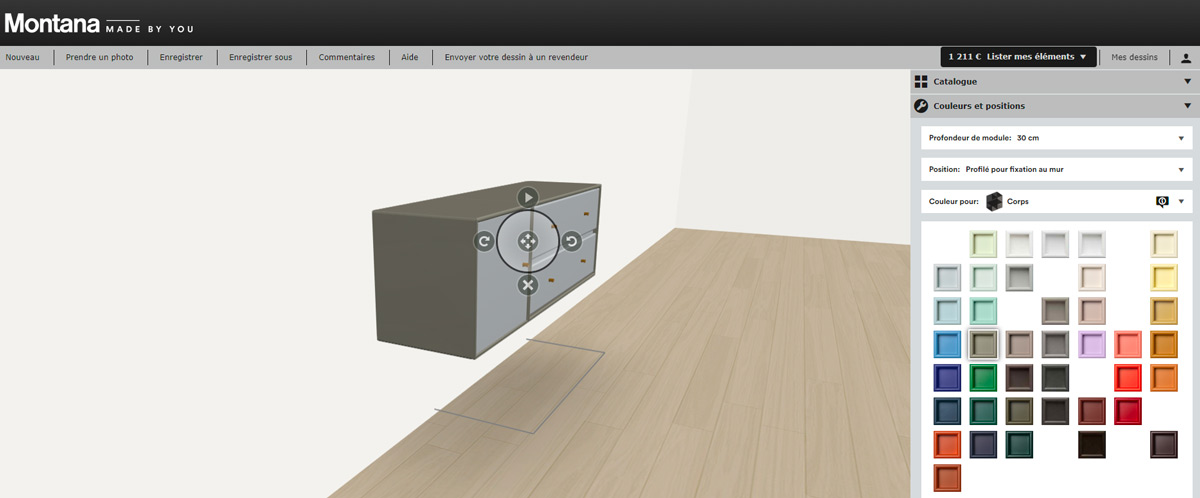
DESIGN WITH MONTANA TOOL
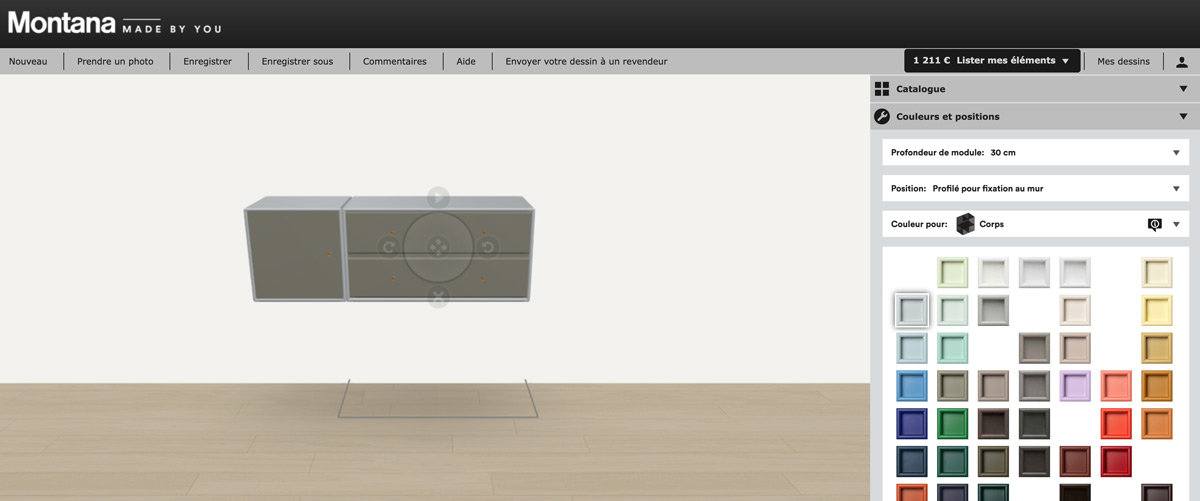
On the Montana Furniture website, there is a useful tool called “Design with Montana” which allows users to easily build their own Montana furniture by selecting from every component and color of the brand. This tool provides a framework that prevents users from being overwhelmed by too many options, but still leaves room for a large number of possibilities.
A budget and renter-friendly IKEA hack
As a renter I often found myself weighing the pros and cons of splurging or not on a certain piece of furniture. I always ask myself :
- Is it a piece that I will be able to take with me in another setting?
- Is it timeless?
- Does it really spark joy?
To be honest, I could have answered yes to all three of those questions. However, I still felt that the cost was a bit too high considering the significance of this project.
So that’s when I searched for a similar alternative within my budget, prioritizing the availability of color, which first drew my attention to Montana furniture. I quickly realized that there was no alternative to Montana furniture that was significantly cheaper and as good-looking. Although I did not intend to undertake a DIY project, I ultimately realized it was the only way to achieve the desired result.
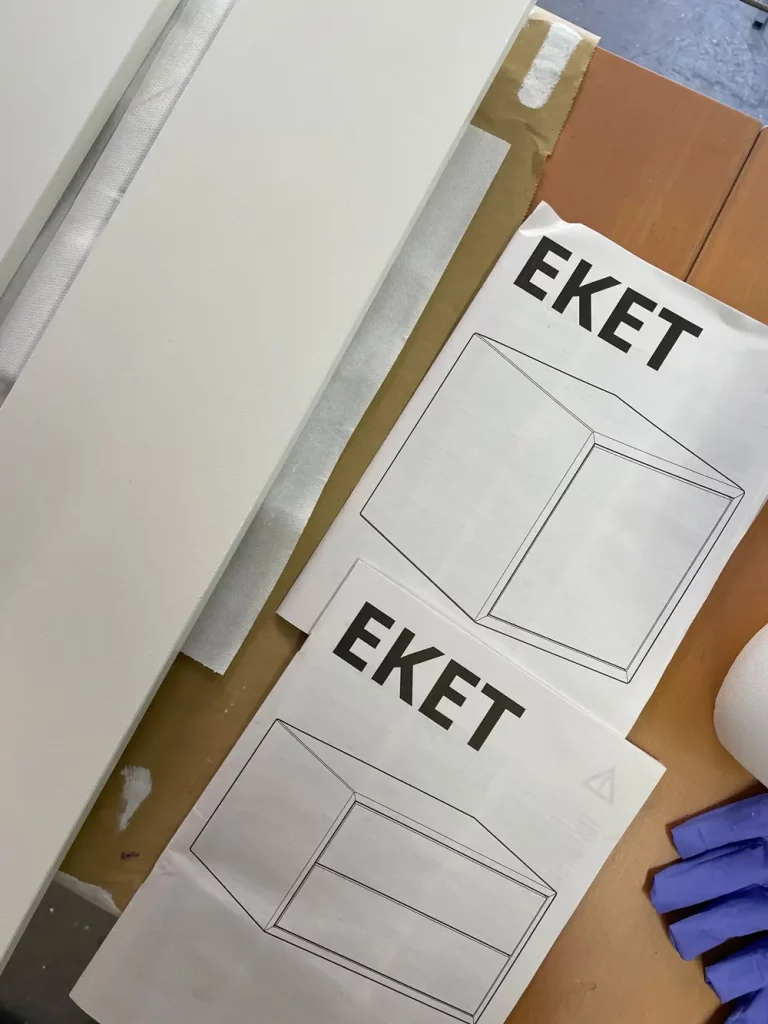
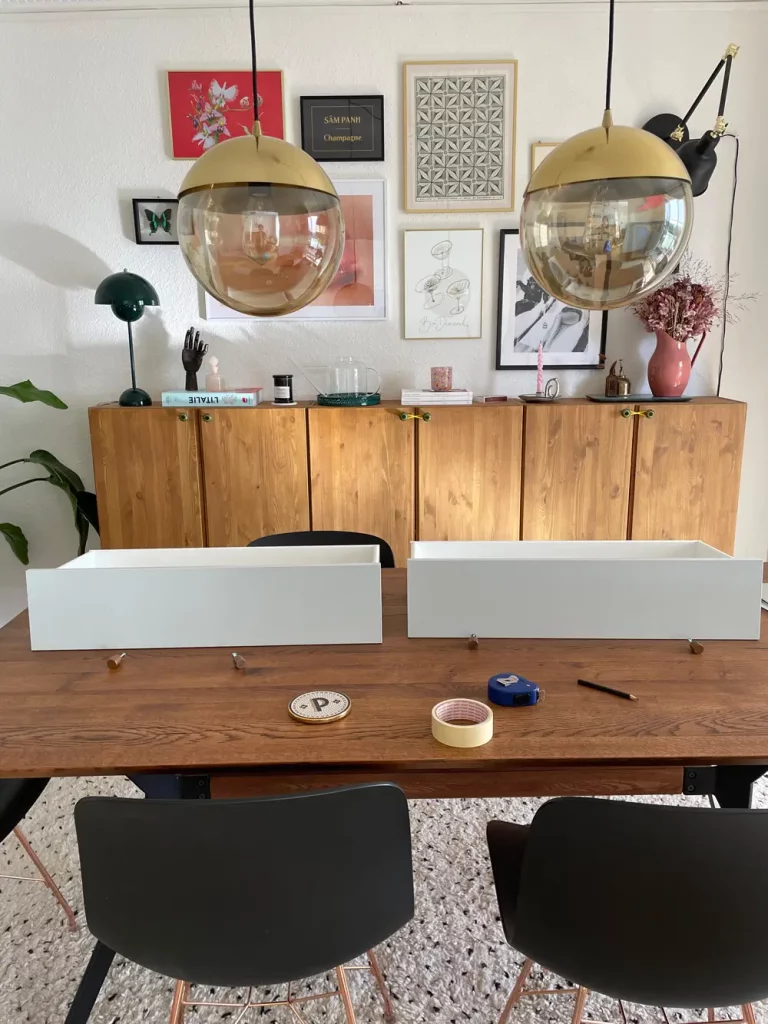
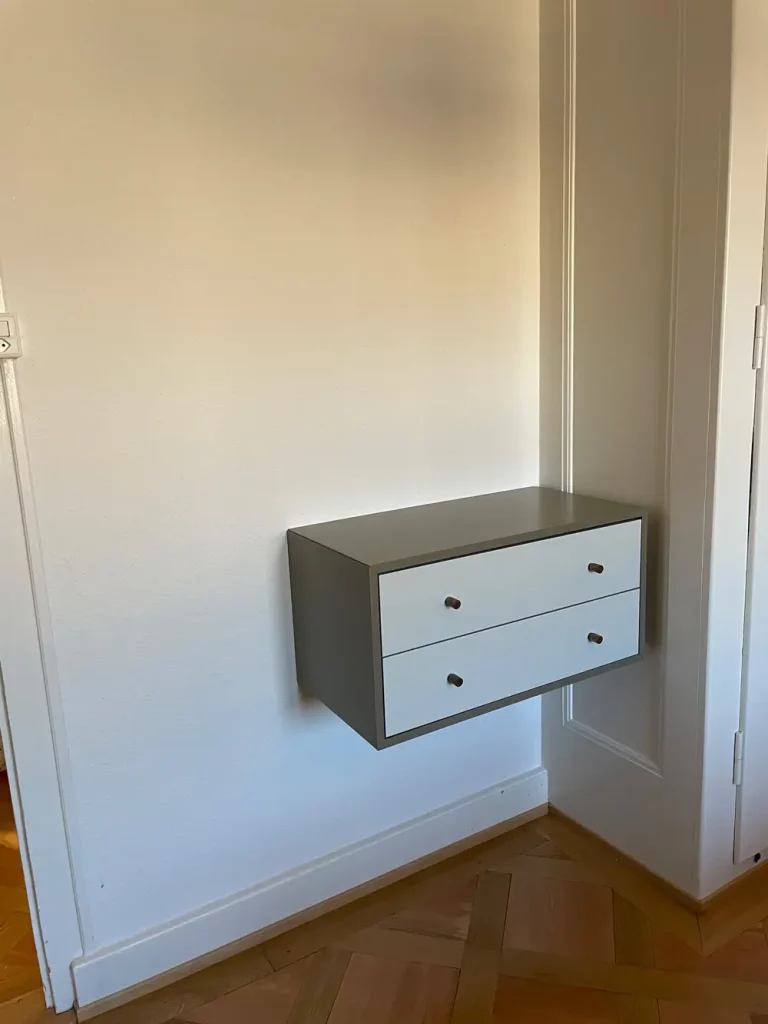
Consequently, I opted for IKEA’s EKET cabinet due to its similar design and dimensions.
Follow this guide outlining the process of transforming your IKEA Eket cabinets into Montana Furniture-inspired makeover :
PART 1: planning for the IKEA EKET Cabinet Montana-style
1. Design your furniture using the Montana design tool
The Montana design tool is not the most user-friendly tool but it is a very practical tool to experiment with different options. You can try out various colors on different sections of your furniture, including the front, back, body, entirety, handles, and legs. Just ensure that you are using modules that have a comparable alternative in the IKEA Eket line. Of course, the selection is not as extensive as the Montana catalog.
Montana Furniture is renowned for its wide range of bold and well-curated colors. What’s nice is that their color range allows you to enjoy yourself without being overwhelmed, unlike with a traditional color chart.
Start by selecting a color palette that fits the ambiance you are looking to create or complements your existing decor (here is a good article on how to nail your color palette). Whether you prefer a monochromatic look or a mix of contrasting hues, the choice is yours.
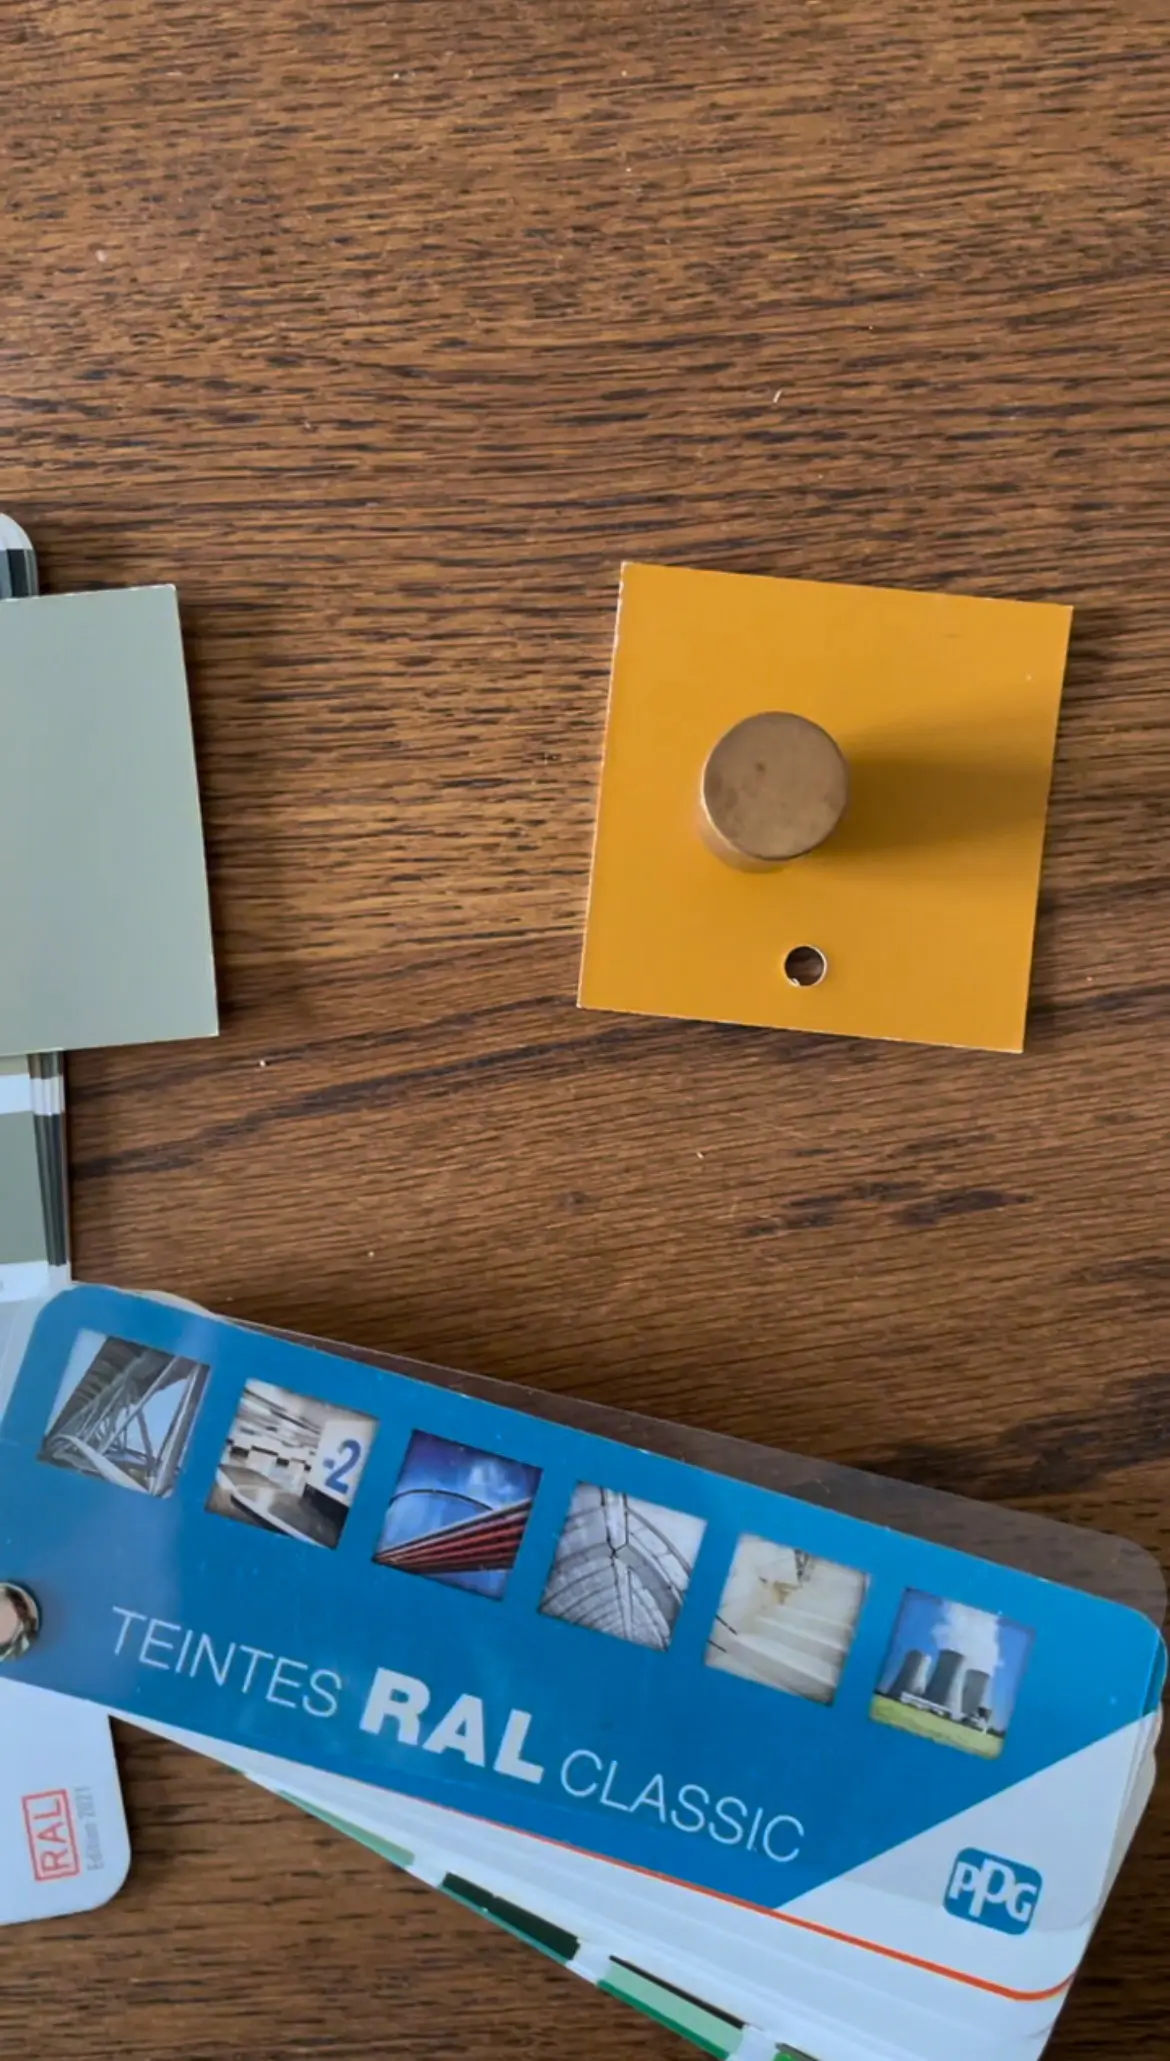
2. Translate your Montana color palette into the RAL color system or any color system that suits you
Once you are happy with your design and your choice of colors, you’ll have to find similar colors in the real world. The idea here is to simply find a similar color in your local paint shop. For that, I use the RAL color chart because any paint shop can make the colors for you. But you can use the color chart of your liking or go with a paint brand that you like particularly.
EXPERT TIP
Working with the real life color palette will help you get a better grasp at the mix you like the most, I encourage you to order the Montana samples before making any decision. It will also make your life easier when it comes to finding a matching paint color.
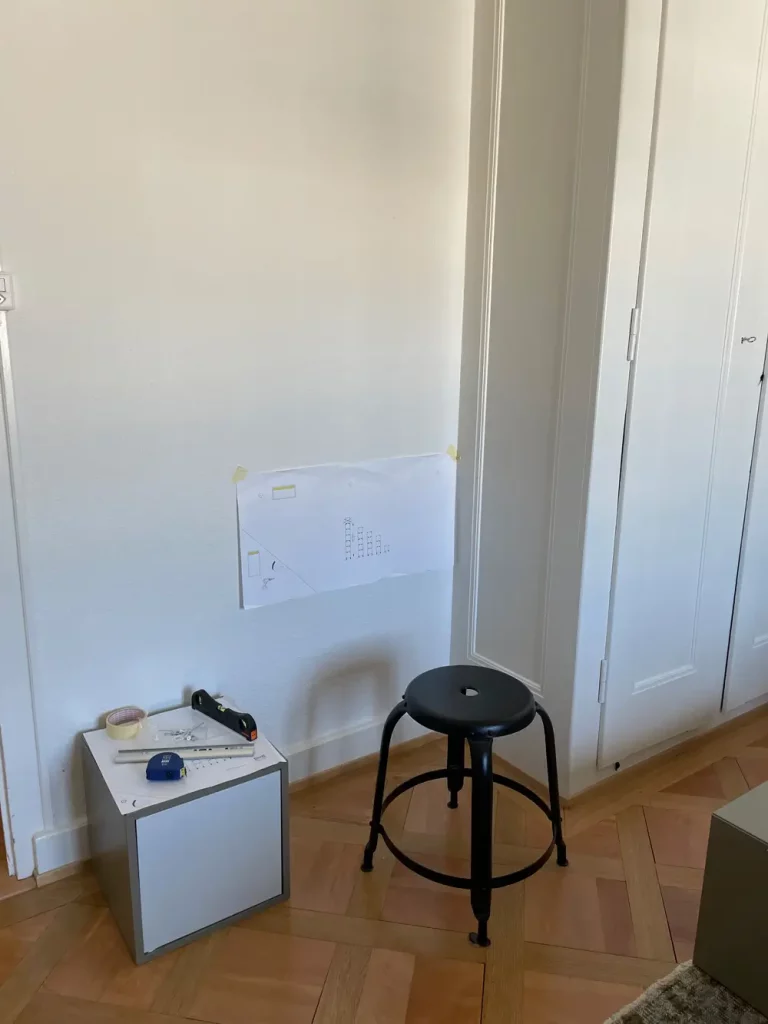
3. Transferring your design into IKEA Eket cabinets
Now it’s time to go and design your piece of Montana-like furniture to the IKEA Eket planner page and translate your Montana design into an Eket combination. Here is what mine looked like :
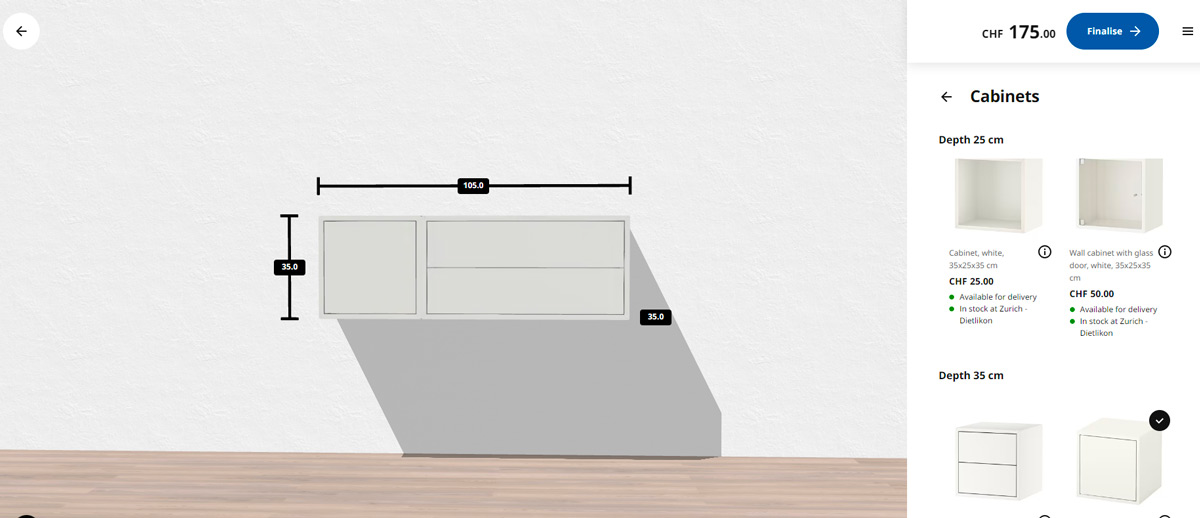
For a total of CHF 175.
You’ll have to add the paint, the primer, and the painting tools which would cost approximately (if you have to buy everything) CHF 200 maybe more depending on the painting brand you choose.
BONUS : A video that shows you the first part of this hack :
Part 2: Making your Montana-inspired cabinet
Required items to paint IKEA Eket cabinet :
- Sanding paper 120-220 grit
- Tack cloth
- Shellac base Primer
- Small foam roller (for the primer only)
- Paint of your choice (I had my two colors made at my local DIY shop from the RAL color chart in a satin finish)
- Small paint roller (preferably no foam roller for the paint because of the lint it can leave after a while)
- Paint brush (to do the hard-to-reach parts)
- Paint tray (one for each color and one disposable tray for the primer)
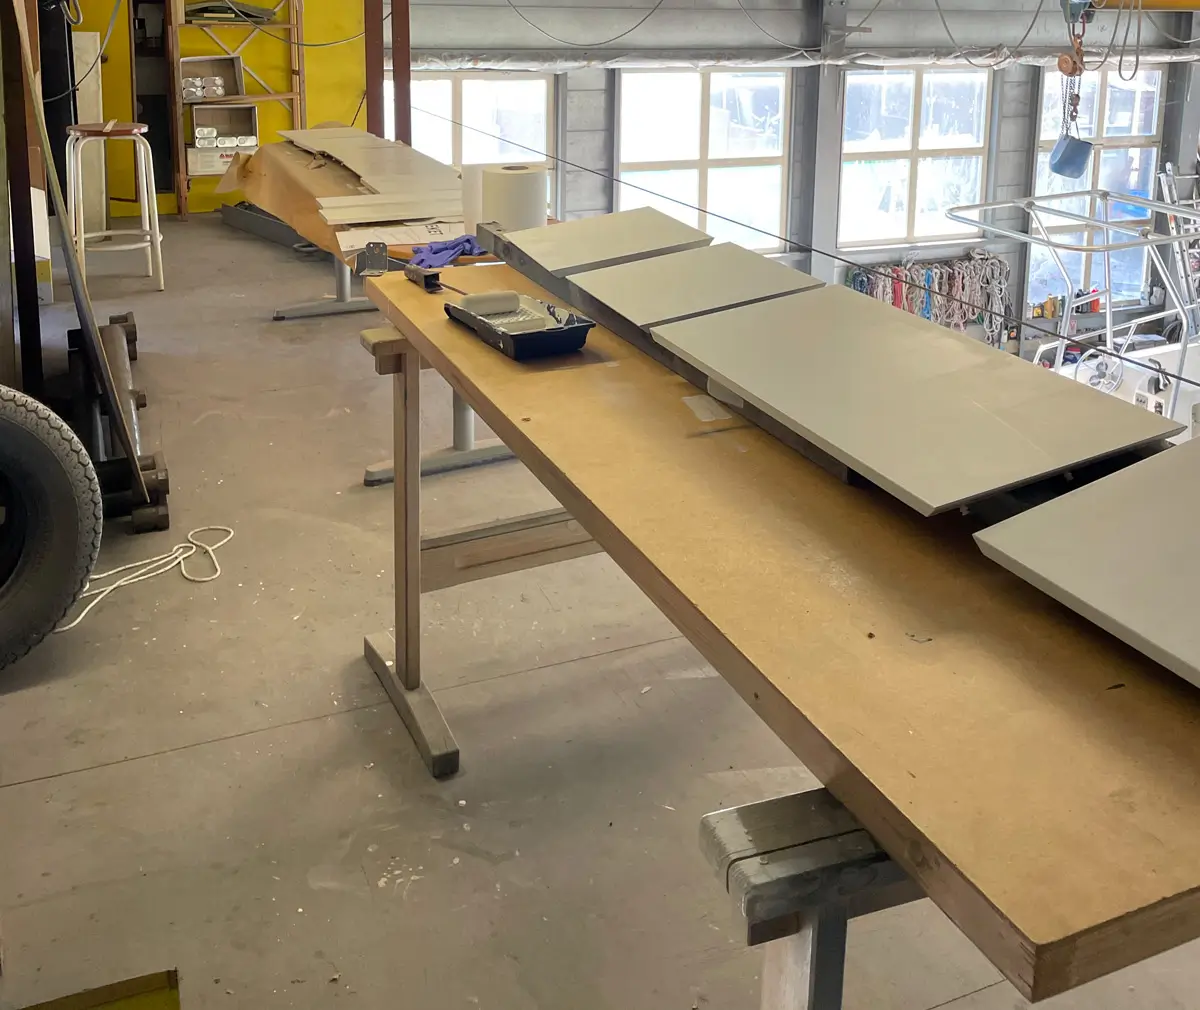
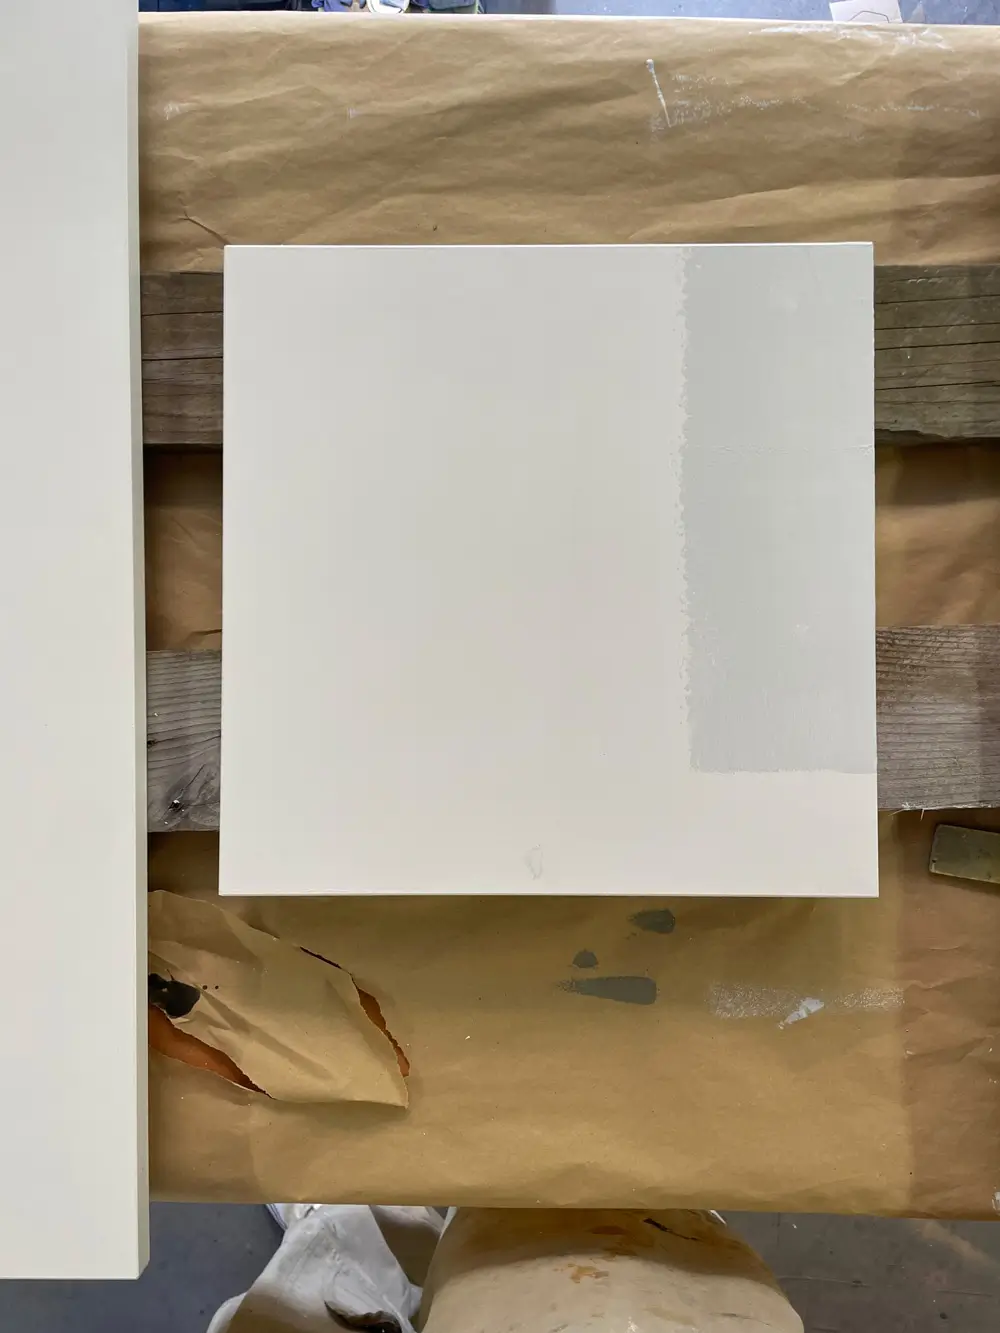
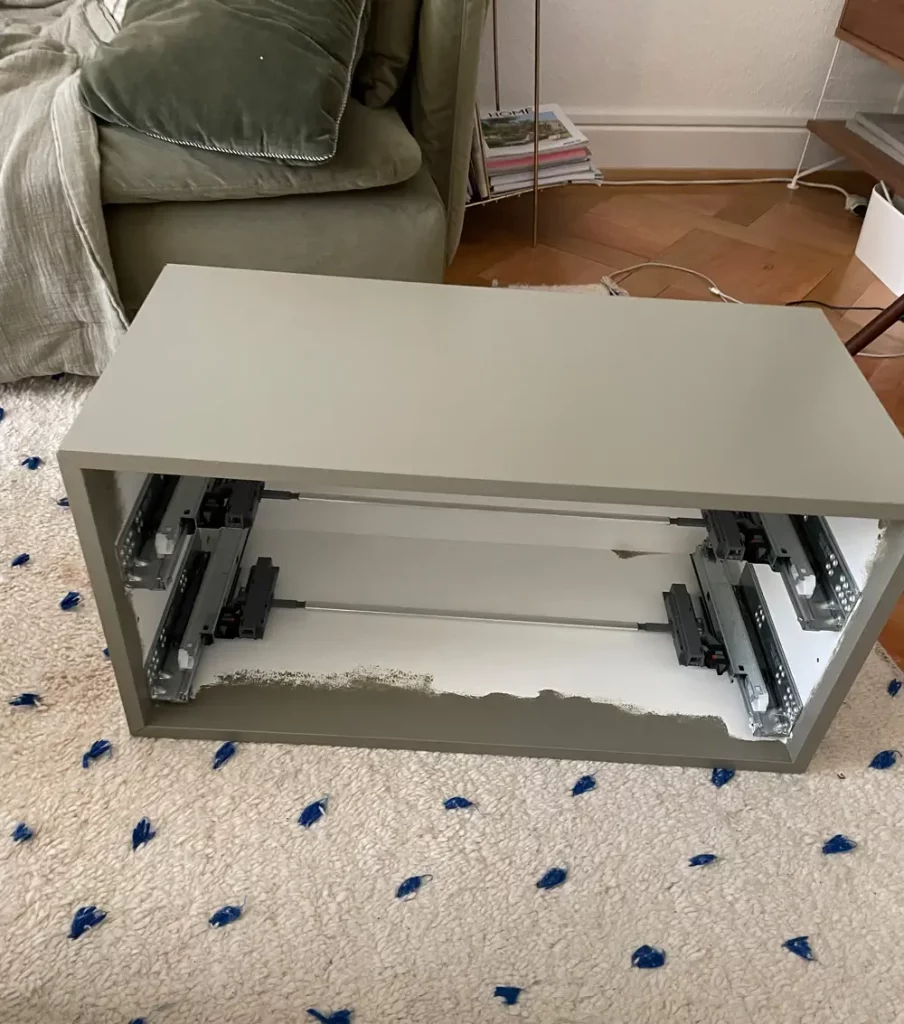
4. Preparing and sanding your IKEA EKET cabinet
Start by unboxing all your cabinet pieces and then lay them out on a protected surface. Differentiate which pieces will be painted in one color and which will be painted in the other to avoid making any mistakes later on. Then you can begin by lightly sanding all your pieces. The goal is not to remove the white completely but rather just to create a surface for better adherence. Indeed, when you are painting a very smooth surface such as laminate, it is necessary to create a slightly rough texture on the surface. This is done to ensure that the primer, which is applied before painting, adheres properly to the surface.
Full disclosure I didn’t sand the pieces for this hack as I had read online that it was okay to not sand it if you use a shellac base primer such as the ZINSEER BIN. To be honest, I kind of regret it. My Eket cabinets are still looking good (a year after doing this DIY) but the result feels more fragile than on my painted Billy bookcase which I sanded ( learning from my mistake ;).
If you are working with an EKET cabinet that you already have, make sure it’s extra clean before starting to sand it and after sanding it use the tack cloth to remove all the dust from the sanding make, sure you do a thorough job.
PRIMING AND PAINTING IKEA’S EKET CABINET BEFORE OR AFTER ASSEMBLING IT?
It is generally recommended to paint IKEA furniture BEFORE assembly. Painting the individual pieces before putting them together allows for easier access to all surfaces and ensures a more even and professional-looking finish.
BUT…
I have discovered through personal experience that reassembling painted pieces after painting them can be a challenging task, as the parts often require rough fitting. Consequently, there is a high probability that your paint will chip, as has happened to mine (I had to do touches up).
IN CONCLUSION:
If I had to do it again, I would sand, prime, and apply the first coat of paint while the furniture is disassembled. Then, I would apply the second coat after assembling the furniture. I believe, this approach would enable me to address any chips or issues during assembly and prevent any missed spots in corners or small areas that are difficult to reach once assembled.
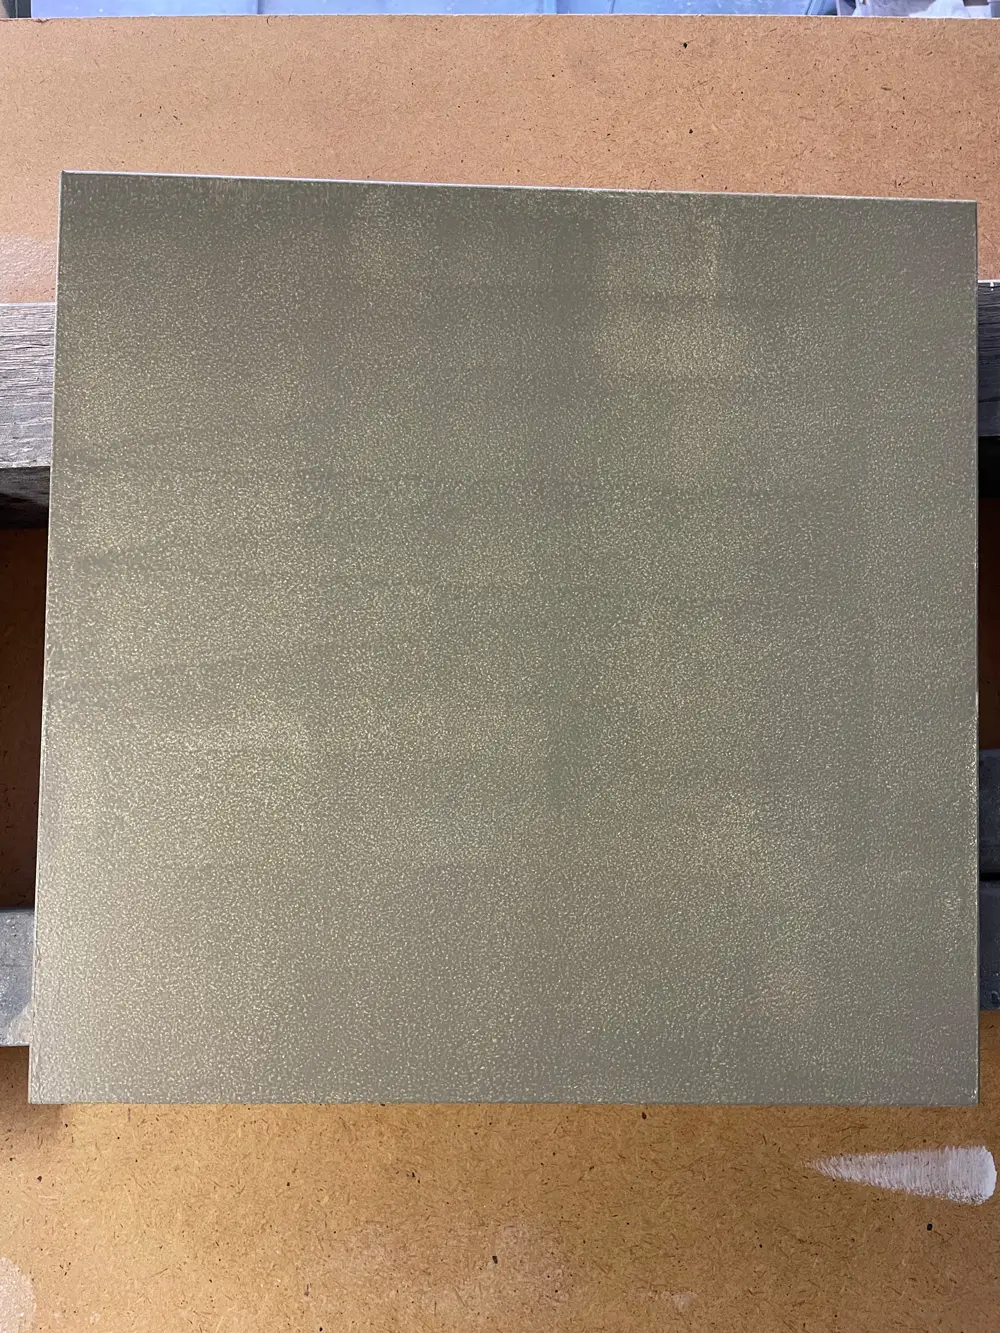
5. Apply the primer
Once your pieces are all sanded and wiped clean thanks to tack cloth, it’s time to apply the primer. I used the very strong shellac-based Zinsser bin as I hadn’t sanded my cabinets before and read online that it was the strongest product out there. I used this one as well on my IKEA Billy hack as I had some leftovers and didn’t want to take any chances of the paint not adhering properly.
Prime the interior sides first. Once you have primed every part of your EKET cabinets, the first primed pieces should be dry so flip them over as gently as you can and start priming the other side.
Which side to start with, back or front ?
Applying a coat of primer and paint to each side of the cabinet parts can be tricky, because when you turn them over to paint the other side, you risk leaving marks and chipping the paint. So start with the inner sides (those that will be inside the cabinets) to avoid chips on the visible part.
Once you have finished priming both sides of each piece, I would advise to let it dry the most time you can (48 hours would be the best) but at least 4 to 6 hours.
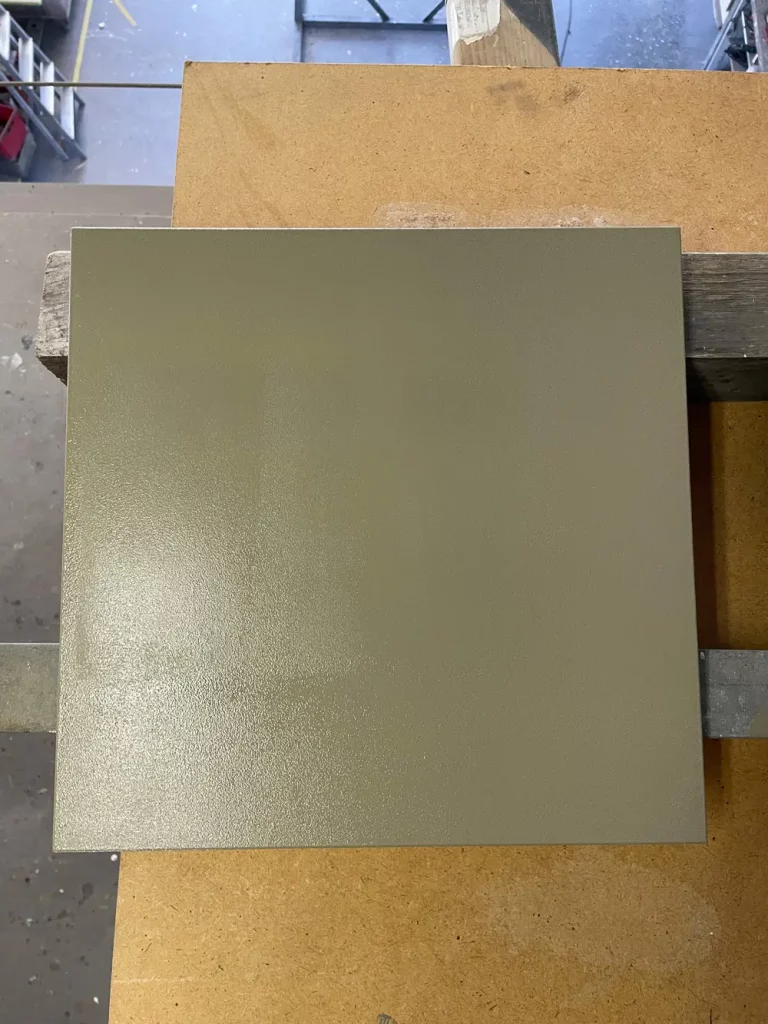
6. Apply a first coat of each paint color
It’s time to finally see your color choice in person. Ensure that you apply the correct color to the respective pieces (it should be fine as you have already separated the pieces beforehand).
Pour some paint into the tray and roll the roller back and forth until it is evenly coated. Then apply the paint in a “W” or “M” pattern, roll along the four sides without applying pressure, simply to smooth out any drips. Then go back over the surfaces with vertical strokes to ensure even coverage.
As for the priming start by doing the inner sides first. Once the paint appears somewhat dry, flip them over and paint the fronts. (The goal is to find a good balance between allowing sufficient drying time and completing the task within a manageable timeframe.)
Once you are finished with your first coat, let it dry for a few hours at least (12 hours would be best). But remember the longer you let it dry the better the result.
Full disclosure: I didn’t paint the inner side entirely as they were not going to be visible but I would recommend doing it, if you are working with a small surface it’s not that much more work.
7. Apply a second coat
After the initial coat has dried, repeat step four. Ensure that the vertical sides of each piece are thoroughly coated. Once you have finished, allow it to dry for a minimum of 48 hours. If possible, wait for a week to ensure that the paint has completely cured.
THE KEY TO A LONG-LASTING RESULT
Don’t be tempted to cut short the rest-time. Ensure that everything is not only dried but fully cured before you start working on it. This is truly the key to achieving a good and long-lasting finish along with the quality of the paint you use. Last but not least DO FINISH BY USING A PROTECTIVE SEALER. I can’t stress that enough. While my painted IKEA furniture appears nice, it can be somewhat delicate, requiring occasional touch-ups. I regret not applying a protective sealer upon completion of the project. I intend to add that step the next time I’ll move.
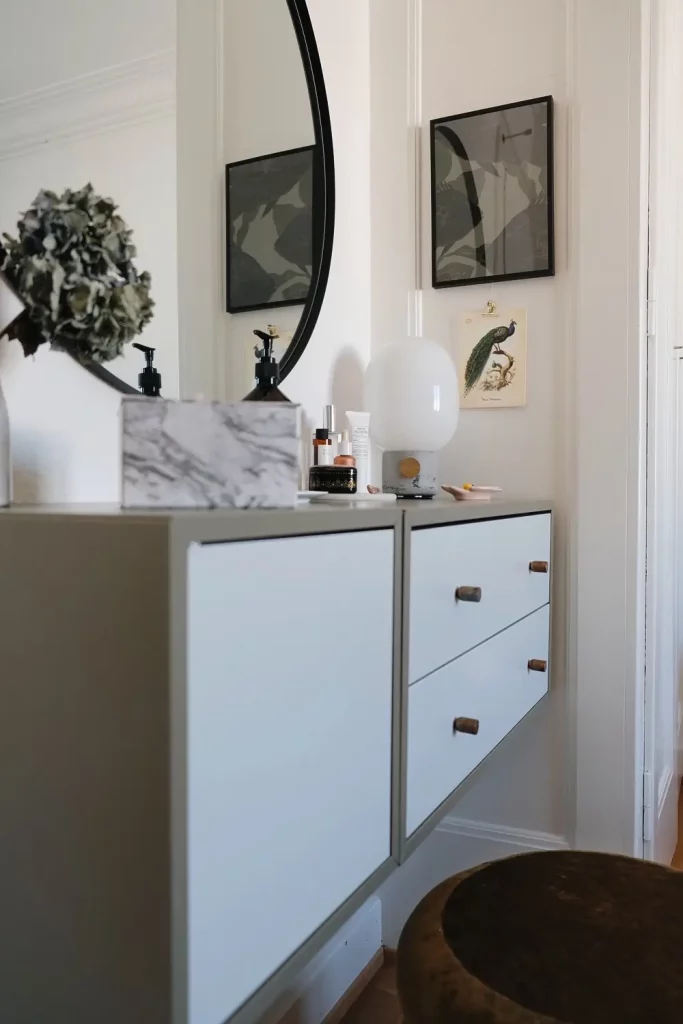
8. Adding the custom knobs
To truly capture the essence of Montana Furniture, consider adding sleek handles to your cabinets. I chose to use my Superfront handles called the Mini reflection in copper that I had bought for my previous kitchen cabinets. They have the same shape as the classic Montana handles and I like the contrast the copper brings to the whole scenery. I also found on Etsy this door knob in brass and this one in brass as well pretty close to the Montana ones. Check out this article for more resources for handles and knobs (it’s actually for leg furniture but you’ll find some good resources for handles as well).

9. Building and mounting the IKEA EKET cabinet on the wall
Once your cabinets are painted and you have added the handles it’s time to arrange them in your desired configuration. The good news is that IKEA makes wall mounting easy, using a sheet of paper the same size as the furniture, with three holes where the wall needs to be drilled. You hang the EKET thanks to a sort of rail that you just clip to the back of your cabinet. I don’t know about mounting Montana furniture but IKEA EKET modules are very well thought out and easy to hang.

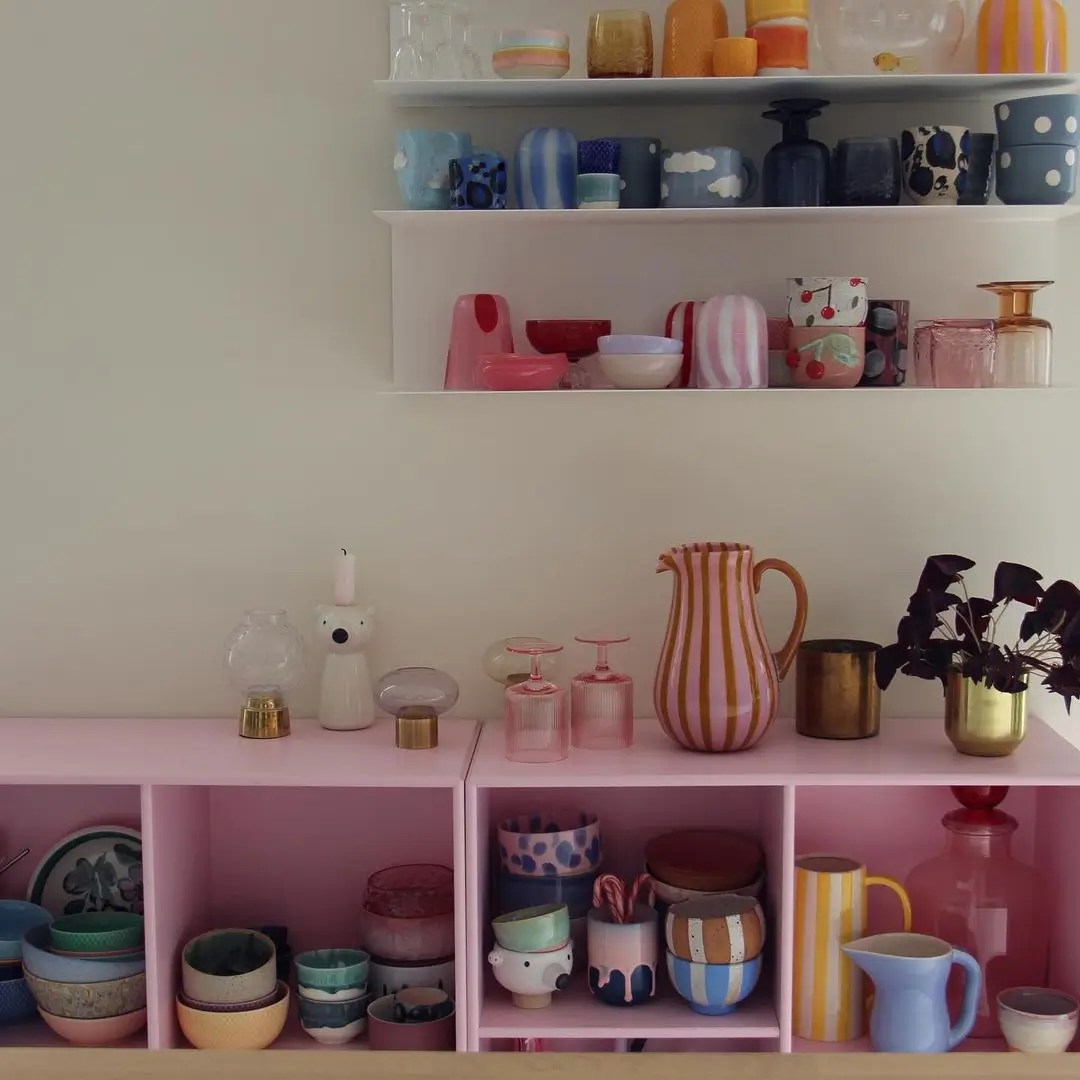
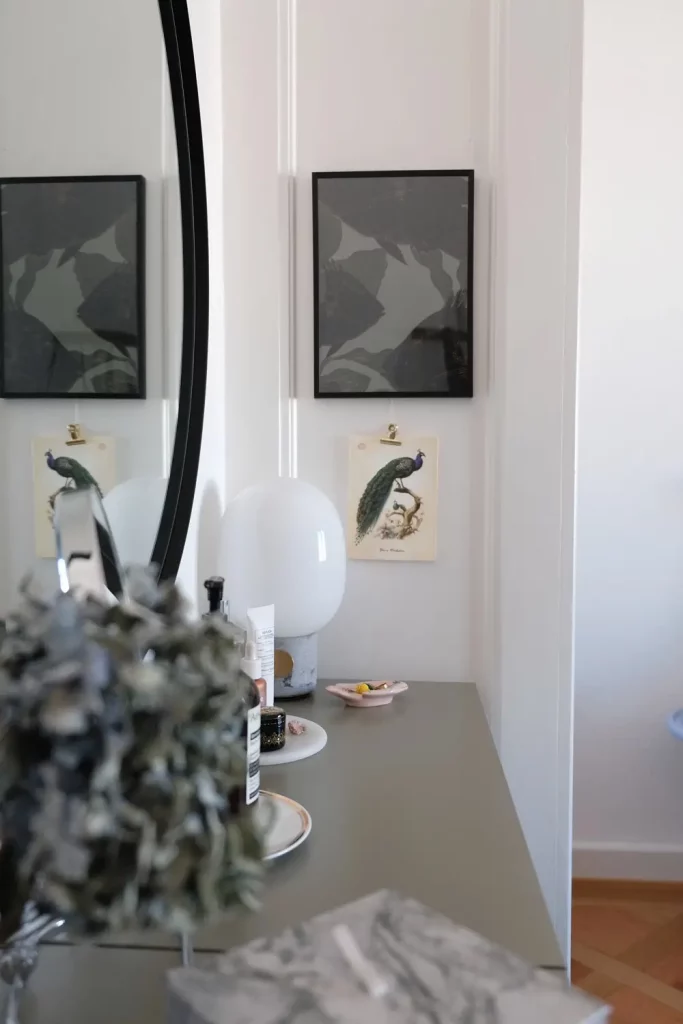
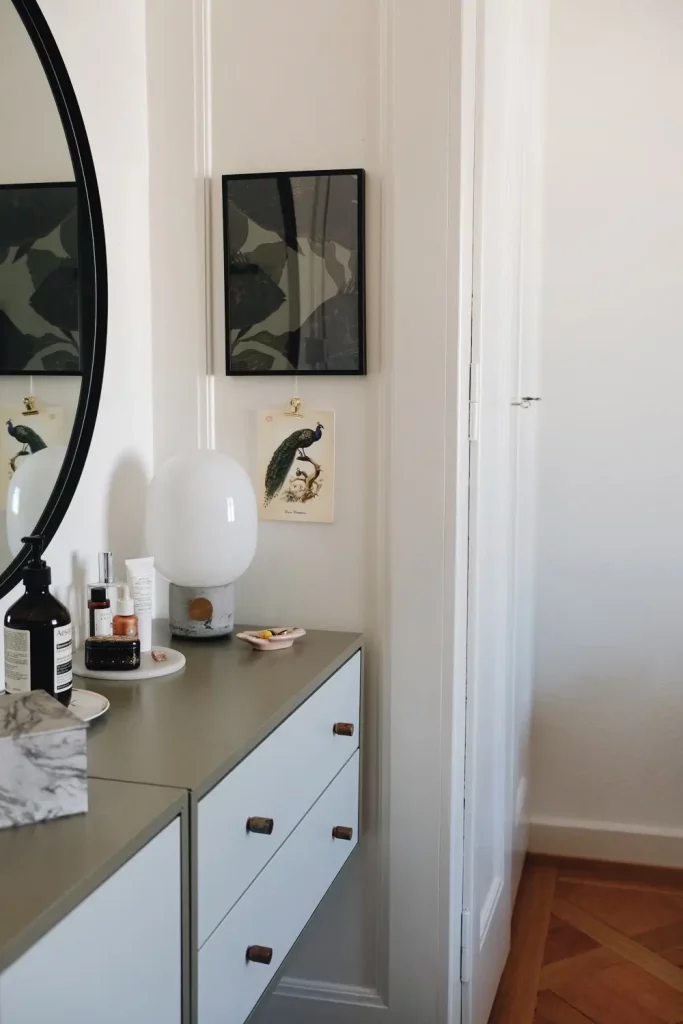
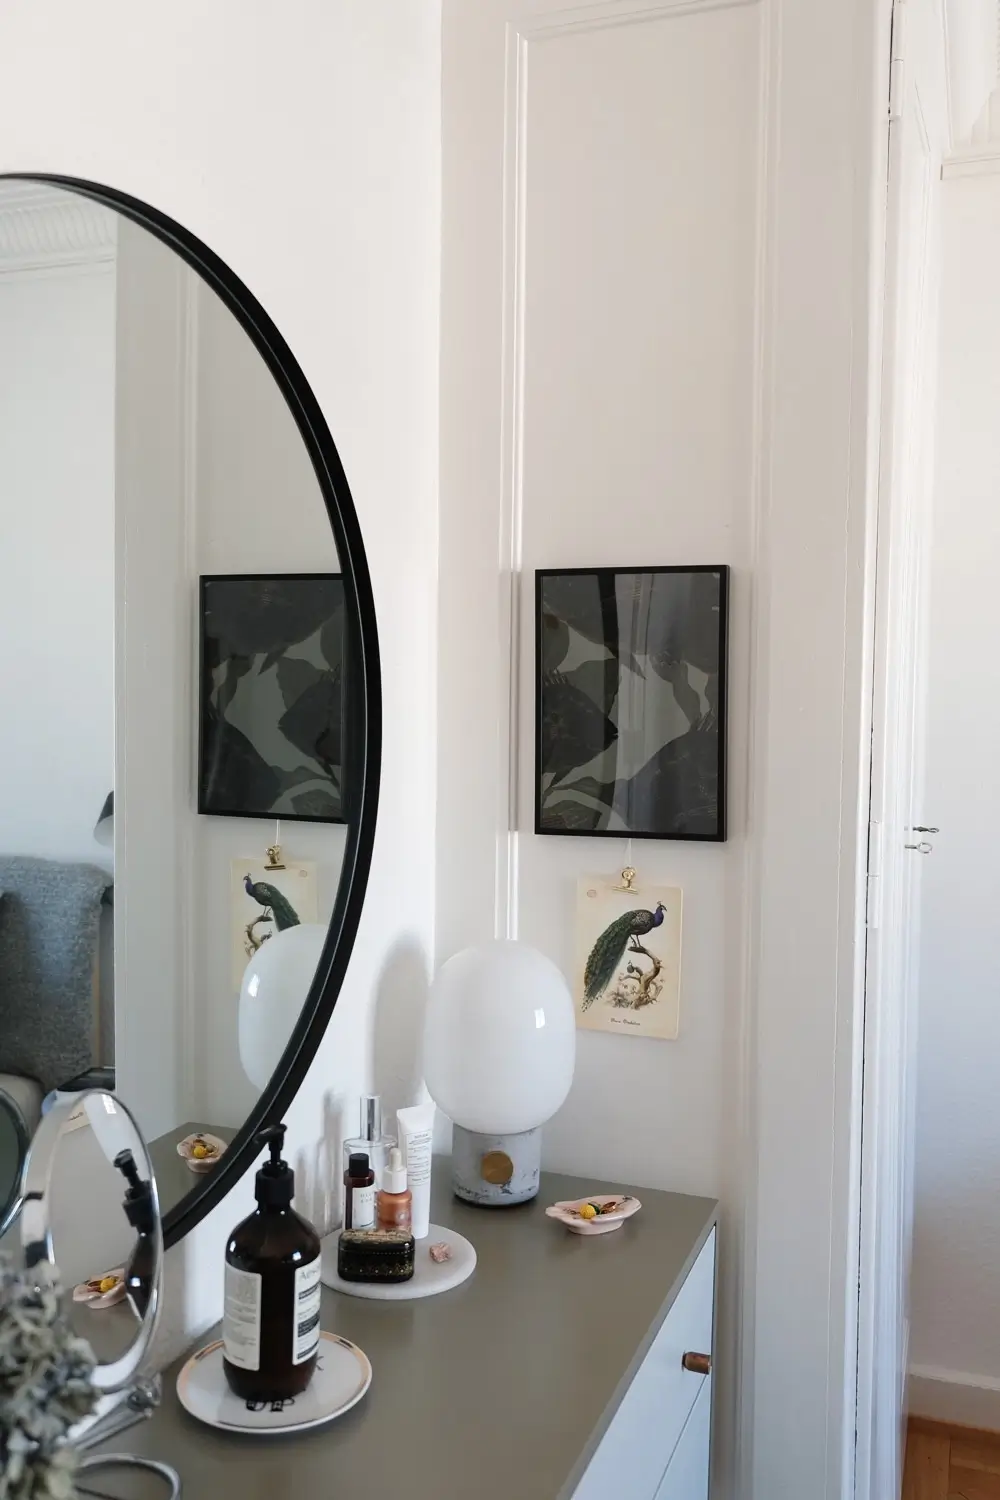
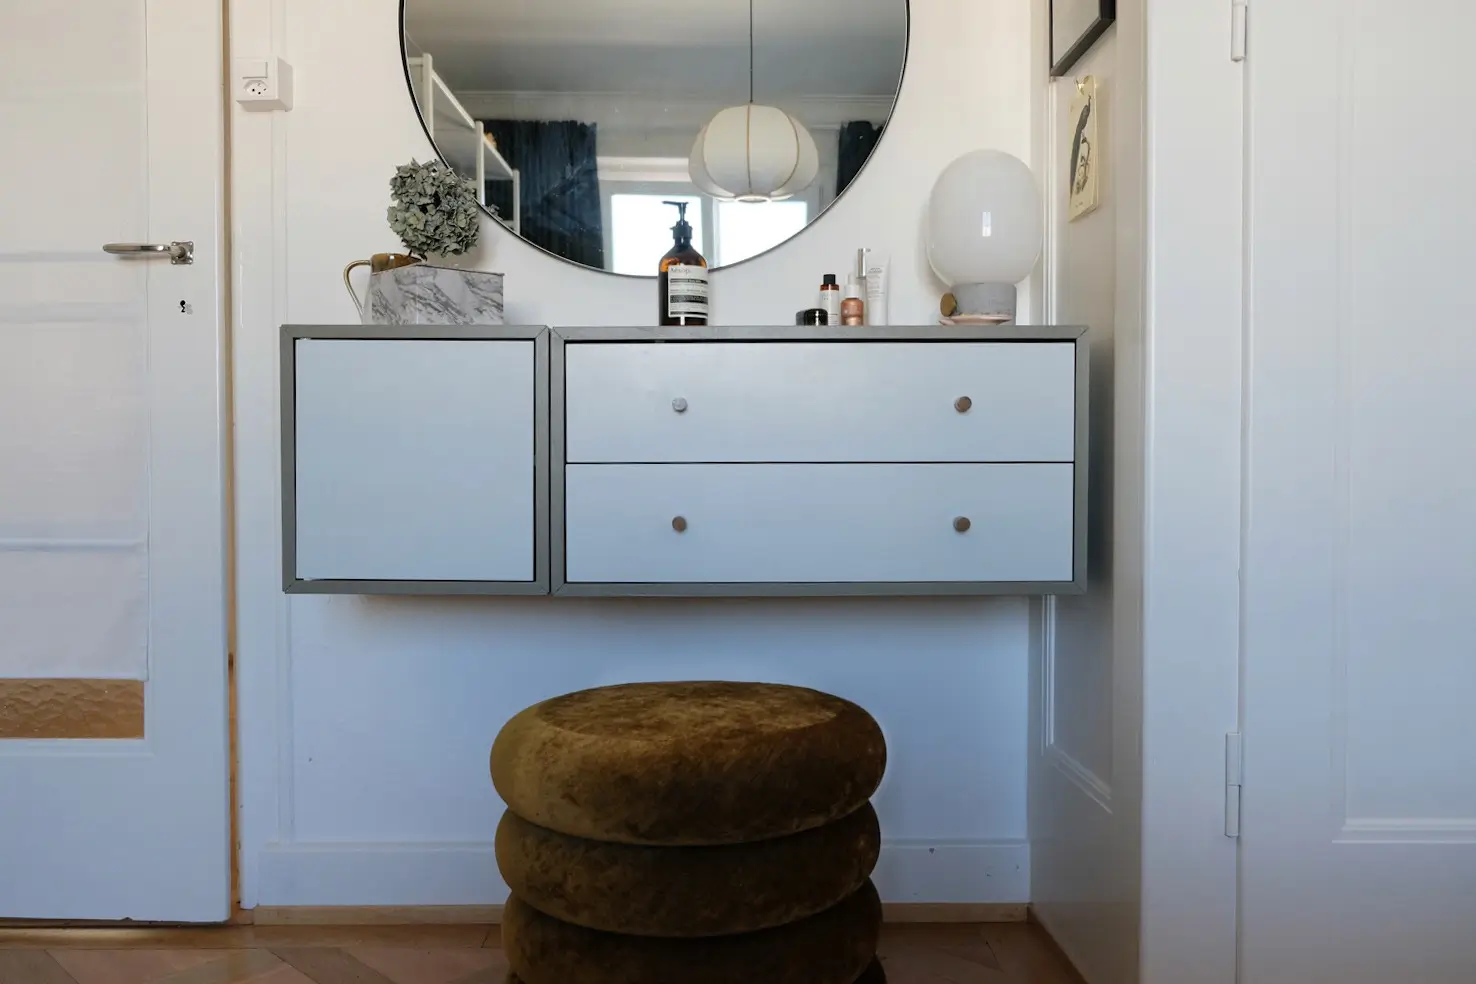
10. Styling it by adding personal and decor objects
Now that your IKEA Eket cabinets have been transformed into stunning Montana Furniture-inspired pieces, it’s time to showcase your creation. Don’t be afraid to experiment with different styling options and accessories to complete the look.
I added a large round mirror by Yunic (similar to IKEA’s Lindbyn) to create depth and to prep myself of course. I included a moss green velvet pouf by FERM LIVING for added coziness. The JWDA AUDO lamp (formerly Menu) remains my all-time favorite. Additionally, I incorporated several personal knick-knacks, like this Anthropologie dish for holding my rings, which adds character to the overall mix.


By following these steps and unleashing your inner designer, you can achieve a Montana Furniture-inspired DIY project that will transform your IKEA Eket cabinets into stylish and personalized pieces. Embrace the minimalist aesthetic, play with vibrant colors, and create a storage solution that not only looks beautiful but also reflects your unique style. I can’t wait to see your version of this hack, as there are so many possible options! So don’t hesitate to share with me if you try this method.